

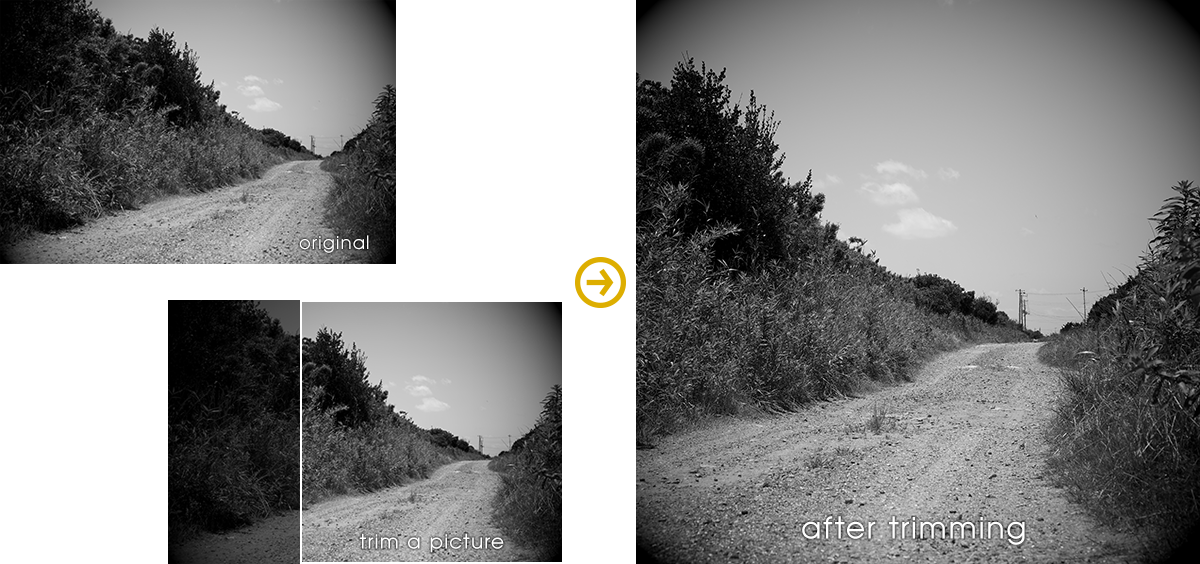
Development / Output
* Click on a sample photo, you can see the larger detail image.
Improved Image Quality during Noise Reduction
|
The latest developed noise reduction algorithm "NR5," has been installed, improving the quality of images during noise reduction.
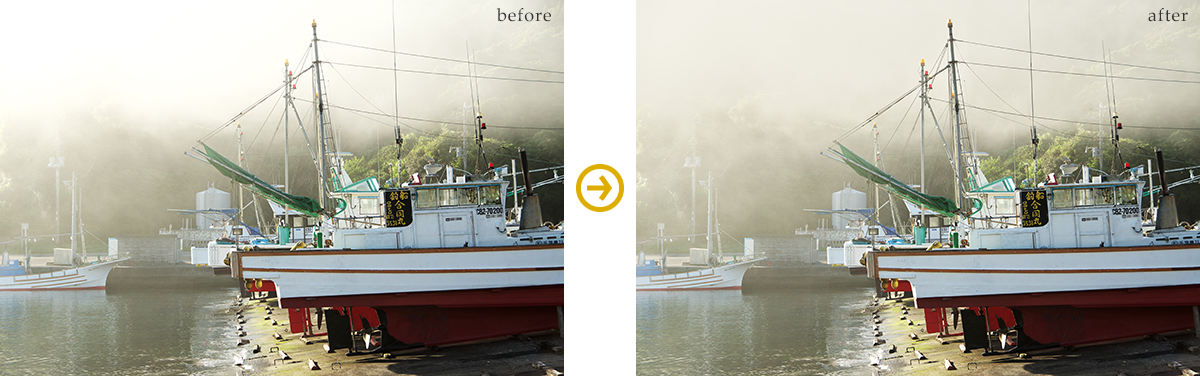
Easing low frequency color noise in wide areasYou can smooth out the spotted designs and color noise of uneven colors shot with super high ISO film speed photography. 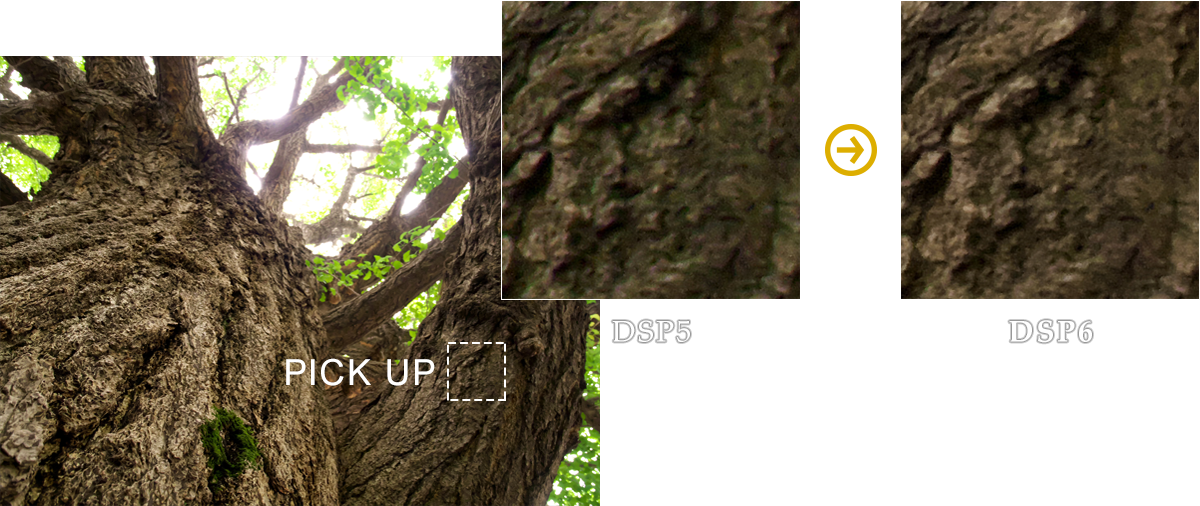
This compares with the default settings of DSP5 and DSP6.
Red and green color noise in the wide areas that remain in shadows are reduced. Easing Brightness NoiseThe performance in easing the roughness (brightness noise) in images generated through high sensitivity has improved compared to conventional noise reduction. Side effects such as photographs dimming have been suppressed when compared with the amount of noise as usual. 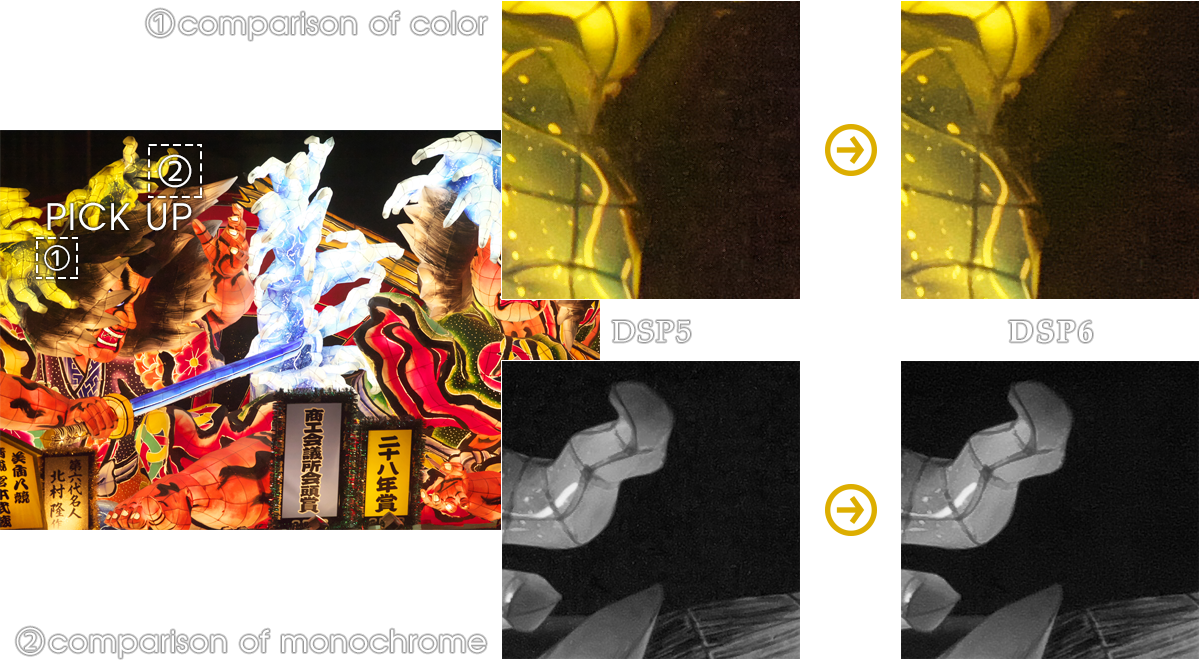
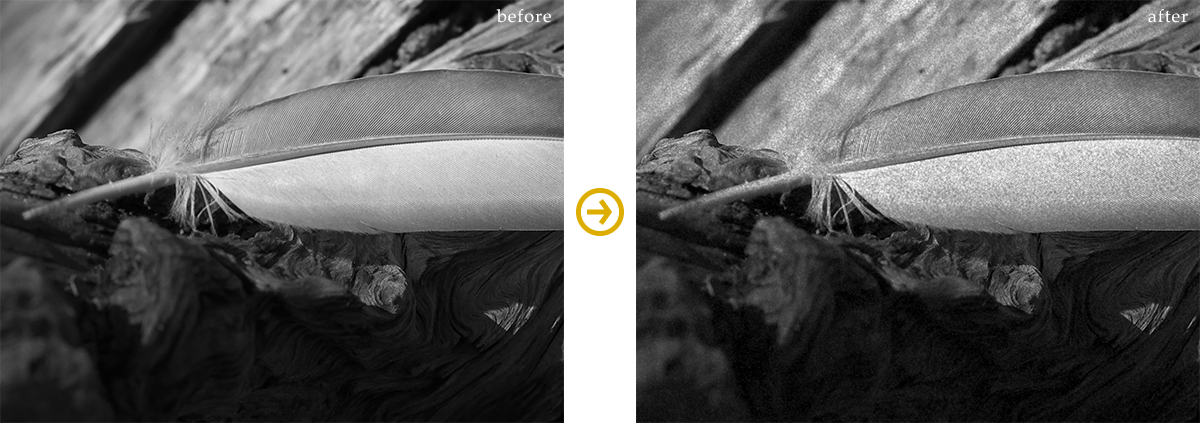
Brightness noise that could not be eliminated from parts with a strong noise level by DSP5 can be removed with DSP6. The following of a detail image is a comparison of monochrome that clearly shows the differences in brightness noise levels.
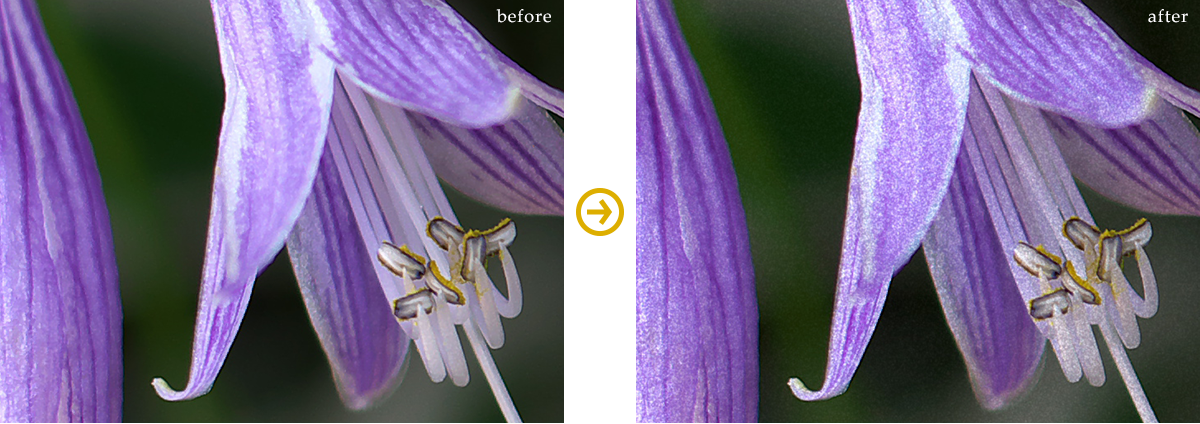
Improved Maintenance Level of Outlines during Noise ReductionBlurs and waves in outlines are suppressed during noise reduction when compared with conventional items. Therefore, natural finishes are possible even with NR. 
The sense of definition has been improved when comparing DSP5 with the same amount of noise. The difference in reproductions of outlines and details can be seen.
|
Adjusting Bright Sections and Dark Sections with Dodge Functions / HDR Functions
|
Controls have been added so that the Dodge and HDR functions that have conventionally been performed for correcting gradation in dark areas and light areas at the same time can now be independently adjusted.
* HDR (High Dynamic Range) expression is a technique for expressing photographs in a condition close to that of human memory.
Dodge only (common to both Dodge / HDR)You can automatically detect shadow areas and have their brightness reproduced by intensifying them. In addition, this can be applied only to shadow areas without influencing the brightness of highlighted areas. 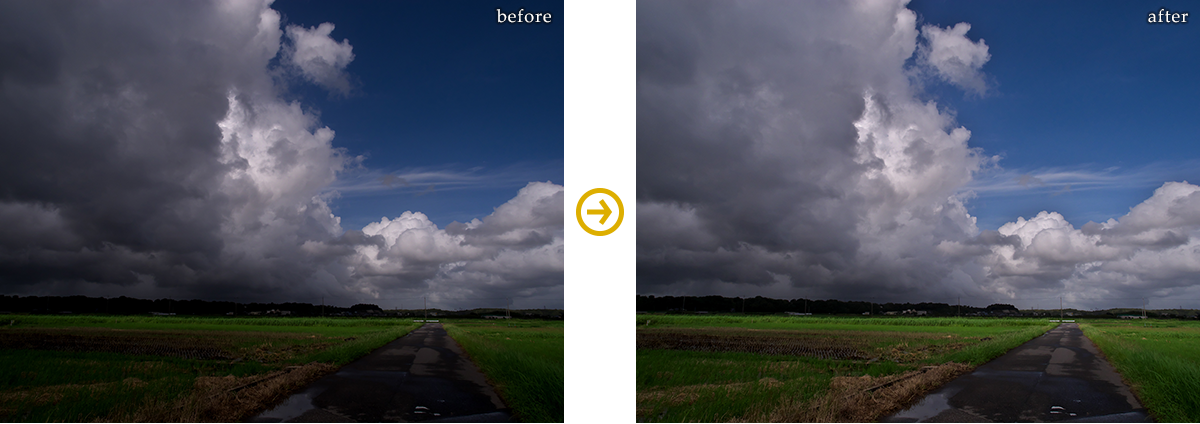
You can automatically detect only shadow areas and reproduce the natural brightness without changing the gradation of bright, cloudy areas.
You can brighten and correct strong shadow areas. By independently correcting dark areas, you can apply this strongly to only shadow areas.
Color Burn only (common to both Dodge / HDR)You can automatically detect and restore harmony to highlighted parts close to overexposure through desensitization. In addition, this can be applied only to highlighted areas without influencing the brightness of shadowed areas. 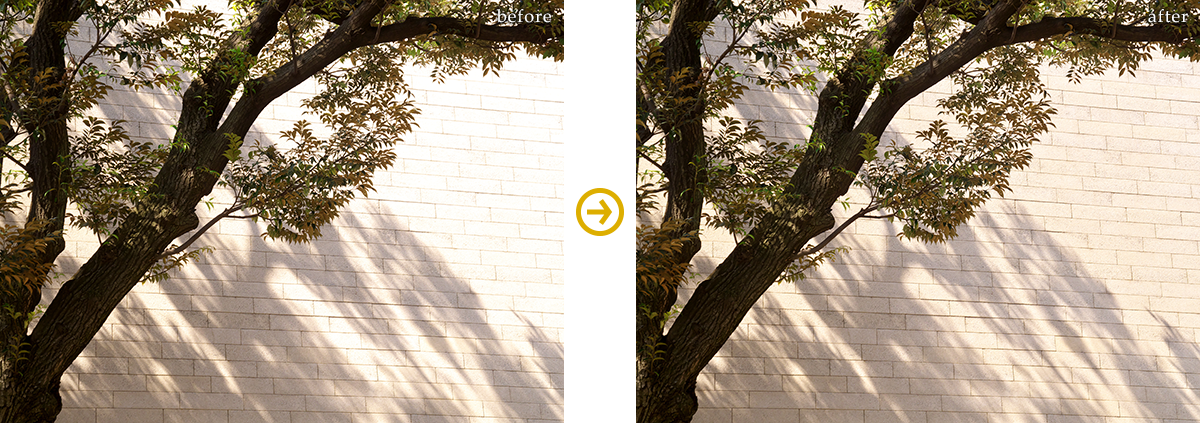
You can compress and reproduce the gradation of the black tree trunk area while keeping highlighted areas of the wall as is (without adjusting black levels).
HDR color burn is darkening and reproducing only highlighted areas so that you can reproduce the gradation of overexposed areas.
|
Red Eye Correction
Red Eye Correction BrushBy using the Red Eye Correction Brush found in the Spotting Tools, it is possible to designate and correct areas of red eye from flashes. 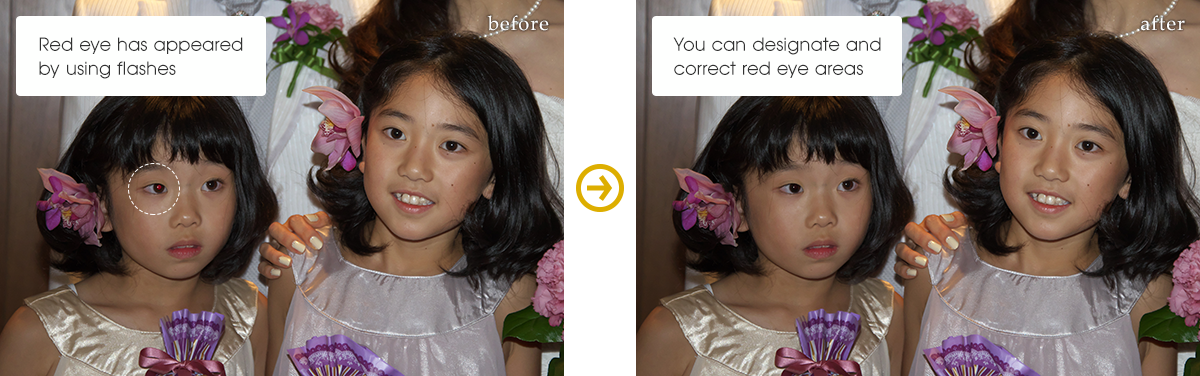
Even when red eye has appeared in photographs using clip on flashes and the like, you can designate and correct those areas.
|
Portrait Beautification
Portrait Beautification EffectYou can control details such as rough or layering skins, through the automatic search and smooth expression of areas close to skin tones. Natural, high resolution processing is possible in areas of skin tones and outlines near them. Sometimes reproductions of skin details in photography from the bust up are available in the latest high resolution devices. This is very useful in portrait photography. 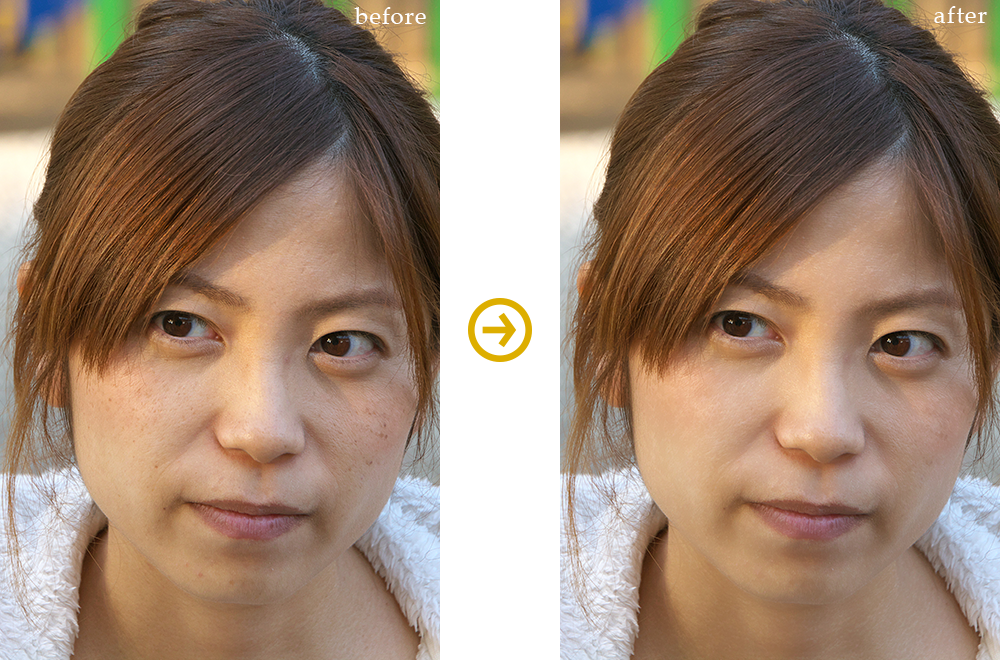
Improvements in resolution of digital cameras sometimes lead to finished photographs with good impressions from Portrait Beautification in close-up photography.
Because you can make automatic adjustments with the slider to correct areas, you do not have to perform individual spotting for stains, freckles, layering, etc.
|
Add Noise
|
You can obtain effects that increase the emphasis and sharpness of details of the subject being photographed by adding grey scale noise to your photographs.
This is not simply adding noise uniformly, but rather distinguishing the brightness in photographs and adding noise filters to applicable photographs changed automatically in quantities generating noise depending on the area.
Therefore, you can use this as a film grain (granular feeling of the frame) emulation.
You can improve gradations and direct textures by adding noise in monochrome photography.
You can also finish with a feeling of film photography by adding grey scale noise in color photography as well.
Noise AmountYou can adjust intensity by adding grey scale noise. Setting to strong will add strong noise, bringing a high contrast in noise. 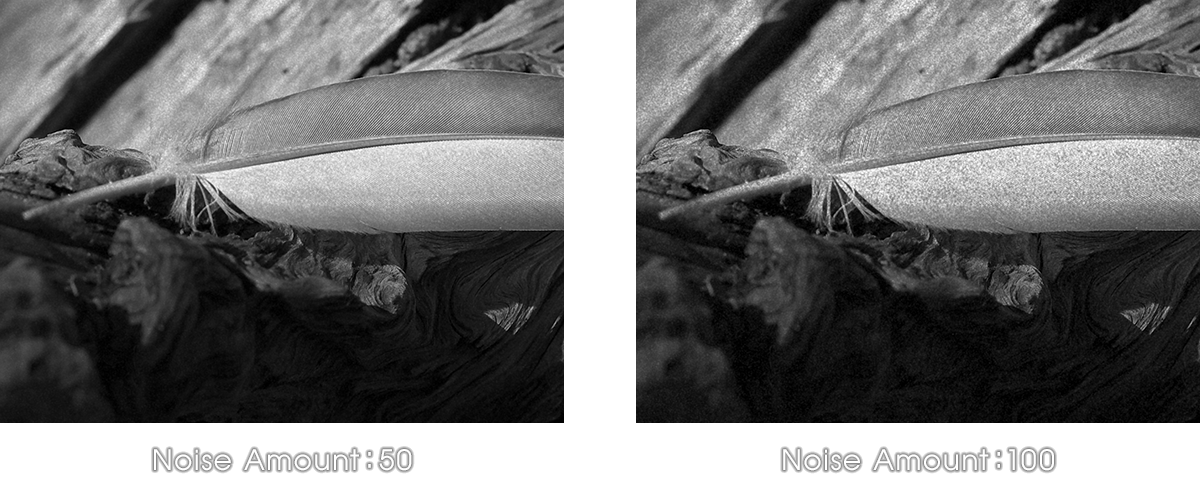
Noise SizeYou can adjust the size of grey scale noise. You can determine the size of noise depending on usage, based on the final print size by increasing or decreasing it. 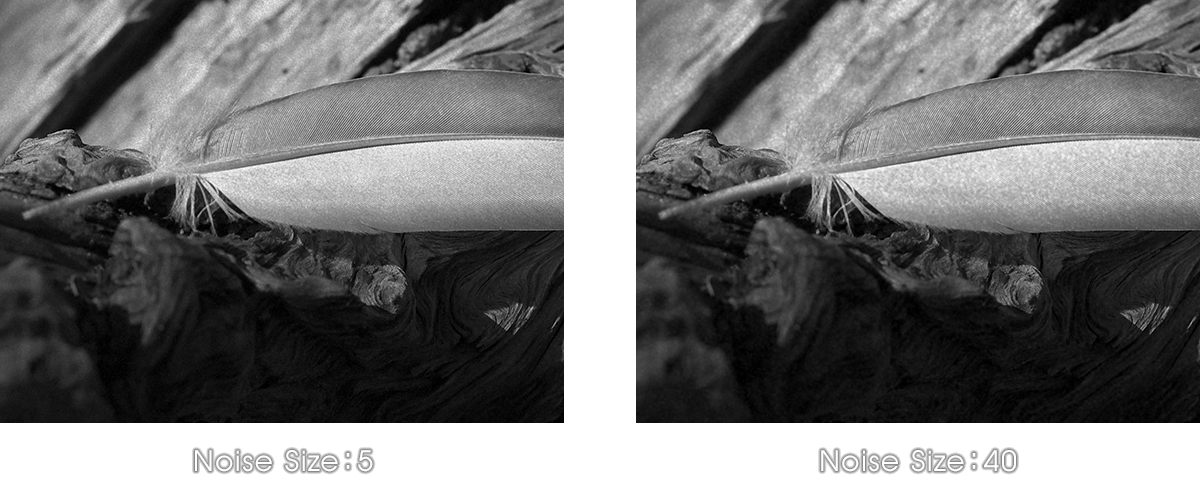
|
Automatic Level Correction
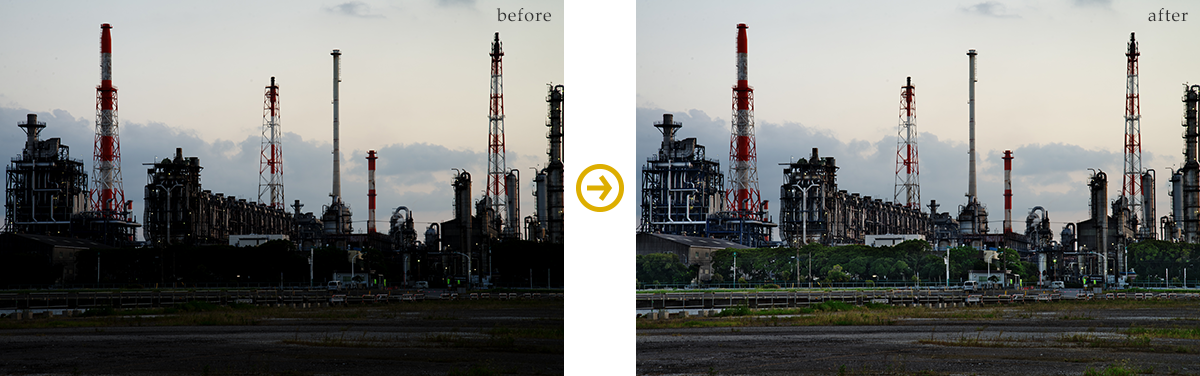
Automatic Level CorrectionThis function automatically recognizes the photograph's histogram and sets the level for shadowing and highlighting. It is a convenient function for when lighting conditions are weak (low contrast) and you want to set tones used to the maximum of RGB gradation. Sometimes a strong level correction raises the contrast, leading to a higher chroma. If this happens, use the chroma slider to lower the chroma. 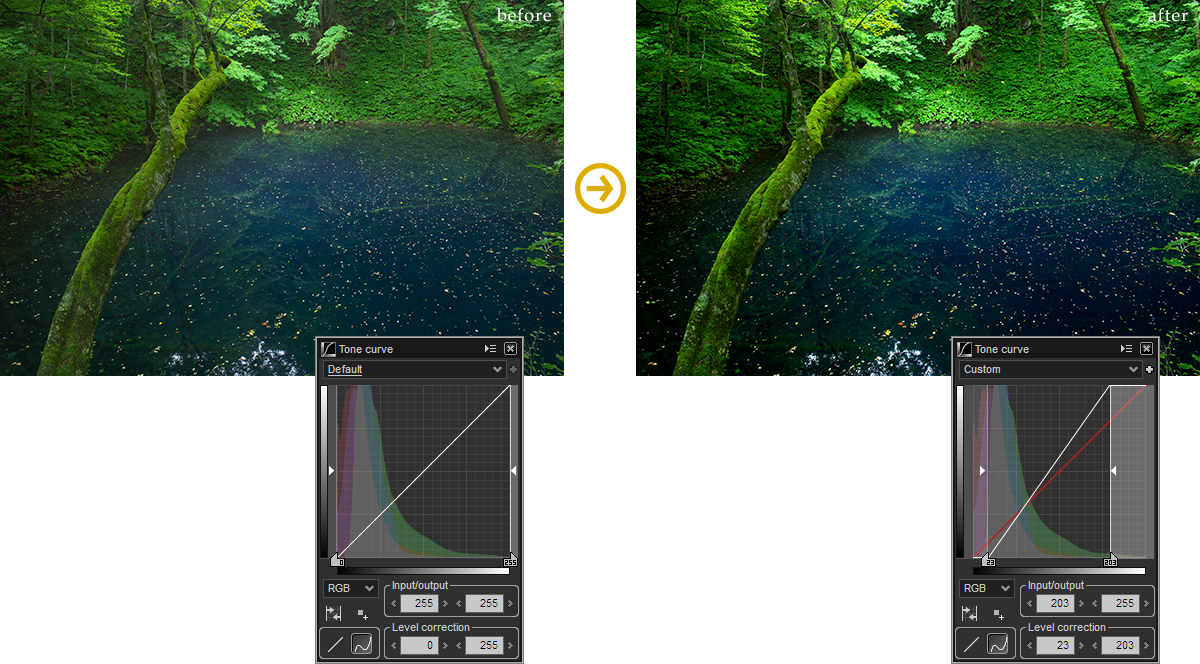
It is possible to finish using a maximum of gradation even in scenes with weak lighting conditions. You might want to make adjustments to input / output levels after basic automatic level corrections.
You can create lively, bright photographs by performing automatic level corrections even in photographs that appear sleepy under conditions of gentle light with little differences in brightness.
|
Unsharp mask during preview
|
You can now set the preview screen for unsharp mask as set for JPEG / TEFF output or printing in the past.
AmountYou can set the strength of the sharpness. 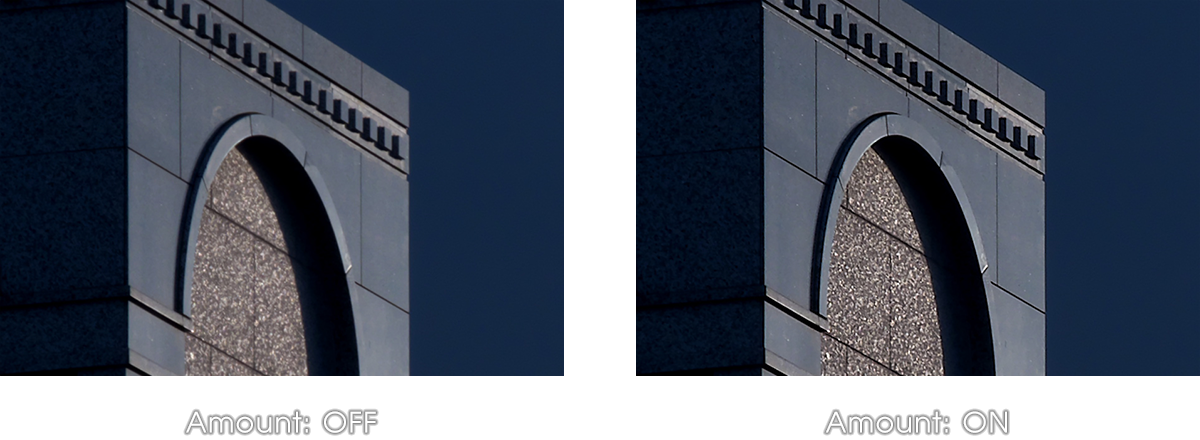
RadiusYou can set the thickness of the outline that sharpness is applied to. 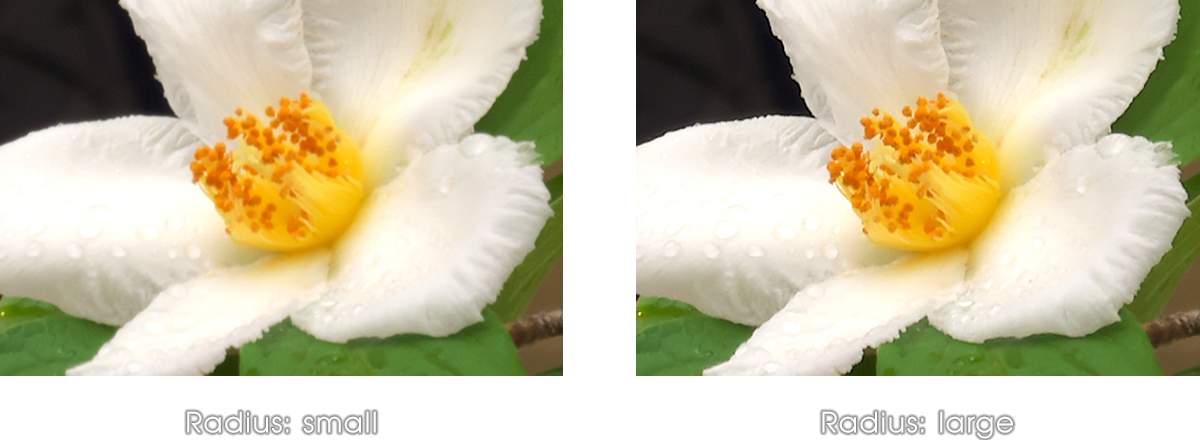
ThresholdYou can set the definition to outlines that can be applied to sharpness. Sharpness can be applied to only outlines to a certain degree with a high setting. 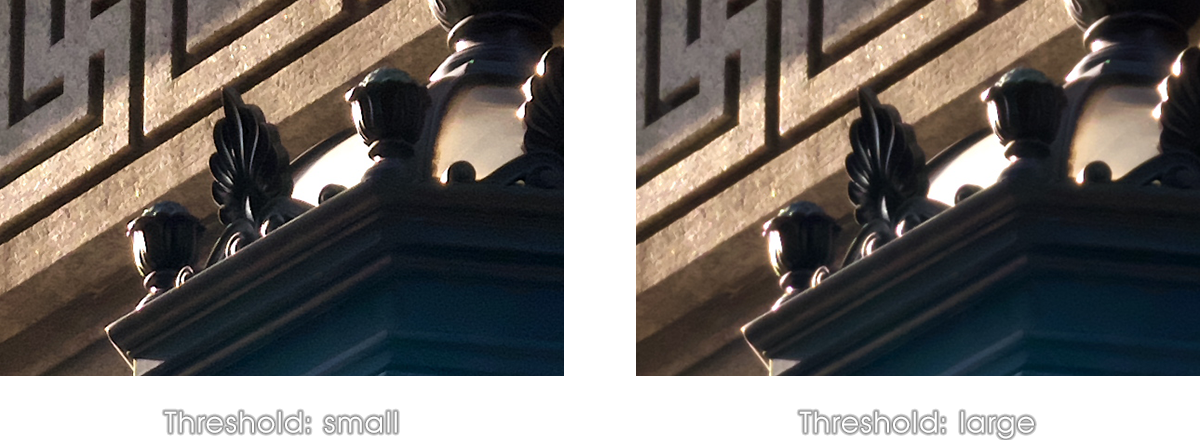
|
Changes centered on shading
Shading CenterYou can change the center of corrections to shading (peripheral dimming). This is especially effective when obtaining effects of dimming the four corners equally, even when trimming the photograph so that the center angle of view has been moved when the peripheral has been dimmed as an effect (when aiming for a tunneling effect). 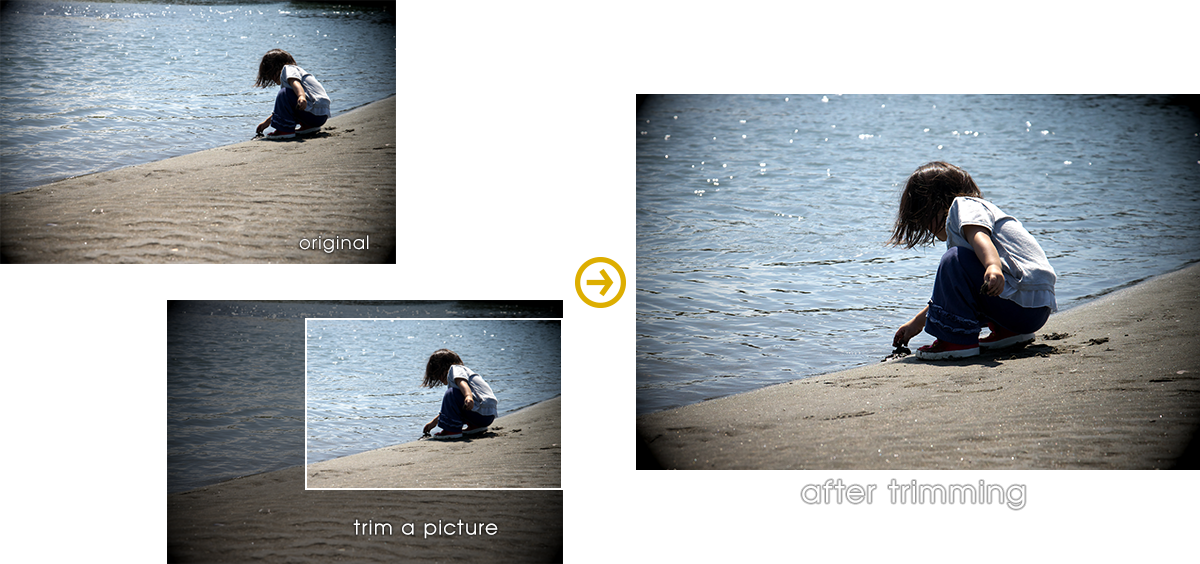
If you are aiming for peripheral dimming effects, this can be applied to dimming effects equally in the four corners, even when the center of the image has been moved.
Dimming effects of shading can be applied to the four corners equally even when the center of the trimming is moved when changing the aspect ratio due to trimming as shown in 1:1.
|
Soft Proofing (Display of Printing Warning)
|
You can confirm color tastes on the preview screen when printing by selecting the printer profile and "Printer + Paper."
It is possible to edit data for highly precise printing because you can confirm that there are no color shifts or eliminated (or added) dark areas when using fine art paper that is especially different from RGB characteristics.
This function performs color management on the monitor, making it possible to proofread (simulate) to a high degree of reliability only in environments for reading the printing.
Print ProfileThis displays a list of the print profiles installed on the computer you are using. You can select an ICC profile of "Printer + Paper" that you wish to simulate. 
Matching MethodYou can select a clipping process for areas outside the color region. 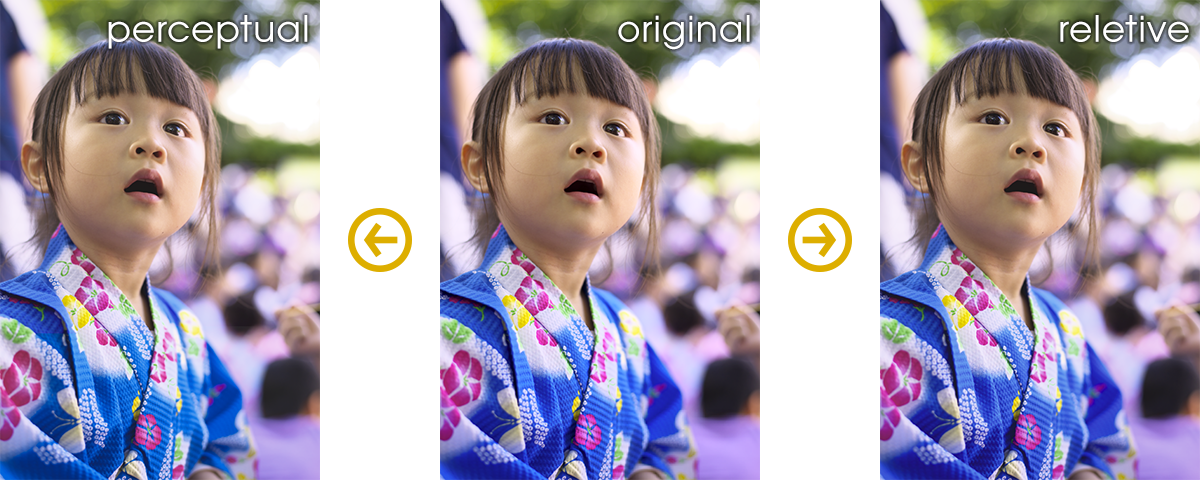
|