| SILKYPIX® Developer Studio 6 | SOFTWARE MANUAL |
| 0. Overview and Introduction | ||||||||
0.1. Section Names
An overview of section names and operation methods of the SILKYPIX® screen display will be explained.
0.1.1. Entire SILKYPIX Display

The SILKYPIX® display is composed of the following elements.
0.1.2. Menu bar

The Menu Bar is an interface from which you can select and execute various operations from the SILKYPIX menu.
Sub-menus for each menu item are displayed in dropdown form when you click on an item from the Menu Bar.
Each item on the Menu Bar is an entry point to locating menu items. They are categorized so that menu items are easy to find.
0.1.3. Toolbar

Icons for functions that are frequently used are located in the toolbar.
0.1.4. Information Box
 0.1.5. Parameters Controls
 0.1.6. Sub-controls for adjusting development parameters and windows for displaying status can be displayed as windows independent of the main window.
 A
A  icon is displayed to the upper right of most controls, such as Parameters controls and Sub-controls.
A context menu is displayed when you click on this menu, and you can change the location of controls from this menu.
In addition, the method for locating controls that can be changed differs depending on the type of control. Please see "3.5. Arranging parameters controls and sub-controls" for details.
0.1.8. How to Operate GUI
0.1.1. Entire SILKYPIX Display
The SILKYPIX® display is composed of the following elements.
| (1) | Main window |
The basic windows in this software are composed of the following parts.
| (A) | Title bar |
| Displays of the software name and status, as well as Minimize, Maximize and Close Software buttons are located here. | |
| (B) | Menu bar |
| The various functions can be executed by selecting the Menu. | |
| (C) | Toolbar |
| Various functions can be executed by clicking on icons in the toolbar. Icons also have the function of displaying status. | |
| (D) | Status bar |
| This displays information on the selected image. | |
| (E) | Information box |
| Main controls such as Folder and Parameters Controls, as well as controls for displaying information such as image properties, navigator and histogram, can be displayed in this area. | |
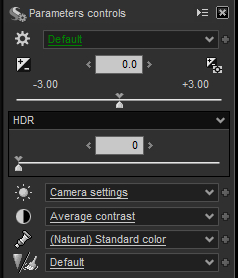
| (F) | Parameters controls |
| This interface is for setting development parameters. Parameters controls comprises four parts. |
| (F-1) | Main control | |
| The main functions are for selecting tastes prepared for each category of development parameters and for calling up sub-controls for adjusting parameters in detail. Adjust exposure bias here. | ||
| (F-2) | Tab page | |
| Sub-controls for detailed adjustments in each category of the development parameters are displayed here. The sub-controls displayed here can be changed through operations on the Main Control. | ||
| (F-3) | Control box | |
| Sub-controls for detailed adjustments in each category of the development parameters which are regularly used can be displayed in this area. We recommend that you arrange sub-controls that you use frequently here. Please see "4.2. Sub-control" concerning sub-controls. | ||
| (F-4) | Sub-control icon | |
| This switches between displaying and not displaying sub-controls displayed as floating windows. |
| (G) | Preview window |
| This displays an image of the selected image. By splitting it into two parts, in the window on the right side you can either have the another image, or you can locate the results of processing the same image with results from different development parameters. | |
| (H) | Thumbnail window |
| This is a thumbnail display listing images subject to operations. This window can be located outside of the main window and displayed as a floating window. |
| (2) | Floating window |
Sub-controls for adjusting development parameters and windows for displaying status can be displayed as windows independent of the main window.
These are collectively known as floating windows in this software.
These are collectively known as floating windows in this software.
| (3) | Modal dialog |
These are windows that temporarily display various setting dialogs, setting changes, etc.
| (4) | Message box |
Message boxes are displayed while running the software in cases such as special processing, when an error occurs or when you are asked to select the next operation from multiple choices.
Messages displayed here are assigned their own message numbers. Please make note of this message number if there is a problem, such as when an error occurs.
You may be able to use the troubleshooting sections in the manual or on our company's home page.
Messages displayed here are assigned their own message numbers. Please make note of this message number if there is a problem, such as when an error occurs.
You may be able to use the troubleshooting sections in the manual or on our company's home page.
The Menu Bar is an interface from which you can select and execute various operations from the SILKYPIX menu.
Sub-menus for each menu item are displayed in dropdown form when you click on an item from the Menu Bar.
Each item on the Menu Bar is an entry point to locating menu items. They are categorized so that menu items are easy to find.
| * | Here you can assign shortcut keys to any functions you may select. Please refer to "9.4. Shortcut keys settings" to learn how to set keys. |
| (1) | File (F) | Menu items related to files are found here. |
| Open file (O) | Open RAW data and JPEG/TIFF images for development processing as single files. | ||
| Develop (D) | Develop one selected image and save it to a file. | ||
| Close | Close all developed images. | ||
| Print (R) | Print selected images. | ||
| Load development parameters (L) | Read development parameters saved in files. | ||
| Save development parameters | Save development parameters for a selected image to a file. | ||
| Delete marked images (E) | Delete images that was marked for deletion. | ||
| Copy marked images (C) | Copy images that was marked for copying. | ||
| Move marked images (M) | Move images that was marked for moving. | ||
| Batch develop marked images (B) | Perform batch develop for marked images. | ||
| Delete selected images | Delete selected images. | ||
| Copy selected images | Copy selected images. | ||
| Move selected images | Move selected images. | ||
| Batch rename | Rename selected images as a batch. | ||
| Batch develop selected images | Perform batch develop for selected images. | ||
| Immediately batch develop selected images | Register selected images as jobs for batch development. | ||
| Close selected images | Close selected images. | ||
| Exit (X) | Close SILKYPIX. | ||
| Plug-ins | Execute plug-ins. | ||
| Folder access history | Display history of folders that have been edited. |
| (2) | Edit (E) | Operations of the type that change the status of images for processing are found here. |
| Undo (U) | Return to the editing state of the previous development parameter. | ||
| Redo (R) | Advance to the next position of the history state. | ||
| Select all images | Select all images for processing. | ||
| Select | Select all images set as marked. | ||
| Invert selection | Invert status of selected images. | ||
| Copy development parameters (C) | Copy development parameters of a selected image to the paste buffer. | ||
| Paste development parameters (P) | Paste development parameters copied to the paste buffer to selected images. | ||
| Partial paste of development parameters | Paste a part of development parameters copied to the paste buffer to selected images. | ||
| Partial paste of image properties | Paste edited status of image properties copied to the paste buffer to selected images. | ||
| Initialize development parameters (I) | Initialize development parameters of the selected images to default. | ||
| Rotate right | Rotate right selected image. | ||
| Rotate left | Rotate left selected image. |
| (3) | Tools (T) | Items related to preview display operations are found here. |
| Fitted display | Always fit display to size of preview display. | ||
| Zoom tool | Resize and move preview display with zoom tool. | ||
| Loupe tool | Resize and move preview display with loupe tool. | ||
| Palm tool | Resize and move preview display with palm tool. | ||
| Exposure bias tool | Adjust exposure of designated preview display to standard. | ||
| Black level tool | Adjust black levels based on designated points in preview display. | ||
| Gray balance tool | Adjust white balance of designated preview display to standard. | ||
| Skin color tool | Adjust exposure and white balance using designated skin color tool in preview display. | ||
| Rotation tool | Use rotation tool to correct inclination of image in preview display. | ||
| Chromatic aberration tool | Use Chromatic aberration tool to correct chromatic aberration in preview display. | ||
| Crop tool | Use the crop tool to crop an image in preview display. |
| (4) | View (V) | Items related to Main Control and Sub-controls are found here. |
| Thumbnail mode | Switch to thumbnail mode. | ||
| Combination mode | Switch to combination mode. | ||
| Preview mode | Switch to preview mode. | ||
| Multi preview | Divide preview window into two windows and compare images. | ||
| Previous image | Move selected image to previous image. | ||
| Next image | Move selected image to next image. | ||
| Display magnification (M) | Set magnification of display in preview display. | ||
| Display warning | Display highlight warning, shadow warning and out of color gamut warning. | ||
| Display grid | Turn grid display in preview display on / off. | ||
| Sort thumbnails | Set rule for thumbnail display order and sort thumbnails. | ||
| Filter images | Select images to be displayed from within images for processing. | ||
| Display toolbar | Turn toolbar display on / off. | ||
| Display status bar | Turn status bar display on / off. | ||
| Parameters controls | Turn parameters controls display on / off. | ||
| Folder | Turn "Folder" sub-control display on / off. | ||
| Image properties | Turn "Image Properties" sub-control display on / off. | ||
| Navigator | Turn "Navigator" sub-control display on / off. | ||
| Histogram (H) | Turn "Histogram" sub-control display on / off. | ||
| Batch development status | Turn "Batch Development Status" sub-control display on / off. | ||
| Sub-controls | Turn sub-controls display on / off. | ||
| Display settings (D) | Make settings related to display. |
| (5) | Parameters (P) | Items related to development parameters are found here. |
| Copy development parameters (C) | Copy development parameters for a selected image to paste buffer. | ||
| Paste development parameters (P) | Paste development parameters copied to paste buffer to selected image. | ||
| Partial paste of development parameters | Paste a part of development parameters copied to paste buffer to selected image. | ||
| Partial paste of image properties | Paste edited status of image properties copied to paste buffer to selected image. | ||
| Initialize development parameters (I) | Initialize development parameters of selected image to default. | ||
| Initialize crop area (N) | Initialize crop area of selected image to default. | ||
| Add taste | Add / register development parameters of selected image as taste. | ||
| Edit tastes | Edit registered taste. | ||
| Load development parameters (L) | Read development parameters saved to file. | ||
| Save development parameters | Save development parameters of selected image to file. | ||
| Rotate right | Rotate right selected image. | ||
| Rotate left | Rotate left selected image. | ||
| Copy development parameters to ROOM | Copy development parameters of a selected image to temporarily register buffer. | ||
| Paste development parameters from ROOM | Paste development parameters copied to temporary register buffer to selected image. | ||
| Paste the latest editing development parameters | Paste latest automatically stored editing parameters to selected image. | ||
| Default parameters settings | Set a registered taste as default parameter. |
| (6) | Development (D) | Items related to development processing are found here. |
| Develop (D) | Develop one selected image and save to a file. | ||
| Batch develop marked images (B) | Perform batch develop for marked images. | ||
| Batch develop selected images | Perform batch develop for selected images. | ||
| Immediately batch develop selected images | Register selected images to batch development job. | ||
| Batch development status | Turn "Batch Development Status" sub-control on / off. | ||
| File output settings (F) | Make settings related to saving files of developed images. | ||
| Batch development settings | Make settings for batch development. |
| (7) | Settings (S) | Items related to settings are found here. |
| File output settings (F) | Adjust settings related to saving files of developed images. | ||
| Display settings (D) | Adjust settings related to displays. | ||
| Function settings (U) | Adjust settings related to overall SILKYPIX functions. | ||
| Shortcut keys settings (K) | Assign SILKYPIX functions to shortcut keys. | ||
| Default parameters settings | Set a registered taste as default parameter. | ||
| Imprint data for printing settings | Edit data for imprint data for printing. | ||
| Imprint data for file output settings | Edit data for imprint data for file output. | ||
| Export settings | Export various settings to setting file. | ||
| Import settings | Import settings from various setting files saved to file. | ||
| Inherit settings tastes | If a past version of SILKYPIX has been installed, this setting will be transferred. | ||
| Register window positions | Saves current window and control box positions. | ||
| Restore window positions | Recalls current window and control box positions. | ||
| Options (O) |
| Delete access history | Delete access history of folders for processing. | |
| Initialize window positions and display states | Initialize sub-controls display location and status. | |
| Select skin | Select SILKYPIX skin. |
| (8) | Help (H) | Items related to help and SILKYPIX are found here. |
| Open software manual (H) | Display this manual. | ||
| Visit SILKYPIX WEB Site | Display SILKYPIX web site. | ||
| Registration | Start product key registration. | ||
| Clear product key registration | Clear product key registration. | ||
| Troubleshooting | This is a function for overcoming troubles by following instructions and operations from our company's support desk. |
| Initialize user configuration files | Initialize SILKYPIX user configuration files. | |
| Delete temporary files | Delete temporary files prepared for high-speed SILKYPIX processing. | |
| Product key registration test | Perform a test to see if it is possible to do an on-line registration of the product key. | |
| Troubleshooting settings | Adjust settings for troubleshooting. |
| Version information | Display SILKYPIX version information and customer's license information. |
Icons for functions that are frequently used are located in the toolbar.
| * | Many functions that can be selected here can be assigned shortcut keys. Please see "9.4. Shortcut keys settings" for how to set keys. |
| (1) | Print selected images. | ||
| (2) | Undo | Return edited development parameters one step back. | |
| (3) | Redo | Add one step in history to the status of the editing history for development parameters. | |
| (4) | Thumbnail mode | Switch to thumbnail mode. | |
| (5) | Combination mode | Switch to combination mode. | |
| (6) | Preview mode | Switch to preview mode. | |
| (7) | Multi preview | Divide preview window into two windows and compare images. | |
| (8) | Display warning | Adjust display settings for highlight warning, shadow warning, out of color gamut warning and soft proofing. | |
| (9) | Previous image | Move selected image to previous image. | |
| (10) | Next image | Move selected image to next image. | |
| (11) | Preview tools | Adjust settings for tool mode and display methods for the preview display. | |
| (12) | Exposure bias tool | Set designated preview display to standard and adjust exposure. | |
| (13) | Gray balance tool | Set designated preview display to standard and adjust white balance. | |
| (14) | Black level tool | Adjust black level based on designated points in preview display. | |
| (15) | Crop tool | Use the crop tool to crop an image in preview display. | |
| (16) | Rotate left | Rotate left selected image. | |
| (17) | Rotate right | Rotate right selected image. | |
| (18) | Develop mark | Mark selected image for development. | |
| (19) | Develop | Develop one selected image and save to file. | |
| (20) | Batch develop selected images | Perform batch develop for selected images. | |
| (21) | Batch develop marked images | Perform batch develop for marked images. | |
| (22) | Environment settings | Make SILKYPIX settings such as File output settings, Display settings and Function settings. | |
| (23) | Version information | Display SILKYPIX version information and customer's license information. | |
| (24) | Plug-ins | Execute plug-ins. | |
| (25) | Batch development status | Turn "Batch Development Status" sub-control on / off. |
This refers to the boxes to which controls can be located on either side of the Main Window.
Each Information Box is divided into an upper and lower part. The "Navigator" and "Histogram" can be located in the upper part of the box.
In addition, the "Folder", "Parameters controls" and "Image properties" can be located in the lower part of the box.
Each Information Box is divided into an upper and lower part. The "Navigator" and "Histogram" can be located in the upper part of the box.
In addition, the "Folder", "Parameters controls" and "Image properties" can be located in the lower part of the box.
0.1.5. Parameters Controls "Parameters controls" refers to the entire box to which various controls for adjusting development parameters are located.
You can locate multiple controls within the box, or combine each control and locate them on a tab page or in a control box.
You can change the location of a control are performed from the Context Menu, displayed when you click on the upper right of the controls.
Please see "0.1.7. How to Locate Controls" for details on how to change locations.
The kinds of parts in the Main Control are classified into the following four parts.
You can locate multiple controls within the box, or combine each control and locate them on a tab page or in a control box.
You can change the location of a control are performed from the Context Menu, displayed when you click
on the upper right of the controls.Please see "0.1.7. How to Locate Controls" for details on how to change locations.
The kinds of parts in the Main Control are classified into the following four parts.
| (1) | Icons for selecting category | Select sub-controls category displayed on tab page. | |
| (2) | Dropdown list for selecting taste | Select taste registered in various categories of development parameters. Open dropdown list by clicking on "V" mark. | |
| (3) | Icon for adding taste | Register current development parameter as taste. | |
| (4) | Control for adjusting exposure bias | Adjust "exposure bias", "exposure bias fine tune" and "HDR/Dodge/Color Burn" parameters within development parameters. Select automatic exposure bias here. |
0.1.6. Sub-controls for adjusting development parameters and windows for displaying status can be displayed as windows independent of the main window. Sub-controls for adjusting development parameters are displayed on the tab page by default, or as a floating window, with each category prepared separately. (*1)
Sub-controls can be located in the control box.
Selection / adjustment to parameters through sub-controls are mainly composed of controls for adjusting numerical values using sliders and edit boxes, dropdown lists and check boxes.
Please see "0.1.8. How to Operate GUI" for operation methods.
 0.1.6.1. Category Selection Icons
0.1.7. How to Locate Controls Sub-controls can be located in the control box.
Selection / adjustment to parameters through sub-controls are mainly composed of controls for adjusting numerical values using sliders and edit boxes, dropdown lists and check boxes.
Please see "0.1.8. How to Operate GUI" for operation methods.
| *1 | As an example, "Sharpening" and "Noise reduction" exist as separate sub-controls, but they share the same development parameter category. |
0.1.6.1. Category Selection Icons Located in the Main Control part, the six following sub-controls are displayed upon selecting the Category Selection Icon.
Furthermore, these sub-controls are located on the tab page by default.
0.1.6.2. Sub-control icons Furthermore, these sub-controls are located on the tab page by default.
| (A) | Tastes/Parameters | Switch to "Tastes/Parameters" sub-control. Tastes selected here are tastes for all categories of development parameters. There are two types of tastes, overall tastes and partial tastes. |
| (B) | White balance | Switch to "White balance" sub-control. Tastes selected here are partial tastes in the "White balance" category. |
| (C) | Tone | Switch to "Tone" sub-control. Tastes selected here are partial tastes in the "Tone" category. |
| (D) | Color | Switch to "Color" sub-control. Tastes selected here are partial tastes in the "Color" category. |
| (E) | Sharpening | Switch to "Sharpening" sub-control. Tastes selected here are partial tastes in the "Sharpening / Noise reduction" category. "Sharpening" and "Noise reduction" exist as separate sub-controls, but they share the same development parameter. |
| (F) | Noise reduction | Switch to "Noise reduction" sub-control. Tastes selected here are partial tastes in the "Sharpening / Noise reduction" category. "Sharpening" and "Noise reduction" exist as separate sub-controls, but they share the same development parameter. |
Sub-controls that can be selected from the sub-control icons at the bottom of the Parameters controls are as indicated below.
Controls displayed from the sub-control icons are displayed as a floating window by default.

Controls displayed from the sub-control icons are displayed as a floating window by default.
| (1) | White balance adjustment | This is the sub-control for adjusting the white balance according to feeling. |
| (2) | Tone curve | This is the sub-control for minute tone adjustments with the tone curve. It has a level bias function. |
| (3) | Highlight controller | This is the sub-control that adjusts the tint and gradation of parts saturated by color. It can also perform dynamic range adjustments. |
| (4) | Fine color controller | This is the sub-control for performing hue / chroma / brightness adjustments for each color hue. |
| (5) | Lens aberration controller | This is the sub-control for compensating for shading (when surrounding light quality is low), and distortion, as well as chromatic aberration. |
| (6) | Rotation/Shift lens effect | This is the sub-control for rotating images and performing shift lens effect. |
| (7) | Development settings | This is the sub-control that displays "Development settings". It is not a taste that can be set. |
A icon is displayed to the upper right of most controls, such as Parameters controls and Sub-controls.A context menu is displayed when you click on this menu, and you can change the location of controls from this menu.
In addition, the method for locating controls that can be changed differs depending on the type of control. Please see "3.5. Arranging parameters controls and sub-controls" for details.
Various GUI controls are located in parameters controls and sub-controls, but common methods of operation are explained here.


| (1) | Slider control |
This is a SILKYPIX® Developer Studio 6 standard GUI composed of slider bars, text boxes and buttons for changing numerical values.
Use the following methods to change values.
Use the following methods to change values.
| a) | Drag the needle on the slider to change the value. | |
| b) | Click the slider to change the value. | |
| c) | Click on the arrow located to the left and right of the text box to raise or lower the value. | |
| d) | Directly input numbers in the text box |
Moving the focus to the text box will turn the background of the text box red. This indicates that you have entered direct editing of numerical values mode.
Push the [Enter] key to confirm edited contents and leave the direct editing mode. Moving the focus to other controls will also allow you to confirm edited contents and leave the direct editing mode.
Push the [Esc] key to delete edited contents and leave the direct editing mode.
There are cases in which intermediate value settings cannot be set through other operation methods.
| e) | Raise and lower values with the mouse wheel |
The mouse wheel can be used only when the mouse cursor is within a slider control composed of slider bars, edit boxes and buttons for changing numerical values.
Except for direct editing modes in text boxes, the concept of focus was not adopted for "SILKYPIX® Developer Studio 6", so please use the mouse wheel to move the mouse cursor on controls for operations.
Except for direct editing modes in text boxes, the concept of focus was not adopted for "SILKYPIX® Developer Studio 6", so please use the mouse wheel to move the mouse cursor on controls for operations.
| f) | Click on the default value mark on the slider bar to set to the default value. |
| g) | Click on the scale on the slider bar and set values. |
| h) | Double click on the text box to set to the default value. |
| (2) | Edit control |
This is a SILKYPIX® Developer Studio 6 standard GUI composed of text boxes and buttons for changing numerical values. It is used in several sub-controls such as crop tool.
| a) | Click on the arrows located to the left and right of the text box to raise or lower the value. | |
| b) | Directly input numbers in the text box |
Moving the focus to the text box will turn the background of the text box red. This indicates that you have entered direct editing of numerical values mode.
Push the [Enter] key to confirm edited contents and leave the direct editing mode. Moving the focus to other controls will also allow you to confirm edited contents and leave the direct editing mode.
Push the [Esc] key to delete edited contents and leave the direct editing mode.
There are cases in which intermediate value settings cannot be set through other operation methods.
Push the [Enter] key to confirm edited contents and leave the direct editing mode. Moving the focus to other controls will also allow you to confirm edited contents and leave the direct editing mode.
Push the [Esc] key to delete edited contents and leave the direct editing mode.
There are cases in which intermediate value settings cannot be set through other operation methods.
| c) | Raise and lower values with the mouse wheel |
The mouse wheel can be used only when the mouse cursor is within an edit control composed of text boxes and buttons for changing numerical values.
Except for direct editing modes in text boxes, the concept of focus was not adopted for "SILKYPIX® Developer Studio 6", so please use the mouse wheel to move the mouse cursor on controls for operations.
Except for direct editing modes in text boxes, the concept of focus was not adopted for "SILKYPIX® Developer Studio 6", so please use the mouse wheel to move the mouse cursor on controls for operations.
| d) | Double click on the text box to set to the default value. |
This will not function if no default value has been set.
| (3) | Dropdown list |
A dropdown list will open when you click on the "V" mark to the right. Make your selection by moving the mouse and clicking on the selected item.
You can change the selected item with the mouse when the dropdown list is not open.
You can change the selected item with the mouse when the dropdown list is not open.
| (4) | Checkbox |
You can turn these adjustments ON or OFF by clicking on them.
0.2. What is SILKYPIX®?
This SILKYPIX® software generates images by processing RAW data recorded by the digital camera.(*1)
This process of generating an image by processing RAW data is called "development".
RAW data is the unprocessed data recorded as digital light energy information that image sensors capture. Compared to normal JPEG files, RAW files are bigger in size because native information is recorded at the time the photograph was taken.
When photographs are taken in RAW e.g. when photographs are saved as RAW data, you will be able to perform more varied image processing from the unprocessed light energy information even after taking the photograph.
The role of SILKYPIX® is to get the most out of the photographic merits of RAW and to draw out as much image information as possible when reproducing scenes shot in RAW data. SILKYPIX® was developed to make this a reality.
*1 ... JPEG/TIFF files can be developed. For more details, please refer to '2.4. How to Handle JPEG/TIFF Image'.
0.2.1. Basic Image Adjustment Items
In this software, you can adjust various parameters of development procedure. Basic development parameters will be introduced here.
0.2.2. Features of SILKYPIX® | (1) | Exposure bias | You can adjust parameters at the development process with SILKYPIX® Developer Studio 6 and obtain the same effect when using the function of the camera. Also, you can use a high-precision "automatic exposure bias" feature, which makes it possible to drive into correct exposure quickly. |
| (2) | White balance adjustment | You can obtain results comparable to photographs taken with appropriate white balance settings on your camera by adjusting parameters when you develop them. You can also obtain results comparable to photographs taken using color temperature conversion filters by adjusting parameters when you develop them. |
| (3) | Sharpening / Noise reduction adjustments | You can emphasize the outline of a shot image, or change the noise reduction during the development process. |
| (4) | Tone Adjustment | You can change the tone of the target scene (soft or hard, etc.) during the development process. |
| (5) | Saturation Adjustment | The "Color representation" enables you to treat an image like changing reversal film, even after taking a photograph. |
| (6) | Lens aberration controller | You can correct or reduce shading (when surrounding light quality is low), distortion and magnification aberrations from a peculiar lens, and create images of a higher quality. |
| (7) | Rotation/Shift lens effect | If you find pictures you took with a camera that was tilted, you can adjust the angle by using the "rotation" function after taking a photograph. In addition, the "Shift lens effect" function has the same effect as using a shift lens which enables you to control the perspective and to shoot a building effectively. |
When you store image data as RAW data and use this software to develop them, you don't have to worry much about adjustments during taking the picture because you can do most corrections at the development process stage. The merits of recording and saving to RAW data compared with saving in JPEG / TIFF are that information is not processed and the amount of information recorded is much richer.
It is also possible to readjust photographs recorded and saved as JPEG / TIFF with this software. However, compared to RAW data, there is less information recorded because JPEG / TIFF images convert to a special color space (sRGB, Adobe RGB, etc.) and color gradation converts to 8bit = 256 steps.
Therefore, if you readjust photographs saved as JPEG / TIFF, the breadth of adjustments are narrowed and deterioration of the image from the adjustments becomes greater.
In order to adjust images while maintaining high image quality, it is necessary to save the RAW data when taking the photograph.
By saving to RAW data and developing with this software, you will be able to obtain very similar results when developing after taking the photograph, as when color and image quality are adjusted at the time the photograph was taken.
SILKYPIX® greatly shortens the time spent shooting and increases the chance of capturing that important "moment" on the camera.
In addition, with the adoption of a high development algorithm, SILKYPIX® has the following features.
| (1) | High resolution, High resolving power |
Although it is generally considered that resolution is decided by the type of lens and the number of pixels of the image sensor, a key factor of actual image resolution is the demosaic process during development procedure.
When you select RAW data to record images and use SILKYPIX® Developer Studio 6 to develop them, you can obtain higher quality pictures than the JPEG image which the camera records in taking a photograph.
When you select RAW data to record images and use SILKYPIX® Developer Studio 6 to develop them, you can obtain higher quality pictures than the JPEG image which the camera records in taking a photograph.
| (2) | Advanced color separation |
When photographing with a digital camera, the color boundary in high saturation area is lost and becomes white outline, which is a specific phenomena of digital cameras.
This effect called digital haloing is caused by the white outline through the phenomena that occurs when color resolution is low compared to excessive brightness.
We have therefore created a completely new demosaicing logic and embedded it into the software in order to provide advanced color resolution. This logic allows delicate and advanced color resolution.
| (3) | Less false color |
Most of digital cameras now have sensors with a structure called Bayer array.
The R, G, and B sensor elements are allocated in order of Bayer array flatly. Each sensor can only capture one of the R, B or G, so false color appears on the edge of picture or area including delicate pattern.
The software reduces this false colors highly effectively with advanced pixel value forecast logic.
Fundamentally, high resolution, high separation capability, and false color reduction are not realized at the same time logically. High resolution causes increased false color phenomenon, and a trail of false color reduction results in low resolution.
However, the software efficiently enables the realization of these processes simultaneously to create natural pictures and colors.
| (4) | Color noise reduction at high sensitive photography |
When photographing in high sensitivity mode for night photography or in a dark place, noise of the image sensor generates color noise spots on the image, which is specific to digital cameras.
These color noise spots appearing irregularly on the picture are very unpleasant to the eyes, and supposedly many photographers avoid high sensitive photography because of this phenomenon.
The software provides a function for reducing the color noise that surprisingly creates clean pictures for high sensitive photography.
With this software, you can select a wide variety of photographic methods and objects to create a new photograph.
| (5) | Hue control for highlight area |
The software has the function to reduce color reverse or overexposure (bleached-out looking) in the highlight area.
For example, when taking a picture of a person, if you increase a development gain to make a skin color white, color shift phenomenon occurs and highlight boundary area often becomes yellow.
The Highlight controller of the software enables color control in over exposed area and creates fine color adjustment in these highlight areas.
| (6) | Real color reproducibility with high linearity |
In order to create accurate colors with various types of light sources, we have embedded our unique color matching logic based on multiple color matching data acquired in many test pictures.
Many types of light source with various spectral distributions, such as sunlight (natural light), fluorescent light, tungsten filament lamp, glow of sunset, electric flash and combination of them are supported, which realizes accurate color reproducibility.
Based on this color reproduction, you can utilize "3-dimensional color mapping methods", which converts colors into 3-dimentional data to create (Memory color) expressing similar colors with the colors in a human's memory, (Portrait color), expressing highlights of the skin, and Film taste expressing colors in a positive (Film color)". You can use these color modes according to its utilization or picture image.
Also, '4.10. Fine Color Controller' can change the precise color and to control the delicate color.
| (7) | Highlight reproduction control by the "dynamic range compression" |
The "dynamic range" control function allows you to make the best use of RAW's ability, which has enough "dynamic range" and records whiter energy than the white point.
You can obtain the smooth gradation in highlight area similar to film.
You can obtain the smooth gradation in highlight area similar to film.
0.3. Difference to Other Photo Retouching Software
RAW development process with SILKYPIX® Developer Studio 6 and image processing with a photo retouching software are similar.
While various types of photo retouching software that support RAW data are increasingly available in the market, there is a critical difference between them. Understanding of the difference helps you to use SILKYPIX® Developer Studio 6 to its fullest.
The important point is that this software always starts every image processing function based on RAW data.
When you change parameters in image processing (for example, changing "Exposure bias", "white balance" or "saturation"), the software always starts processing based on RAW data.
Development parameters are recorded in separate files different from RAW data.
Therefore, although the workload for the computer increases, you can obtain a lot of benefits described below.
| (1) | RAW data is not modified (non-degrading image processing). |
Original image data is never changed, so you don't have to worry about losing it even if you make a wrong operation.
The basic design of this software is to "not modify RAW data files".
If JPEG files recorded on a camera are processed with photo retouching software or digital camera editing software, there is a chance that the original image will be overwritten, but with this software the original data file is not modified. (*1)
| (2) | You can change parameters until you're completely satisfied |
In photo retouching software, images are processed through independent procedures, proceeding in order, one by one.
For example, if you want to change brightness and then adjust color balance, you have to create the image with a new brightness level and then adjust color balance of the newly created picture image. Adjustment work proceeds while checking each result.
If it is necessary to make minute adjustments to brightness after adjusting the color balance, then you have to choose to either start over again from the beginning or make the image at that time even brighter. Using the first method will not degrade the quality of the image, but it is that much more trouble. The second method is accompanied by image degradation.
Always having to start over again is not actually realistic, and in most cases a certain degree of image degradation is allowed and work proceeds. The user's technique is shown in how he or she lessens degradation in image quality and adjusts the image to fit the purpose.
With this software, image processing always takes place in the optimal order after reading the RAW data. If development parameters are determined, development results will be the same and there will be no degradation to image quality, whatever sequence is employed until adjustments are concluded.
Whether you adjust the white balance after adjusting exposure or adjusting exposure after adjusting the white balance, if the final parameters are the same, the results will be the same.
Therefore, you can change the parameters a number of times until you are satisfied with the result.
| (3) | There is no degradation in image quality from adjustment procedures. |
If you make adjustments through photo retouching software, the adjustment procedures will have an influence on image quality.
You have to decide which one should be adjusted first, brightness or color balance. You also have to consider when you should adjust: Sharpening, Tone curve, and Color space for working or the Lens aberration controller.
Always performing these in the optimal procedure demands a high degree of knowledge which to the lay person may result in excessive image quality deterioration.
In addition, even if procedures are appropriate, there are times when gradation or a part of the color gamut is lost due to the combination of procedures.
This software is designed so that image degradation like that through other photo retouching software will not occur, through internal processing that appropriately combines high-grade pipeline image processing that can transmit pixels brighter than pure white.
Leave the image processing order up to SILKYPIX®. Whatever order the adjustments made to development parameter are performed, SILKYPIX® will output development results of the highest quality through optimal image processing.
| (4) | You can restart adjustments whenever you want |
Development parameters are automatically read and updated for each image, and are managed in a file separate from the RAW data. (*2)Therefore, you can later readjust development parameters from the previous adjustment results.
Development parameters are also concealed in JPEG / TIFF images that saved developments. The development parameters buried in these developments can be viewed with this software and applied to other images for processing. (*3)
If you have the developed JPEG / TIFF images and the original RAW data, the development parameters for the development results can be read and minute adjustments can be made from the previous adjustment results at any time.
| (5) | Perform efficient image adjustments. |
After image processing based on parameters that were set is complete, photo retouching software performs the next image processing, so image processing is complete at the stage when all adjustments have been completed. With this method, in order to go through multiple image processes, you must wait until the previous process is complete, which means that there is a lot of wait time until image processing is complete.
With this software, development processing is gathered for later and can be processed as a batch. You can use a workflow in which development parameters are set while looking at a preview image and development processing is performed later in a batch.
In order to efficiently adjust images, a preview image makes full use of simple image processing and partial development processing, and it is displayed quickly. Even if one image processing has not completely finished, there are many times when making the next adjustment to development parameters is possible, so less time is wasted waiting for the next development parameter to take effect.
Even if a certain amount of time is necessary for actual development processing under the final development parameters, the work can be performed efficiently until the development parameters take effect.
This workflow shows its power when processing large quantities of pictures at the same time.
| *1 | It is possible to rewrite rotation information tags, depending on the settings, on JPEG / TIFF / DNG images. |
| *2 | Development parameters are automatically recorded in a "SILKYPIX_DS" sub-folder created within folders that contain RAW data for editing and JPEG / TIFF / DNG images. |
| *3 | Development parameters are buried within the Exif information in JPEG / TIFF images that record development results. They will not be buried if not recorded with Exif information. |
| * | From an early stage, our company developed this kind of "non-degrading image processing" (named OIP technology by our company) and adopted it for many products beginning with digital camera software called "Daisy Digital Camera Friend" which was sold in 1999. With SILKYPIX® Developer Studio 6, we have applied the technology to such processes that irregular images like Distortion Correction and, Digital Shift and implemented a completely continuous image processing in those processes. The process causing rotation and deformation of image must be usually executed after development, however, this software allows users to skip this step and enables a complete set of smart workflow from the basic adjustment, such as exposure and white balance, to lens aberration correction. |
0.4. Keyboard and Mouse Operation for Mac OS
This manual is described on the assumption that the mouse has 2 or more buttons and keyboard operation is for Windows PC.
Therefore if you use Mac OS PC, please pay attention for the following;
Therefore if you use Mac OS PC, please pay attention for the following;
| Right click | [Control] key + mouse click is the same as "Right click" of the mouse. |
| [Ctrl] key + Left click | [Command] key + mouse click is the same as "[Ctrl] key + Left click" of the mouse. |
| [Alt] key | [Option] key is the same as [Alt] key. |