| SILKYPIX® | SOFTWARE MANUAL |
| 8. File operation | ||||||||
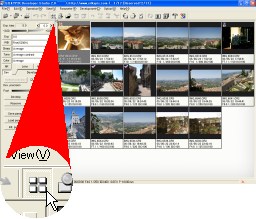 When you are in the thumbnail mode, you can delete the scenes and copy/move the scenes to other folder.
8.1 Delete
- There are two methods to delete the scenes. One operates the reserved scenes and another is for the selected scenes.
8.1.1 Delete reserved scenes
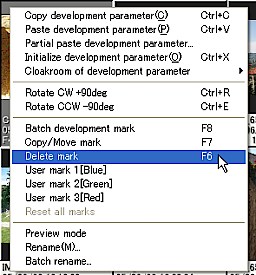 At first you should reserve for the scenes to delete by marking "Delete mark" for each scenes. You can mark "Delete mark" to the selected scene from the context menu command or F6 key.
  Delete mark
When you put a "Delete mark" to the scene, this scene is not deleted at the time.
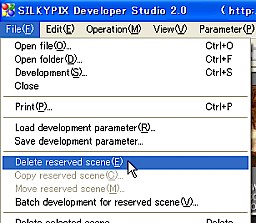 Then you can delete the reserved scenes by the menu command [File (F)] - [Delete reserved scene].
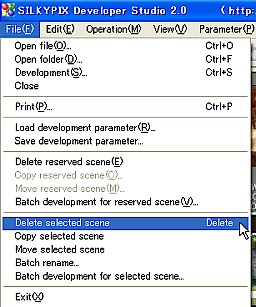 You can delete the selected scenes by the menu command [File (F)] - [Delete selected scene] or "Del" key.
In both the above two operations, the scenes are deleted to the trash box as a default operation. This means that they are not deleted completely and you may resume from the trash box later. If you would like to delete them completely at the time, you should use Shift key at the same time to execute the menu commands or short cut keys.
- There are two methods to copy/move the scenes to the other folder. One operates the reserved scenes and another is for the selected scenes.
8.2.1 Copy/Move reserved scenes
 At first you should reserve for the scenes to copy/move by marking "Copy/Move mark" for each scenes. You can mark "Copy/Move mark" to the selected scene from context menu command or F7 key.
  Copy/Move mark
When you put a "Copy/Move mark" to the scene, this scene is not copied/moved at the time.
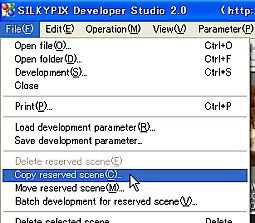 Then you can copy/move the reserved scenes by the menu command [File (F)] - [Copy reserved scene] or [Move reserved scene].
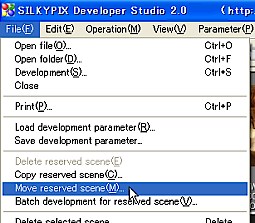
 You can copy/move the selected scenes by the menu command [File (F)] - [Copy selected scene] or [Move selected scene].
- SILKYPIX® Developer Studio is in conformity to DCF (Design rule for Camera File system) standard for the file operation.
We treat the files as one group, which have the same basename that is a part of filename except file-extension.
For example, when there are IMG0001.JPG, IMG0001.THM, IMG0001.WAV and IMG0001.SPD in the same folder, we treat these four files as one group. Therefore delete, copy and move operation are performed as a group. It means when you delete IMG0001.JPG in this software, IMG0001.THM, IMG0001.WAV and IMG0001.SPD are deleted automatically.
- In this software, the development parameter file (spd) and the thumbnail file (spi) are automatically created for each image files on the same folder. (*1)
Sometimes we make some other files (For example spt, spj). These files are called "Incidental files" in this software.
Please refer to "10.3 What kind of file does this software make automatically".
If you would like to save the image data to a CD/DVD, we recommend you to save also the above files. With these files, you can quickly and smoothly operate the images files on CD/DVD with this application. Without using the above files, operating the image files on a CD/DVD will be slow due to the performance to read the huge image data.
Thumbnail files (spi) are created automatically in the time to display the scene. Therefore all thumbnail files for all image files in the folder may not be created when you want to copy to CD/DVD. You can create thumbnail files for all images before copying by following instruction;
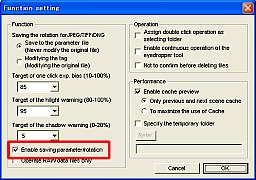 (1) Check "Enable saving parameter/rotation" on the "Function setting" dialog to permit to create thumbnail files.
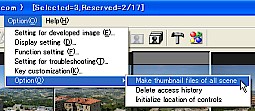 (2) Execute the menu command [Option (O)] - [Option(O)] - [Make thumbnail files of all scene]
| *1 You can disable this function when you would like to avoid the creation of the incidental file. Please refer to "7.1 To save the development parameter and rotation information". |
- There are two way to rename a filename.
- - Rename
- When you select only one scene in the thumbnail mode, you can use this function.
- When you select one or more scenes in the thumbnail mode, you can use this function.
- Rename only base name(exclude extension) and cannot change extension.
- Rename function is performed for all files that has same base name and in the same folder.
 |
[How to rename]
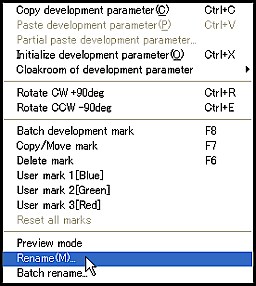 When you select only one scene in thumbnail mode, you can display context menu by clicking right mouse button on the scene.
Then select [Rename (M)...] on the menu, Rename dialog is displayed.
 You can specify new base name on this edit box.
[How to use batch rename]
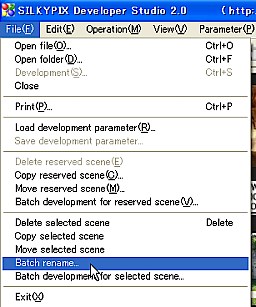 The menu [File (F)] - [Batch rename...] command displays "Batch rename" dialog.
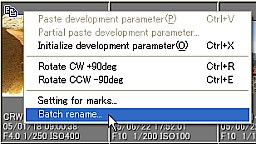 Or display context menu by right clicking and select [Batch rename...].
You can rename all selected scenes according to the setting of this dialog.
[How to use "Batch rename" dialog]
(1) Specify rename method
- Base name is categorized following three parts;
- [Area-A] Optional word can be specified
[Area-B] Select type from the list
[Area-C] Specify about serial number
- Select the sorting method, and you can change order by clicking "Original" tab.
- Select the method when same filename is existed.
- Select the method about the letter case of extension
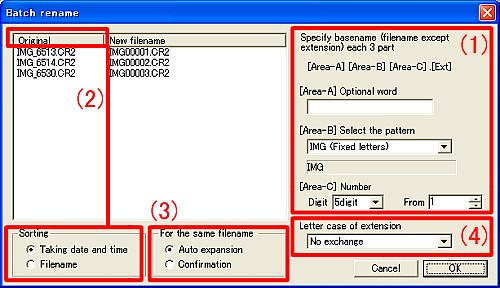 "Batch rename" dialog |
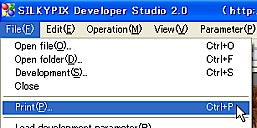 The menu [File (F)] - [Print...] command displays "Print" dialog.
This function provides you to print selected scenes.
 |
8.6.1 Setting the print area on the paper
- 8.6.1.1 Print area
- Specify the print area on the paper. Image will be printed within the specified area.
- Offset from the top left
- Specify the offset with mm (millimeter).
- Specify the size with mm (millimeter).
Image is printed fitting automatically in this area.
- Set whole printable area to print area.
- Center print area on the printable area.
- Specify the location method to print in print area.
- "Auto rotation to minimize borders"
- Rotate automatically to minimize borders.
- If not selected, the image is printed inscribing in print area and some borders remains.
If selected, the image is printed circumscribing the print area and is trimmed some parts.
- - Resolution
- Specify print resolution with dpi.
- Select colorspace sRGB or adobeRGB.
- - Printer setting
- Clicking [Printer setting] button displays the common dialog for printer setting.
- Specify the quantity of the set.
- Clicking [Print] button begins printing.
- Clicking [Cancel] button exits the dialog.
- If you selected multiple scenes to print, you can change preview image with [page] button.