| SILKYPIX® | SOFTWARE MANUAL |
| 9. Setting | ||||||||
- 9.1 Setting for developed image
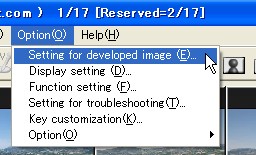 From the menu, select the [Option (O)] from the drop down menu. Choose the [Setting for developed image (E)] command.
 9.1.1 Setting the file type
- In this software, the TIFF file is a non-compressed format. A JPEG file can be saved as a compressed file format. When you would like to edit the developed image with another software, We recommend using TIFF as the non-compressed format to avoid decreasing the image quality. In addition, using a 16bit TIFF is a better way of keeping the latitude.
If you want to reduce the size of the file, we recommend using JPEG to save your file. Please note, when you adjust the JPEG Quality value depending upon your needs, the quality of the JPEG image will decrease according to the JPEG Quality value.
You can select the format in conformity to EXIF. Refer to "10.2 EXIF information" for more detail.
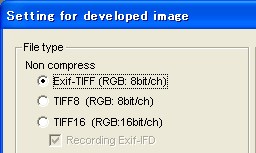 (1) Non-compressed format
- Three kind of selection can be made from the following;
RGB Exif-TIFF (8Bit)
- 8bit/channel, RGB 3 channels/pixel, Non-compressed Format.
EXIF information is imbedded in accordance with EXIF standard.
- 8bit/channel, RGB 3 channels/pixel, Non-compressed Format.
EXIF information is not imbedded.
- 16bit/channel, RGB 3 channels/pixel, Non-compressed Format.
When you check the "Recording EXIF-IFD", the EXIF information is imbedded but it is not in accordance with the EXIF standard.
The EXIF standard does not allow 16bit TIFF.
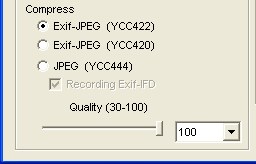 (2) Compressed format
- You can select the following three types of JPEG compressed format. And you can specify the quality coefficient that determines the file size and the image quality.
When the quality coefficient is reduced, the file size will become smaller and the image quality will decrease. When the quality coefficient is higher, the file size will become larger and the image quality will improve.
Exif-JPEG (YCC422)
- It contains 4 brightness and 2 chroma per every 4 pixels. This is the most popular format to record an image.
EXIF information is imbedded in accordance with EXIF standard.
- It contains 4 brightness and 1 chroma per every 4 pixels.
The EXIF information is imbedded in accordance with the EXIF standard.
The file size is smaller and the image quality is lower than EXIF-JPEG(YCC422).
- It contains 4 brightness and 4 chroma per every 4 pixels. This has the highest quality in of these three JPEG format but the file size is also the largest.
When you check the "Recording EXIF-IFD", the EXIF information is imbedded but it is not in accordance with EXIF standard.
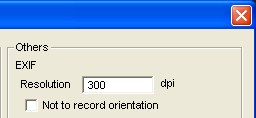 You can specify the image resolution in the EXIF information.
* This setting will not affect the development of the image. The value recoding in the EXIF information, which is usually in use for specifying the print size.
 You can rotate developed a image, or not rotate a image and record rotation information in Exif information.
You can specify to validate rotation in "Setting for developed image" dialog.
When enable rotation, rotated imaged is output and saved.
When disabled rotation, developed image is not rotated. And rotation information is separately recorded in Exif information.
In this case, if selected format has no Exif information or selected "Not to record orientation" option, rotation information is not recorded anywhere.
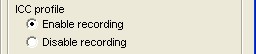 You can select which ICC profile is recorded or not to the developed image file. When the ICC profile is embedded, some software's can get the colorspace information by this ICC profile.
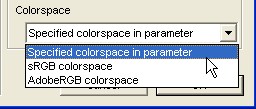 You can specify the colorspace to save the developed image. You can override the specific colorspace which you specified in the development parameter.
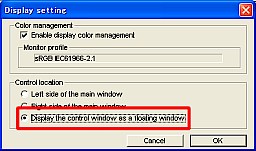
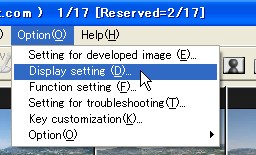 When you execute the menu command [Option (O)] - [Display setting (D)...], the "Display setting" dialog will appear. This is where you can set the color management and the location of the GUI control.
9.2.1 Color management
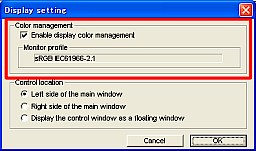 You can enable or disable the color management display.
The related monitor profile will be used and displayed.
We recommend enabling the color management to display the true color. When you select adobeRGB colorspace, you should enable the color management.
9.2.1.1 Monitor profile
- When the color management is enabled, this software uses the monitor profile that is specified as OS(Windows or Mac OS) default. About how to specify the monitor profile as OS default, please refer the manual of your using OS.
Some software are specified a monitor profile by different method from this software. Please check both setting of the monitor profile.
- You can select which where you would like the GUI control is to be located, on the left side in the main window or the right side, or as a floating window.
 |
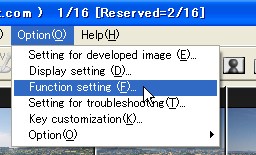 When you execute the menu command [Option (O)] - [Function setting (F)...], the "Function setting" dialog will appear. You can set up the function, operation and performance.
9.3.1 Saving the rotation for JPEG/TIFF/DNG
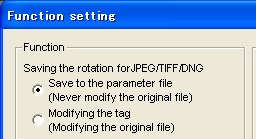 You can specify how the rotation is recorded for JPEG/TIFF/DNG.
- Saving to the incidental information file. (The original file is not modified)
- Modify the tag information in the image file. (The original file is modified)
- Only the rotation tag is modified. Other software can share the rotation information. When the rotation tag is not available in the image file, the rotation information is recorded to the incidental information file.
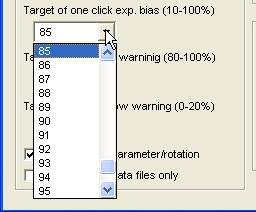 You can specify the target threshold brightness level of the scene for the "Exposure bias tool". Please understand that the value is for a linear energy level, in another word, it is not for a pixel value. The linear energy level is the value before processing the tone and gamma process.
For example, when you set it at 18%, you should click the "Exposure bias tool" on the 18% gray card to adjust exposure bias.
Usually it is set at about 90% and you should click on the white part of the scene in this case.
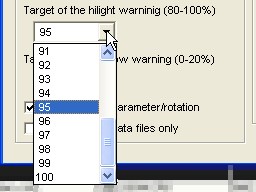 You can specify the target threshold of the brightness level for the "Highlight warning". When you enable the "Highlight warning" in the preview mode, the part of the image that is brighter than the specified target level is blinking.
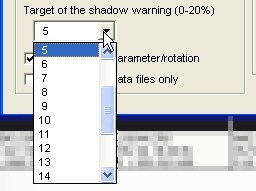 You can specify the target threshold of the brightness level for the "Shadow warning". When you enable the "Shadow warning" in the preview mode, the part of the image that is darker than the specified target level is blinking.
 When you check this setting, the modification of the development parameter and rotation is automatically saved. This setting allows creating spd, spi, spj and spt files on in the folder that has the RAW data file.
If you want to disable creating these files in the folder, please remove the check. In this case the modification of the development parameter and rotation is will not be saved automatically.
 You can select this option to operate RAW data file only.
If disabled, Jpeg/Tiff image files are also target of operation.
If enabled, only RAW data files are target of operation.
* If enabled, you cannot handle the RAW data of EOS-1D or EOS-1Ds, because their file-extension is also "TIF".
 When it this is checked, you can select the folder by double clicking the folder item in the "Select folder" dialog. When it is not checked, this operation is assigned to expand/close the folder tree and it this is a default operation.
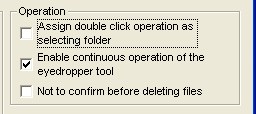 What's the Eyedropper? It indicates the exposure bias tool, gray balance tool and add-point tool for tone curve.
When you check this it, you can continuously use the eyedropper. When you do not check it, you can use the eyedropper as one shot.
In addition, when you hold the shift key with the eyedropper tool, it provides you the opposite of this setting temporarily.
Therefore you can specify the permanent setting here, and you can temporary change the operation by using the shift key.
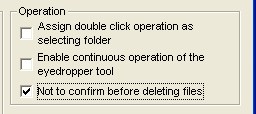 You can select the option "Not to confirm before deleting files".
If disabled, confirmation dialog is displayed every deleting operation.
If enabled, no confirmation before deleting operation.
 When you check this, the preview image is cached for quick display. This function provides you quick response but it uses memory.
When a PC does not have enough RAM memory, please do not check the box because the cache will use up available memory.
- Only previous and next scene cache
- You will be able to quickly move between the previous and the next scene, using the cache memory. You will be able to do a difference check between two images on the preview screen using the cache memory.
- The middle development image and the developed image will be cached.
The final developed image of the past five scenes and four cloakrooms will be cached. This is the maximum amount of scenes that can use the cache.
| To maximize the use of the cache memory, you should use at least 512MB or more. We highly recommend using a PC that has 1GB or more RAM to enable this setting. |
If you want to specify the temporary folder, please check it and select the folder by clicking the "Refer" button.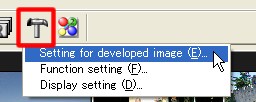 * You can indicate the above setting dialogs by clicking the [Environment setting] button on the Toolbar.
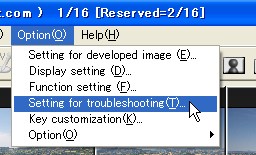
- 9.4 Setting for troubleshooting
- Please operate the software according to the instructions from our technical support in the "Setting for troubleshooting" dialog, or you are solely responsible for the items you set in the dialog.
Please note, the performance of this software will decrease if you make any unnecessary changes.
 9.4.1 Troubleshooting for Windows
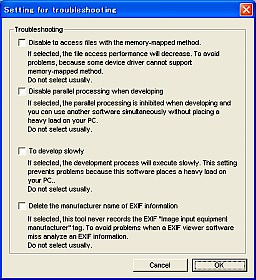 9.4.1.1 Disable to access files with the memory-mapped method
- If selected, the file access performance will decrease. To avoid problems, because some device driver cannot support memory-mapped method.
- SILKYPIX® achieves high performance by effectively using Multi-threading. When you operate SILKYPIX® on a PC that has multi processors, Hyper-Threading Technology or a Dual-Core processor, SILKYPIX® performs parallel processing and achieves high performance.
In short, using SILKYPIX® will place a heavy load on your PC, and it may lower the performance of other software.
Please refer "9.4.1.3 To develop slowly" to control the load low.
Additionally, please refer "5.2.5 To develop with low priority" to give priority to other software while batch development.
If selected, the parallel processing is inhibited when developing and you can use another software simultaneously without placing a heavy load on your PC.
- If selected, the development process will execute slowly. This setting prevents problems because this software places a heavy load on your PC.
This setting is a setting to verify if there is trouble caused by the rise of the temperature of CPU.
When this setting is selected, all the processing procedures like a preview, thumbnail generation, one scene development, and the batch development can be done slowly.
- If selected, this tool never records the EXIF "Image input equipment manufacturer" tag. To avoid problems when a EXIF viewer software miss analyze an EXIF information.
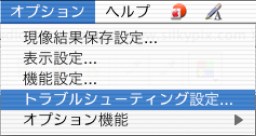 9.4.2 Troubleshooting for Macintosh
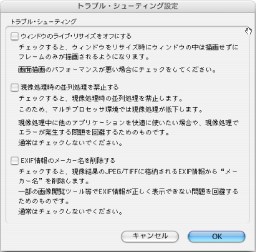 9.4.2.1 Disable live window resizing
- If you check this, the drawing load decreases during a window resizing operation.
If you check this it, the frame is only drawn during the window resizing operation and the final image will be redrawn after the end of the operation.
- SILKYPIX® achieves high performance by effectively using Multi-threading. When you operate SILKYPIX® with a PC that has dual processors, SILKYPIX® performs parallel processing and achieves higher performance.
In short, SILKYPIX® places a heavy load on your PC, and this may lead to lower performance of other software.
If you check this, the parallel processing is inhibited when developing. This setting allows you to avoid problems and to use another software simultaneously and smoothly because SILKYPIX® heavy load for your PC.
- If you check this, the software will never record "Image input equipment manufacturer" tag of EXIF. This will prevent problems when some EXIF viewer software miss reads the EXIF information.
- You can customize control location and display style.
[How to use]
- 1. On the control window, right clicking on the tab displays context menu and you can select "Make it a floating window".
 Floating control box |
2. The menu [Option (O)] - [Display setting (D)...] command displays "Display setting" dialog. You can select "Display the control window as a floating window".
 |
3. On the title bar of each control, right clicking displays context menu and you can select "Locate it in the control box".This item cannot be used if it is not more than 1600x1200 pixel.
 Locate in the control box |
- The menu [Option (O)] - [Key customization (K)...] command displays "Key customization" dialog.
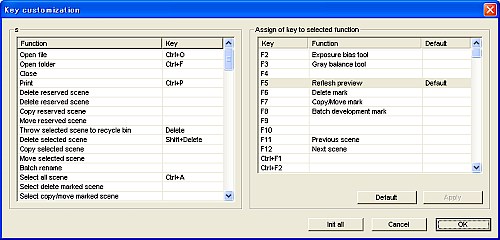 |
- Assign a key to the function
- Select the function on the left function list to set the short cut key.
Next assign the key on the right list, then click [Apply] button.
- Select the function on the left function list to initialize to default.
Next click [Default] button and then click [Apply] button.
- Click [Init all] button.
- 9.7.1 Make thumbnail files of all scenes
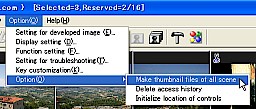 This function makes thumbnail files of all scenes.
- Delete access history of files and folders.