| SILKYPIX® Developer Studio 3.0 | SOFTWARE MANUAL |
| 5. Development Execution | ||||||||
5.11 Scene Development
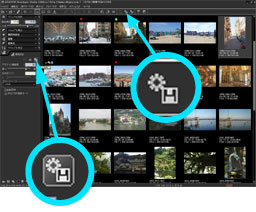 When you click the
  icon on the "Development" sub-control or the toolbar, the "Save as" dialog is displayed.
You can specify the filename to save the developed image, and specify setting for saving.
5.1.1 Image Pixel Size to Save
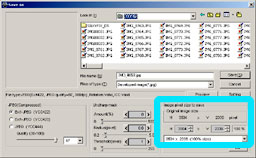 When executing 1-scene development, you can specify the image pixel size to save. In another ward, you can save an enlarged or reduced image with this feature.
5.1.1.1 Select from History of Pixel Size
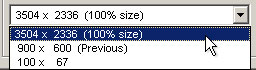 You can select an image pixel size from the history, which includes the original image size (100%), the previous pixel size, and the pixel size that has been used for this scene and also for other scenes.
It is convenient to select it from the history if you want to save it with the same pixel size as the previous.
However, the list shows only the pixel size which is matched with the aspect ratio in the target scene.
 From the drop down list you can select a file type, either JPEG or TIFF.
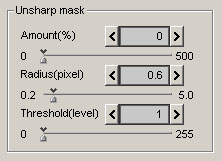
 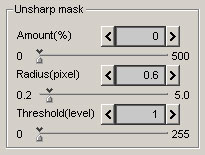 This feature allow you to apply the unsharp mask filter to the developed image. You can adjust the unsharp mask in amount(%), radius(pixel) and threshold value(level).
Please use this feature according to your purpose and the output type, apart from the sharpness specified by the development parameter.
The "sharpness" specified by the development parameter should be used for each scene to adjust its resolution.
The other hand, the "unsharp mask filter" should be used for a certain purpose and output type. For example, when you want to reduce an image for using on a web site, you can use the unsharp mask to make up for sharpness of the image, which will be lost by the image reduction. Or when you want to prepare an image for printing, you can use the unsharp mask to increase image sharpness, avoiding blurred prints.
Please refer to '10.1.10 How to Use Sharp and Unsharp Mask' for more details.
5.1.3.1 Amount
You can specify the "amount" when you use the "unsharp mask". The larger the value is, the stronger the sharpness is.
5.1.3.2 RadiusRadius sets the width of edge of the object to be emphasized.
The larger the value is, the wider the edge is (stronger sharpness), and the smaller the value is, the narrower the edge is (weaker sharpness).
Typically, setting the range between 0.5-1.0 is recommended.
5.1.3.3 ThresholdThe larger the value is, the wider the edge is (stronger sharpness), and the smaller the value is, the narrower the edge is (weaker sharpness).
Typically, setting the range between 0.5-1.0 is recommended.
If a threshold value is set smaller, sharpness is emphasized regardless of the clearness of edges of objects.
If the value is set larger, sharpness is emphasized only where the edges of objects are clearer to some degree.
You can prevent noise in an image with this parameter, typically, when it is set to '0'. Please adjust this parameter to balance noise and sharpness.
If the value is set larger, sharpness is emphasized only where the edges of objects are clearer to some degree.
You can prevent noise in an image with this parameter, typically, when it is set to '0'. Please adjust this parameter to balance noise and sharpness.
5.1.5 Preview
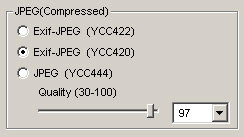 You can specify JPEG setting. For more details, please refer to '
 You can confirm the saving image with the preview, which reflects the effect of the "unsharp mask" and "JPGE compression".
When you adjust the setting value for the "unsharp mask" or the JPEG image, the preview is automatically refreshed.
It takes a time to complete the development of the entire preview image.
But when part of the image is displayed, only the part is developed, shortening the time for development.
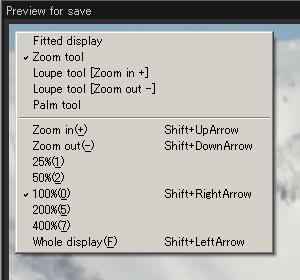
You can change an operation mode or a display magnification from the context menu, which is displayed by right-clicking on the preview image.
5.2 Batch Development
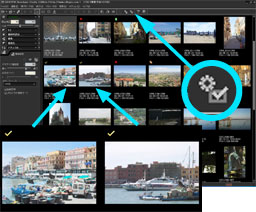 The "Batch development" function allows you to simultaneously develop the scenes which have been selected or on which the "batch development" marks.
The "Batch development" icon on the toolbar is automatically changed according to the status of selected scenes. When only one scene is selected, the
 (batch development for reserved scene) is displayed. And when some scenes are selected, the
  (batch development for selected scene) is displayed.
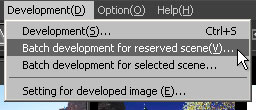 * You can start from the menu command [Development(D)]-[Batch development for reserved scene(V)] or [Batch development for selected scene].
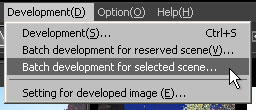
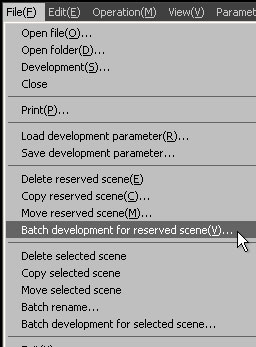 * You can start from the menu command [File(F)]-[Batch development for reserved scene] or [Batch development for selected scene].
 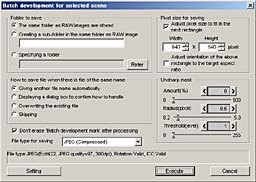 ["Batch Development" dialog]
 When executing the "batch development" function, the "Batch development" dialog is displayed. You can specify the folder to save and other setting of the batch development here.
5.2.1 Folder to Save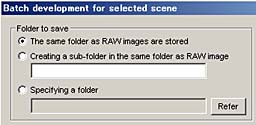 You can select the folder to save a file using the following three ways.
1. Storing the file in the same folder as RAW images are stored.
You can save a developed image in the same folder as the target RAW image is stored.
2. Creating a sub-folder in the same folder as RAW images are stored. You can create a sub-folder under the same folder as the target RAW image is stored.
3. Specifying a folderClick [Refer] button to display the "Select folder" dialog, and you can select the folder to save developed images.
 By default, SILKYPIX uses a RAW file base name ( a file name without an extension) and changes the extension to JPG or TIF.
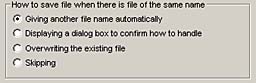
Except for the default, there are the following four ways.
1. Giving another file name automatically
A different file name is automatically created and given to the file as RAW data.
2. Displaying a dialog box to confirm how to handle the file.A dialog box for confirming how to handle the file is displayed.
Please decide the file name.
3. Overwriting the existing filePlease decide the file name.
When the identical file name exists, SILKYPIX® overwrites the existing file automatically.
4. SkippingWhen the identical file name exists, SILKYPIX® skips saving the file.
The file output in the above process is specified in detail at '9.1 Setting for Developed Image'.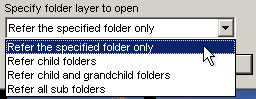
SILKYPIX® allows you to develop the RAW data files located in the separated folders at the same time.
When SILKYPIXR loads files, it can refer to target folders together with their subfolders at the same time.
When it is not necessary to refer to all files in the same folder, you can load only desired files to SILKYPIX®.
In addition, as a higher technique, by using the Find Tool of the Explorer, you can load multiple RAW files located in different folders simultaneously into SILKYPIX®.
 You can specify the pixel size of each developed image when you want to save an enlarged image or reduced image.
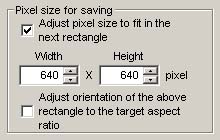
Check [Adjust pixel size to fit in the next rectangle] to save an enlarged image or reduced image.
The image is saved so as to fit in the specified rectangle.
When creating the picture for a slide show that are displayed on a particular display, you can specify a display pixel size. For example, when you want to display images on a VGA display, you can specify the display pixel size of 640x480.
By this setting, the developed image files are saved with the pixel size of 640x480. Therefore, you do not need to adjust the image size at the slide show.
[Adjust orientation of the above rectangle to the target aspect ratio]
When you check this setting, the specified pixel size is automatically adjusted to match the orientation with the aspect ratio of the target image.
For example, when specifying 640x480 as pixel size, the result pixel size will be inscribed to 640x480 for the lateral image and it will be inscribed to 480x640 for the longitudinal image.
For example, when specifying 640x480 as pixel size, the result pixel size will be inscribed to 640x480 for the lateral image and it will be inscribed to 480x640 for the longitudinal image.
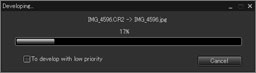 This function is used when you do not want interrupt other running program while the batch development of SILKYPIX® is being executed.
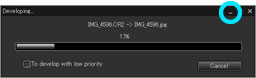
When the batch development is started, the progress dialog (indicating a process status) as shown in Fig. is displayed.
Check [To develop with low priority] box in this dialog. Then the priority of developing the next scene is lowered. So other program can run comfortably while batch development is running.
* Please refer to '10.4.6 Priority'.
 When executing the batch development, use this function to minimize a window.
When the batch development is executed, the progress dialog is displayed, which indicates a progress status. By clicking the minimize button
By clicking the minimize button displayed in the progress dialog (indicating a progress status) while the batch development is running, a window of the whole software is also minimized together. When using other program and so forth, it is convenient to minimize the window in advance so that it will not interfere with the operation. If you want to run other programs comfortable, please refer to '5.2.5 Low Priority Development'.
 This feature allow you to apply the unsharp mask filter to the developed image. You can adjust the unsharp mask in amount(%), radius(pixel) and threshold value(level).
Please use this feature according to your purpose and the output type, apart from the sharpness specified by the development parameter.
The "sharpness" specified by the development parameter should be used for each scene to adjust resolution.
The other hand, the "unsharp mask filter" should be used for a certain purpose and the output type. For example, when you want to reduce an image for using on a website, you can use the unsharp mask to make up for the sharpness of the image, which will be lost by the image reduction. Or when you want to prepare an image for printing, you can use the unsharp mask to increase image sharpness, avoiding blurred prints.
Please refer to '10.1.10 How to Use Sharp and Unsharp Mask' for more details.
5.2.7.1 Amount
You can specify the "amount" when you use the "unsharp mask". The larger the value is, the stronger the sharpness is.
5.2.7.2 RadiusRaidus sets the width of edge of the object to be emphasized.
The larger the value is, the wider the edge is (stronger sharpness), and the smaller the value is, the narrower the edge is (weaker sharpness).
Typically, setting the range between 0.5-1.0 is recommended.
5.2.7.3 ThresholdThe larger the value is, the wider the edge is (stronger sharpness), and the smaller the value is, the narrower the edge is (weaker sharpness).
Typically, setting the range between 0.5-1.0 is recommended.
If the value is set smaller, sharpness is emphasized regardless of the clearness of the edges of objects.
If the value is set larger, sharpness is emphasized only where the edges of objects are clearer to some degree.
You can prevent noise in an image with this parameter, typically, when it is set to '0'. Please adjust this parameter to balance noise and sharpness.
If the value is set larger, sharpness is emphasized only where the edges of objects are clearer to some degree.
You can prevent noise in an image with this parameter, typically, when it is set to '0'. Please adjust this parameter to balance noise and sharpness.
 If you leave the check for 'Don't erase "Batch development mark" after processing', the "Batch development mark" will not be removed.
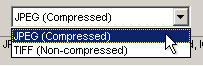 From the drop down list, you can select either of JPEG or TIFF file. When you want to set this in detail, use the "Setting for Developed Image" dialog as described below.