SILKYPIX Developer Studio 8 SE Startup Guide
6. Develop RAW Images
6-1. Development settings
Develop
For the basic settings of [Develop], see "2-3. Develop images."

Development settings
Make detailed settings for converting RAW images to a general-purpose JPEG or TIFF image.
1. Basic settings
Set the format, quality, pixel size, and other details of the saved image.
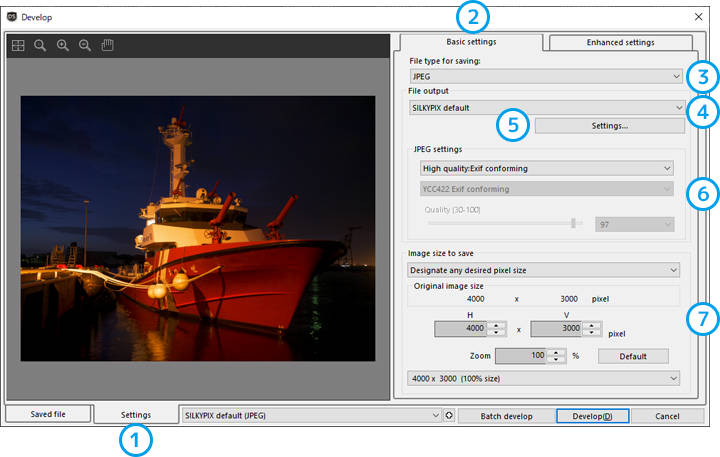
| 1 | Settings | Displays the settings screen. |
| 2 | Basic settings | Displays the screen for setting the file format, quality, pixel size, and other details of the saved image. |
| 3 | File type for saving | Sets either JPEG or TIFF. |
| 4 | JPEG/TIFF settings | Sets the type of JPEG (quality)and TIFF (8bit/16bit). |
| 5 | File output settings | Sets development details such as the resolution and output color space. (See 2. File output settings) |
| 6 | JPEG settings | Sets JPEG saving options. When "TIFF" is selected in 3., the TIFF settings will be displayed. |
| 7 | Size for saving | Sets the pixel size for converting to JPEG/TIFF for resizing, etc. |
2. File output settings
Make detailed settings for saving in the JPEG or TIFF format.
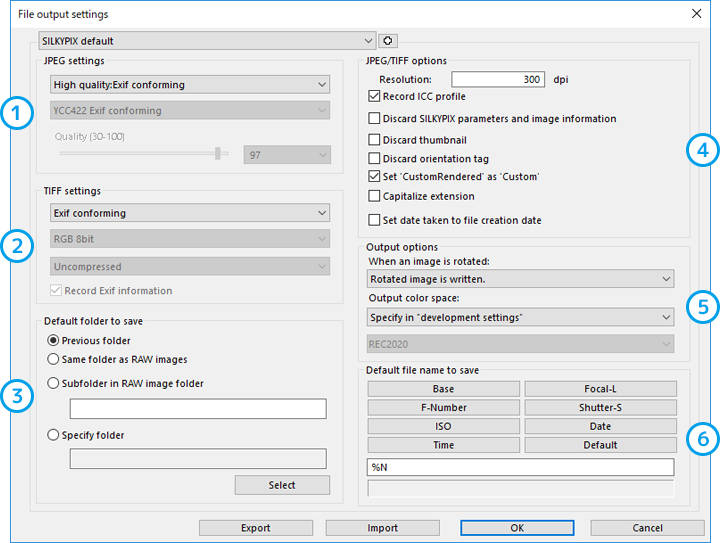
| 1 | JPEG settings | Sets the types and compression ratio for converting to and saving in JPEG. |
| 2 | TIFF settings | Sets the types and number of recording bits for converting to and saving in TIFF. |
| 3 | Default folder to save | Sets the folder to save files converted to JPEG or TIFF. |
| 4 | JPEG/TIFF options | Sets optional information to be embedded in JPEG and TIFF images. |
| 5 | Output options | Sets the rotation and color space for converting to and saving in JPEG or TIFF. |
| 6 | Default file name to save |
Sets the file name for converting to and saving in JPEG or TIFF. The naming rules are as follows. The settings can also be inserted with their respective buttons.
%N ... Base name of the RAW image file (file name excluding the extension)
|
3. Enhanced settings
Set the unsharp mask and imprint data settings for outputting images.
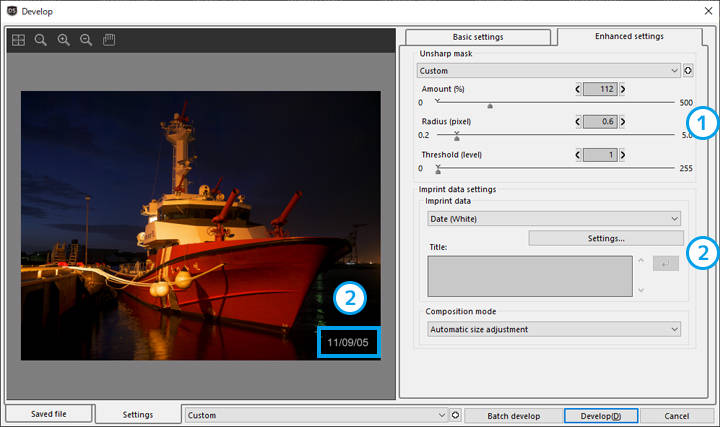
| 1 | Unsharp mask | Sets the unsharp mask for outputting images. The unsharp mask set here will be applied, for example, to resized images when images are resized when output. |
| Amount (%) | Sets the strength of the outline emphasis. | |
| Radius (pixel) | Sets the thickness of the edges of the subject whose outline will be emphasized. | |
| Threshold (level) | When the threshold level is set high, only the outline of a subject with sharp edges will be emphasized. | |
| 2 | Imprint data settings | Imprints text such as the date the picture was taken and comments on the image. Detailed settings such as the position, size, and color of the imprint data can be made from the [Settings] button. |
Imprint data settings
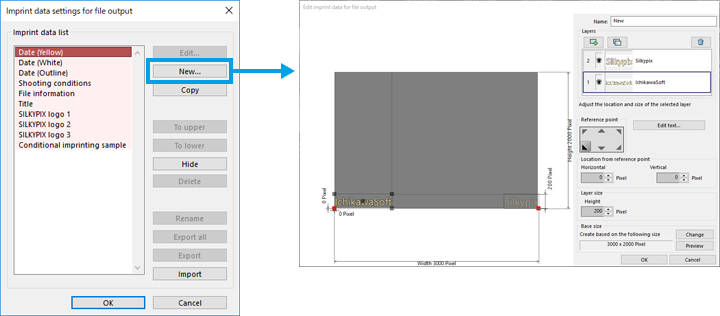
To create original imprint data, click the [New] button and make edits on the [Edit imprint data] window.
6-2. Batch develop
Batch develop selected images
Batch develop images selected on the thumbnail screen.
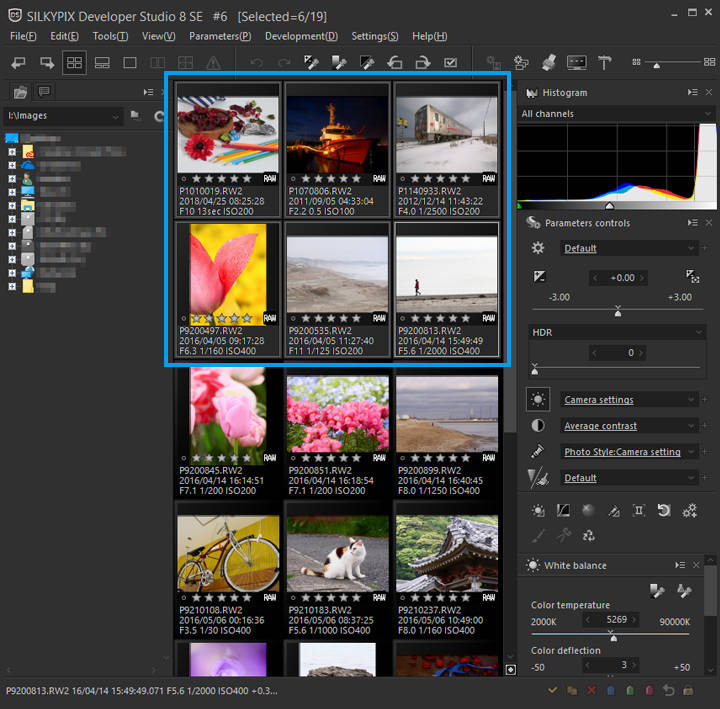
1. Select images to develop
On the thumbnail screen, select images you wish to batch develop by specifying a range by "pressing the Shift key and left-clicking," or making multiple selections by "pressing the Ctrl key and left-clicking. "
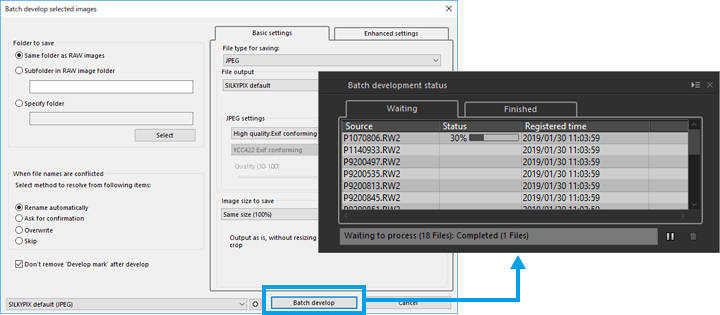
2. Batch develop selected images
If you click 1. [Batch develop selected images] in the toolbar, the [Batch develop selected images] window will open.

Make development settings, and press the [Batch develop] button to start development. The progress status of development will be displayed in 2. [Batch development status].
Batch develop marked images
Batch develop marked images.
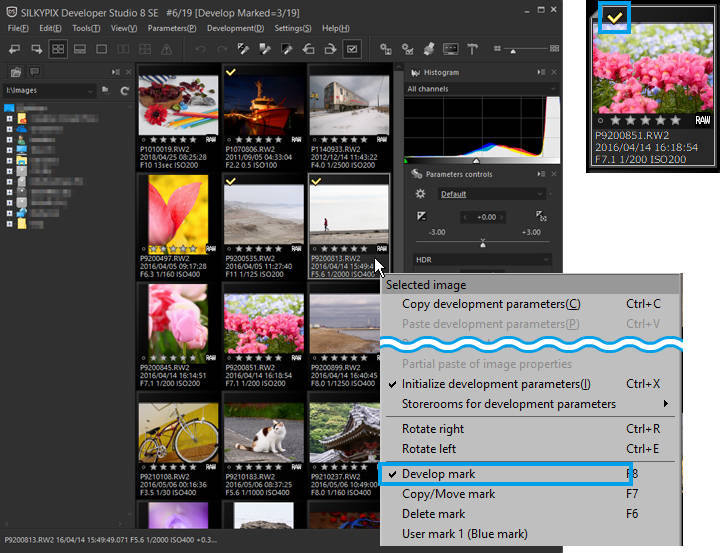
1. Set develop mark
Right-click on the thumbnails of the images you wish to mark for development and select [Develop mark]. A check mark will appear on the selected thumbnails.
2. Batch develop marked images
If you click 1. [Batch develop marked images] in the toolbar, the [Batch develop marked images] window will open.

Make development settings, and press the [Batch develop] button to start development. The progress status of development will be displayed in 2. [Batch development status].

Copyright (C) Adwaa Co.,Ltd. 2004-2025. All Rights Reserved.