| SILKYPIX® Developer Studio 3.0 | SOFTWARE MANUAL |
| 10. How to Handle SILKYPIX® Perfectly | ||||||||
10.1 Techniques
10.1.1 Speeding-up of Refreshing Preview
In order to speed up the preview display, this software first displays the outline preview, while executing the "Formal development" in the background. The "Fomal development" is performed for each part of the image, which replaces the corresponding part of the outline preview one by one.
However, when you want to adjust development parameters based on the developed image, you must wait until the "Formal development preview" is completed.
We will describe about techniques for reducing the time that is required for completing the "Fomal development preview".
(1) Displaying required portion
10.1.2 Utilizing Difference between Exposure Biases of Camera and SILKYPIX®However, when you want to adjust development parameters based on the developed image, you must wait until the "Formal development preview" is completed.
We will describe about techniques for reducing the time that is required for completing the "Fomal development preview".
(1) Displaying required portion
Display only a required portion of a scene by reducing a window. then the developing time becomes smaller.
Since this software is designed to develop and update an image for each part of the image one by one, reduction of a window decreases the time for developing.
(2) Increasing display magnification Since this software is designed to develop and update an image for each part of the image one by one, reduction of a window decreases the time for developing.
Increase a display magnification to display the required portion of a scene. This has the same effect as the case (1).
(3) Setting a parameter of false color control to 0 "False color ctrl." in this software reduces not only high-frequency color noise but also low-frequency color noise. But this function gives a heavy workload to this software.
Therefore, set the parameter of false color control to 0 when adjusting other parameters. After that, use the false color control, so that you can reduce the time for completing the "Formal development preview".
(4) Setting the "Demosaic sharp" slider on the "Development" sub-control to the "min" side Therefore, set the parameter of false color control to 0 when adjusting other parameters. After that, use the false color control, so that you can reduce the time for completing the "Formal development preview".
The development logic (SILKYPIX® 1.6 Development Engine), which is used in this software, can change the demosaic sharp continuously. In most cases, you can obtain better results by setting the "demosaic sharp" slider to the "Quality" side. However, this gives a heavy workload to the software. (Refer to '10.1.4 Relation between Demosaic Sharp and Picture Quality').
For this reason, as well as the case of the false color control, set the slider to the "min" side when adjusting other parameters. Then time reduction is achieved.
For this reason, as well as the case of the false color control, set the slider to the "min" side when adjusting other parameters. Then time reduction is achieved.
If you use the exposure compensation (=exposure bias) on a camera, the light quantity given to an image sensor changes.
For example, when using +1EV exposure bias, the light quantity given to an image sensor becomes doubled.
If you set the exposure bias of SILKYPIX® to +1EV, the light quantity recorded in a RAW file is doubled. Though two cases looks similar, they are different in some point. In the case of using the exposure bias at the development, a developed image becomes rough because noise component is doubled together. But this is not always a disadvantage.
Consider the case where a camera is overexposed when using the exposure bias. The developed image could become too bright. In many cases, too bright image cannot be restored because the highly-bright image does not have sufficient image information. (In some case, restoration could be possible. Please see '10.3.1 Desensitizing at Development.') However, if you take a picture with a little underexposed value using the exposure bias, you can adjust it properly by adding the exposure bias at the development.
This is an advantage of using the exposure bias. You need not determine an exposure exactly at a site of taking a picture. You can adjust exposure carefully and surely at the development. So it is often said that a RAW image should be taken with a little underexposed value. For more details, please see '10.2.2 Should RAW be Photographed in Underexposure?'.
Also when it is difficult to determine an exact exposure under shooting conditions such as backlight or so on, take a picture with a little underexposed value using the exposure bias. For more details, please see '10.2.1 Photography without Backlight Compensation'.
There is a more advanced technique. When it is so dark that you have to use a slower shutter value or a faster lens, one smart way is that you dare to use somewhat insufficient shutter speed or aperture value to result in a darkish image. For more details, please see '10.1.3 Utilizing Difference between ISO Speed Adjustment of Camera and Exposure Bias of SILKYPIX®'.
10.1.3 Utilizing Difference between ISO Speed Adjustment of Camera and Exposure Bias of SILKYPIX®For example, when using +1EV exposure bias, the light quantity given to an image sensor becomes doubled.
If you set the exposure bias of SILKYPIX® to +1EV, the light quantity recorded in a RAW file is doubled. Though two cases looks similar, they are different in some point. In the case of using the exposure bias at the development, a developed image becomes rough because noise component is doubled together. But this is not always a disadvantage.
Consider the case where a camera is overexposed when using the exposure bias. The developed image could become too bright. In many cases, too bright image cannot be restored because the highly-bright image does not have sufficient image information. (In some case, restoration could be possible. Please see '10.3.1 Desensitizing at Development.') However, if you take a picture with a little underexposed value using the exposure bias, you can adjust it properly by adding the exposure bias at the development.
This is an advantage of using the exposure bias. You need not determine an exposure exactly at a site of taking a picture. You can adjust exposure carefully and surely at the development. So it is often said that a RAW image should be taken with a little underexposed value. For more details, please see '10.2.2 Should RAW be Photographed in Underexposure?'.
Also when it is difficult to determine an exact exposure under shooting conditions such as backlight or so on, take a picture with a little underexposed value using the exposure bias. For more details, please see '10.2.1 Photography without Backlight Compensation'.
There is a more advanced technique. When it is so dark that you have to use a slower shutter value or a faster lens, one smart way is that you dare to use somewhat insufficient shutter speed or aperture value to result in a darkish image. For more details, please see '10.1.3 Utilizing Difference between ISO Speed Adjustment of Camera and Exposure Bias of SILKYPIX®'.
Normally ISO sensitivity adjustment of a camera is performed before digitizing the voltage outputted from an image sensor.
For example, if the ISO sensitivity is doubled, an output from an image sensor is also doubled before sampling, or after sampling. After that, when the development is performed for the exposed image, the brightness of the developed image is doubled. As described in 10.1.2, if you set the exposure bias of SILKYPIX to +1EV, the light quantity recorded in a RAW File is doubled. The result of these two cases becomes almost same.
Therefore, the result of taking a picture with sensitivity of ISO 400 seems the same as that of taking a picture with sensitivity of ISO 200 and applying the exposure bias +1EV to the picture.
But they are not the same. Taking a picture with ISO 200 has an advantage. Because even though if you have taken a picture with ISO 200 and produced an underexposed image, you can correct the image using the exposure bias at the development. On the other hand, if you have taken a picture with ISO 400 and produced an overexposed image, you could not correct the image.
So you have a bold way that by taking an underexposed picture intentionally, you can exploit a faster shutter speed or a smaller aperture. Please refer to '10.2.3 Turning Exposure Compensation Dial into ISO Speed Dial'.
10.1.4 Relation between Demosaic Sharp and Picture QualityFor example, if the ISO sensitivity is doubled, an output from an image sensor is also doubled before sampling, or after sampling. After that, when the development is performed for the exposed image, the brightness of the developed image is doubled. As described in 10.1.2, if you set the exposure bias of SILKYPIX to +1EV, the light quantity recorded in a RAW File is doubled. The result of these two cases becomes almost same.
Therefore, the result of taking a picture with sensitivity of ISO 400 seems the same as that of taking a picture with sensitivity of ISO 200 and applying the exposure bias +1EV to the picture.
But they are not the same. Taking a picture with ISO 200 has an advantage. Because even though if you have taken a picture with ISO 200 and produced an underexposed image, you can correct the image using the exposure bias at the development. On the other hand, if you have taken a picture with ISO 400 and produced an overexposed image, you could not correct the image.
So you have a bold way that by taking an underexposed picture intentionally, you can exploit a faster shutter speed or a smaller aperture. Please refer to '10.2.3 Turning Exposure Compensation Dial into ISO Speed Dial'.
This software allows you to adjust the resolving power parameter of demosaic process.
This parameter is called "demosaic sharp" in SILKYPIX®. (In the previous version 1.0 or 2.0, we call it "development precision".)
If you increase the "Demosaic sharp", a resolution gets higher and a developing time gets longer.
If you decrease the "Demosaic sharp", a resolution gets lower, however, a developing time gets shorter.
Therefore, in order to obtain good quality, we recommend you to set the "Demosaic sharp" to a certain large value (about 80).
It is almost correct to think that if you set the "Demosaic sharp" higher and higher, a better and better quality picture can be created. But if a RAW data contains a lot of noise, there is a possibility of resulting in highlighted noise.
In this case, you should set the "Demosaic sharp" lower.
10.1.5 Adjustment for Over-saturationThis parameter is called "demosaic sharp" in SILKYPIX®. (In the previous version 1.0 or 2.0, we call it "development precision".)
If you increase the "Demosaic sharp", a resolution gets higher and a developing time gets longer.
If you decrease the "Demosaic sharp", a resolution gets lower, however, a developing time gets shorter.
Therefore, in order to obtain good quality, we recommend you to set the "Demosaic sharp" to a certain large value (about 80).
It is almost correct to think that if you set the "Demosaic sharp" higher and higher, a better and better quality picture can be created. But if a RAW data contains a lot of noise, there is a possibility of resulting in highlighted noise.
In this case, you should set the "Demosaic sharp" lower.
When taking the high saturated object, the color has sometimes become white in the highlight portion.
This phenomenon is called "Over-saturation" in this manual. This section describes how to adjust for over-saturation.
• Reason for Over-saturation
*2 ... Since the non-linear characteristics which is called γ (gamma) is applied to the actual RGB data (for example, sRGB data), the reality is not so simple as such. The explanation is on the assumption that the RGB value is a linear value and the values of R, G, and B are in proportion to the light quantity that is emitted from a monitor.
*3 ... Actual processing of this software is more complicated. It is because that the actual lightness is not as R+G+B (*1), and the γ (gamma) characteristics is applied (*2). In order to help users understand the functional operations, we just simplified the actual matters.
10.1.6 Color Gamut and Adjustment Outside of GamutThis phenomenon is called "Over-saturation" in this manual. This section describes how to adjust for over-saturation.
• Reason for Over-saturation
In the first place, why does the over-saturation occur?
When the surface of the object is smooth, you observe the light reflection directly and sometimes it looks like white. This is not the "over-saturation".
The "over-saturation" is the phenomenon that the object has been recorded as white by the camera, which looks like the saturated red with human eyes.
It is caused by having exceeded the light which can be expressed when taking photograph or when developing image.
At the digital image, there is a limit of the lightness which can be expressed. This limit becomes lower as a color becomes more saturated.
It is described by using R, G, and B in this section. The monitor of the PC makes the color by mixing R,G, and B pixels which are adjusted brightness.
On the assumption that a red pixel emits the darkest light in R=0, and it emits the brightest light in R=255. Regarding G and B, assumption is the same.
The brightness which the human being feels is the sum of the brightness of R, G, and B. (*1)
For example, in a case of white color, R, G, and B have the same emitted brightness. In other words, when R=100, G=100, and B=100, the color looks white.
This means white color (achromatic color) has a representation range from R=0, G=0, B=0 to R=255, G=255, B=255. As the converted brightness, the representation range is from 0 to 765(=255+255+255).
Next, let's consider light red color (pink). In a case of light red, R has a larger value than that of G and B. For example, R=200, G=100, and B=100.
At this time, the values of G and B are a half of the R value. When this ratio is maintained, the color looks the same.
For example, in a case of darkened light red, the values are R=100, G=50 and B=50. When it makes brighter, the values become R=200, G=100, and B=100.
When it makes more brighter, for example, in a case of the most brightest light red, the values become R=254, G=127, and B=127. (*2)
From this condition, if adjusting the color much more brighter, what will happen? On paper, the values should become R=300, G=150, and B=150.
However, since R=300 cannot be represented in reality, then the actual value of brightness becomes R=255. As the result, the three values are R=255, G=150 and B=150 in this case.
What about setting the color much more brighter? The values R=510, G=255 and B=255 become R=255, G=255 and B=255. This is pure white color!
Roughly speaking, the "over-saturation" occurs in this way.
In the case of this light red color, the limit values that the hue does not change are R=254, G=127 and B=127. And the brightness that human eyes can sense is 254+127+127=508.
This means that although the brightness of white can be represented up to 765, the brightness of light red can be represented only up to 508.
How about a case of deeper red color? For example, let's consider a case of deeper red with values as R=200, G=50 and B=50.
The values of the most brightest deeper red that can be represented are R=252, G=63 and B=63. This means that its maximum brightness is 252+63+63=378.
Therefore, when a color is deeper and deeper, brighter representation cannot be possible.
So when an exposure bias is adjusted to a light color subject, the "over-saturation" occurs at a deep color subject.
This is the reason for the "over-saturation" occurrence.
• Adjustment for Over-saturation 1 (Exposure bias) When the surface of the object is smooth, you observe the light reflection directly and sometimes it looks like white. This is not the "over-saturation".
The "over-saturation" is the phenomenon that the object has been recorded as white by the camera, which looks like the saturated red with human eyes.
It is caused by having exceeded the light which can be expressed when taking photograph or when developing image.
At the digital image, there is a limit of the lightness which can be expressed. This limit becomes lower as a color becomes more saturated.
It is described by using R, G, and B in this section. The monitor of the PC makes the color by mixing R,G, and B pixels which are adjusted brightness.
On the assumption that a red pixel emits the darkest light in R=0, and it emits the brightest light in R=255. Regarding G and B, assumption is the same.
The brightness which the human being feels is the sum of the brightness of R, G, and B. (*1)
For example, in a case of white color, R, G, and B have the same emitted brightness. In other words, when R=100, G=100, and B=100, the color looks white.
This means white color (achromatic color) has a representation range from R=0, G=0, B=0 to R=255, G=255, B=255. As the converted brightness, the representation range is from 0 to 765(=255+255+255).
Next, let's consider light red color (pink). In a case of light red, R has a larger value than that of G and B. For example, R=200, G=100, and B=100.
At this time, the values of G and B are a half of the R value. When this ratio is maintained, the color looks the same.
For example, in a case of darkened light red, the values are R=100, G=50 and B=50. When it makes brighter, the values become R=200, G=100, and B=100.
When it makes more brighter, for example, in a case of the most brightest light red, the values become R=254, G=127, and B=127. (*2)
From this condition, if adjusting the color much more brighter, what will happen? On paper, the values should become R=300, G=150, and B=150.
However, since R=300 cannot be represented in reality, then the actual value of brightness becomes R=255. As the result, the three values are R=255, G=150 and B=150 in this case.
What about setting the color much more brighter? The values R=510, G=255 and B=255 become R=255, G=255 and B=255. This is pure white color!
Roughly speaking, the "over-saturation" occurs in this way.
In the case of this light red color, the limit values that the hue does not change are R=254, G=127 and B=127. And the brightness that human eyes can sense is 254+127+127=508.
This means that although the brightness of white can be represented up to 765, the brightness of light red can be represented only up to 508.
How about a case of deeper red color? For example, let's consider a case of deeper red with values as R=200, G=50 and B=50.
The values of the most brightest deeper red that can be represented are R=252, G=63 and B=63. This means that its maximum brightness is 252+63+63=378.
Therefore, when a color is deeper and deeper, brighter representation cannot be possible.
So when an exposure bias is adjusted to a light color subject, the "over-saturation" occurs at a deep color subject.
This is the reason for the "over-saturation" occurrence.
You can adjust "exposure bias" parameter against "over-saturation".
Since the over-saturation is caused by adjusting the exposure bias to a brighter color, you can ease the over-saturation by adjusting a exposure bias to the certain level.
However, in many cases, a light color subject looks too dark.
• Adjustment for Over-saturation 2 (Saturation adjustment) Since the over-saturation is caused by adjusting the exposure bias to a brighter color, you can ease the over-saturation by adjusting a exposure bias to the certain level.
However, in many cases, a light color subject looks too dark.
You can adjust "saturation" parameter on the "Color" sub-control against "over-saturation".
When "saturation" is lower, a brighter representation is possible. So by lowering the "saturation", you can ease the over-saturation.
However, in many cases, when lowering "saturation" as easing over-saturation for high saturated color, a very light color image is created because saturation at the other portions becomes too low.
• Adjustment for Over-saturation 3 (Highlight controller) When "saturation" is lower, a brighter representation is possible. So by lowering the "saturation", you can ease the over-saturation.
However, in many cases, when lowering "saturation" as easing over-saturation for high saturated color, a very light color image is created because saturation at the other portions becomes too low.
This software has a function to control the method for clipping the color of the region where brightness exceeds any representation limit of R, G, and B in a range.
For example, let's consider the former example of the brightness with values of R=300, G=150, and B=150.
This software internally processes the color in wider range colorspace than the actual representable range. For this reason, this software can keep the real color values such as R=300, G=150 and B=150 internally.
However, when the values are outputted, they are clipped in the range of 255 for each R, G, and B.
If only the R is clipped to 255 simply, hue, saturation and brightness are out of balance. Its original brightness is 300+150+150=600.
When the "highlight controller" is set to give brightness highest priority, the color clipping is executed with priority of brightness 600 instead of color.
For example, the values are R=255, G=173 and B=172 (*3), and brightness can be maintained as 600.
However, this increases "over-saturation" level.
When the "highlight controller" is set to give brightness lowest priority (give saturation highest priority), the color clipping is executed with priority of color in this time.
Here we omit the explanation with numerical values in the case of priority of color. But please remember that the default value of "Chroma-Luminance" parameter is 25, and you can ease "over-saturation" by setting this value lower.
Here we omit the explanation with numerical values in the case of priority of color.
Since in the case of priority of color, the default brightness is 64, you can remember that modification of over-saturation is possible by setting the value from 64 to 0.
In addition, in this case, you can also adjust the priority between saturation and hue. For details, please refer to '4.9 Highlight Controller'.
• Adjustment for Over-saturation 4 (Fine color controller) For example, let's consider the former example of the brightness with values of R=300, G=150, and B=150.
This software internally processes the color in wider range colorspace than the actual representable range. For this reason, this software can keep the real color values such as R=300, G=150 and B=150 internally.
However, when the values are outputted, they are clipped in the range of 255 for each R, G, and B.
If only the R is clipped to 255 simply, hue, saturation and brightness are out of balance. Its original brightness is 300+150+150=600.
When the "highlight controller" is set to give brightness highest priority, the color clipping is executed with priority of brightness 600 instead of color.
For example, the values are R=255, G=173 and B=172 (*3), and brightness can be maintained as 600.
However, this increases "over-saturation" level.
When the "highlight controller" is set to give brightness lowest priority (give saturation highest priority), the color clipping is executed with priority of color in this time.
Here we omit the explanation with numerical values in the case of priority of color. But please remember that the default value of "Chroma-Luminance" parameter is 25, and you can ease "over-saturation" by setting this value lower.
Here we omit the explanation with numerical values in the case of priority of color.
Since in the case of priority of color, the default brightness is 64, you can remember that modification of over-saturation is possible by setting the value from 64 to 0.
In addition, in this case, you can also adjust the priority between saturation and hue. For details, please refer to '4.9 Highlight Controller'.
By using the "highlight controller", you can ease an over-saturation region, however, this does not have sufficient effect to save a high-saturated color completely.
Rather, as remaining a highlighted portion, this function is very effective when you adjust its representation.
The "fine color controller" function can provide more effective method.
The method is to lower both saturation and lightness of only the color with which the over-saturation has occurred.
By adjusting only the color with which the over-saturation has occurred, it is possible to execute the adjustment of over-saturation without giving any effect to the white portion that has low saturation. Please refer to '4.10 Fine Color Controller' for the use of the function.
• Adjustment for Over-saturation 5 (Dynamic range) Rather, as remaining a highlighted portion, this function is very effective when you adjust its representation.
The "fine color controller" function can provide more effective method.
The method is to lower both saturation and lightness of only the color with which the over-saturation has occurred.
By adjusting only the color with which the over-saturation has occurred, it is possible to execute the adjustment of over-saturation without giving any effect to the white portion that has low saturation. Please refer to '4.10 Fine Color Controller' for the use of the function.
This function allows you to ease over-saturation by compressing gradation in the area of the highlights.
Please refer to '4.9.4 Dynamic Range' for more details.
*1 ... In reality, sensitivity of human eye differs according to a hue. Although the brightness which the human being feels is not a sum of the brightness of R, G, and B actually, we simplified the matter for the sake of explanation.Please refer to '4.9.4 Dynamic Range' for more details.
*2 ... Since the non-linear characteristics which is called γ (gamma) is applied to the actual RGB data (for example, sRGB data), the reality is not so simple as such. The explanation is on the assumption that the RGB value is a linear value and the values of R, G, and B are in proportion to the light quantity that is emitted from a monitor.
*3 ... Actual processing of this software is more complicated. It is because that the actual lightness is not as R+G+B (*1), and the γ (gamma) characteristics is applied (*2). In order to help users understand the functional operations, we just simplified the actual matters.
There are some cases that exceed the presentable color range, when taking photograph of the high saturation color or when increasing "saturation" during development process.
The 'Highlight/Shadow/Outside of the Color Gamut Warnings' function gives a warning regarding the portion that exceeds the presentable color gamut.
This software can handle two colorspaces such as sRGB and Adobe RGB. In theses colorspaces, all of existing colors can not be expressed.
On the other hand, when taking a photograph with a RAW file, a camera can capture the colors accurately that are in the color gamut which is much wider than that of the case that these colorspaces can handle.
On this account, in a case of a flower etc. with high saturation, colors may exceed the color gamut (presentable color range) that these colorspaces can handle.
This software can handle the color gamut completely which a camera can capture and also this software can clip the color that exceeds the range at the final stage of the development processing.
The warning function for out of color gamut gives a warning to a portion with a clipped color.
Since the colors that are out of the color gamut are clipped and compressed into the color gamut of sRGB and Adobe RGB, details are compressed as if they are like being crashed.
Even as the over-saturation does not occur, if you feel that details of the highly saturated portion are lost, you need to check whether colors are out of the color gamut or not.
Even if the colors that are out of the color gamut become darkened by adjusting the "exposure bias", a warning is still given, not like the case of the over-saturation.
Describing with the values of R, G, and B, it is a highly saturated portion as if one or even two among R, G, and B takes a negative value.
For example, although a color with values as R=255, G=0 and B=0 is the most saturated red that can be represented in this RGB colorspace, a camera has captured red color with much higher saturation. When it is developed, it may have values like R=255, G=-20, and B=-20. Of course, such a color cannot be outputted, and it is clipped. So details with high saturation are looked like being crashed.
For example, even if an actual flower has subtle details of saturation between R=255, G=-20, B=-20 and R=255, G=-30, B=-30, its development result has exactly the same colors without gradation.
However, since this software keeps the colors that are out of the color gamut, the details can be restored by lowering their saturation.
You can try to lower the saturation until the warning disappears by using "saturation" parameter on the "Color" sub-control or by using the fine color controller.
The colors in such a range are difficult for printing devices such as a printer and so forth. Especially, bright magenta and blue-red colors between red and blue are the most difficult colors for printing devices.
In addition, a monitor for a PC can display bright colors with high saturation, however, these colors are difficult for a printer and other printing devices.
A monitor is a light-emitting device but printed materials display colors by absorbing light.
For this reason, when presenting colors with high saturation, the colors are darkened.
As a result of printing, if the colors are pressed as if they are like being crashed, lowering lightness might be effective.
10.1.7 Sharpening ImageThe 'Highlight/Shadow/Outside of the Color Gamut Warnings' function gives a warning regarding the portion that exceeds the presentable color gamut.
This software can handle two colorspaces such as sRGB and Adobe RGB. In theses colorspaces, all of existing colors can not be expressed.
On the other hand, when taking a photograph with a RAW file, a camera can capture the colors accurately that are in the color gamut which is much wider than that of the case that these colorspaces can handle.
On this account, in a case of a flower etc. with high saturation, colors may exceed the color gamut (presentable color range) that these colorspaces can handle.
This software can handle the color gamut completely which a camera can capture and also this software can clip the color that exceeds the range at the final stage of the development processing.
The warning function for out of color gamut gives a warning to a portion with a clipped color.
Since the colors that are out of the color gamut are clipped and compressed into the color gamut of sRGB and Adobe RGB, details are compressed as if they are like being crashed.
Even as the over-saturation does not occur, if you feel that details of the highly saturated portion are lost, you need to check whether colors are out of the color gamut or not.
Even if the colors that are out of the color gamut become darkened by adjusting the "exposure bias", a warning is still given, not like the case of the over-saturation.
Describing with the values of R, G, and B, it is a highly saturated portion as if one or even two among R, G, and B takes a negative value.
For example, although a color with values as R=255, G=0 and B=0 is the most saturated red that can be represented in this RGB colorspace, a camera has captured red color with much higher saturation. When it is developed, it may have values like R=255, G=-20, and B=-20. Of course, such a color cannot be outputted, and it is clipped. So details with high saturation are looked like being crashed.
For example, even if an actual flower has subtle details of saturation between R=255, G=-20, B=-20 and R=255, G=-30, B=-30, its development result has exactly the same colors without gradation.
However, since this software keeps the colors that are out of the color gamut, the details can be restored by lowering their saturation.
You can try to lower the saturation until the warning disappears by using "saturation" parameter on the "Color" sub-control or by using the fine color controller.
The colors in such a range are difficult for printing devices such as a printer and so forth. Especially, bright magenta and blue-red colors between red and blue are the most difficult colors for printing devices.
In addition, a monitor for a PC can display bright colors with high saturation, however, these colors are difficult for a printer and other printing devices.
A monitor is a light-emitting device but printed materials display colors by absorbing light.
For this reason, when presenting colors with high saturation, the colors are darkened.
As a result of printing, if the colors are pressed as if they are like being crashed, lowering lightness might be effective.
When the photograph is not sharp and you feel that it is lacking vigor and sleepy, please adjust a development parameter according to the following.
1. Exposure Bias
10.1.8 Creating Extremely Clear Image1. Exposure Bias
When you develop the RAW data, you can reproduce the scene by taking out only a necessary part from the wide lightness information captured by a camera at the time of development.
If you take a photograph by JPEG, you have to set the exposure bias to decide brightness of a photograph at the time of taking a photograph. However, if you take a photograph by RAW, you can adjust brightness at the time of development after taking a photograph.
Like the "trimming" function that cuts out unnecessary portion, the adjusting exposure bias means trimming the range of lightness that you want to represent.
Please adjust the portion where you want to express to moderate brightness by adjusting "exposure bias". We hope that your picture can restore its lightness and vigor.
2. Tone Adjustment If you take a photograph by JPEG, you have to set the exposure bias to decide brightness of a photograph at the time of taking a photograph. However, if you take a photograph by RAW, you can adjust brightness at the time of development after taking a photograph.
Like the "trimming" function that cuts out unnecessary portion, the adjusting exposure bias means trimming the range of lightness that you want to represent.
Please adjust the portion where you want to express to moderate brightness by adjusting "exposure bias". We hope that your picture can restore its lightness and vigor.
By adjusting the "tone", you can determine how to compress or expand the lightness that a camera captured.
First, please set "contrast" parameter larger. This is the operation which adjusts white portion more white and black portion more black, and narrows the range in which you want to represent and expands to the device presentable range. A picture might have vigor by this operation.
Now, where is a boundary for determining contrast emphasis? That is contrast center.
If your picture is bright, you can move the contrast center up and make contrast around the bright portion. If it is dark, you can move the contrast center down and make contrast around the dark portion.
How is it? Hopefully the problem is improved.
If flare appears on a picture or if you receive impression that it is dusty, you can try to increase a black level.
Do you feel that a picture is tightened?
If you feel that a picture seems to be a sleepy because of backlight, a distant view and so forth, you can tighten black color by increasing the black level.
3. Sharpness AdjustmentFirst, please set "contrast" parameter larger. This is the operation which adjusts white portion more white and black portion more black, and narrows the range in which you want to represent and expands to the device presentable range. A picture might have vigor by this operation.
Now, where is a boundary for determining contrast emphasis? That is contrast center.
If your picture is bright, you can move the contrast center up and make contrast around the bright portion. If it is dark, you can move the contrast center down and make contrast around the dark portion.
How is it? Hopefully the problem is improved.
If flare appears on a picture or if you receive impression that it is dusty, you can try to increase a black level.
Do you feel that a picture is tightened?
If you feel that a picture seems to be a sleepy because of backlight, a distant view and so forth, you can tighten black color by increasing the black level.
If a picture has been adjusted up to this level, perhaps the picture is cool now.
As the rest, focus is almost ...
From now on, let's adjust sharpness of outline by enlarging a focused area in a picture (more than 100% display magnification).
First of all, let's maximize the sharpness.
The outline of a picture becomes clear, and you might have well-shaped impression.
However, if you look at it very carefully, you might discover that a noise was also increased simultaneously and the outline which was originally very clear seemed to be unnatural because it was too much emphasized.
In order to delete this unnatural impression, you should reduce the sharpness. Now adjustment is over.
Please refer to '10.1.8 Creating Extremely Clear Image' for improving the sharpness setting.
In order to create a picture with high resolution, you can adjust sharpness. We call this sharpness control.
Simply saying, if you select a strong setting in the ""sharp"" dropdown list or increase "Outline emphasis" in the "Sharp" sub-control, the outline looks very clear.
However, a noise component is also increased simultaneously.
When executing the sharpness control, this software can execute a noise reduction process simultaneously. This is called noise canceller.
There is a reciprocal relation between these two.
1. When sharpness (outline emphasis, detail emphasis) is increased, a noise is also increased.
2. When the noise canceller is enhanced, resolution is lost.
Besides this function, this software has the noise reduction adjusting function that can cancel a noise in a positive way on the RAW level (There is a "Noise reduction" slider in the "Exposure" sub-control).
In addition, there are two functions called false color control and demosaic sharp. These two can be operated simultaneously. However, these are not related to reduction directly.
Here, we describe how to optimize these parameters.
By executing the following procedure, you can obtain an optimal combination of parameters in a relatively easy way.
1. Before executing the procedure shown below, you have to adjust white balance, exposure bias, tone and color in advance.
2. First, turn off the sharpness and the noise canceller.
White balance, exposure bias, tone and color are parameters that are associated with the color direction. On the other hand, demosaic sharp, false color control, noise reduction, sharpness and noise canceller are parameters that are associated with the resolution direction (frequency aspect).
For this reason, first, you have to determine the basic parameters in the color direction. Then you can execute adjustment according to the picture processing order.
Regarding the processing in the resolution direction (frequency aspect), it is executed in the following order.
RAW --> Noise Reduction --> Demosaic (demosaic sharp, false color control) --> Sharpness(outline emphasis, detail emphasis, false outline control), Noise canceller (noise level, canceller intensity)
In other words, determining the parameters in the color direction (1), turning off the processes in the later stage (2), according to the processing order, adjusting noise reduction, false color control (3), finally optimizing sharpness and noise canceller (4).
10.1.9 How to Take Advantage of Dynamic RangeSimply saying, if you select a strong setting in the ""sharp"" dropdown list or increase "Outline emphasis" in the "Sharp" sub-control, the outline looks very clear.
However, a noise component is also increased simultaneously.
When executing the sharpness control, this software can execute a noise reduction process simultaneously. This is called noise canceller.
There is a reciprocal relation between these two.
1. When sharpness (outline emphasis, detail emphasis) is increased, a noise is also increased.
2. When the noise canceller is enhanced, resolution is lost.
Besides this function, this software has the noise reduction adjusting function that can cancel a noise in a positive way on the RAW level (There is a "Noise reduction" slider in the "Exposure" sub-control).
In addition, there are two functions called false color control and demosaic sharp. These two can be operated simultaneously. However, these are not related to reduction directly.
Here, we describe how to optimize these parameters.
By executing the following procedure, you can obtain an optimal combination of parameters in a relatively easy way.
1. Before executing the procedure shown below, you have to adjust white balance, exposure bias, tone and color in advance.
2. First, turn off the sharpness and the noise canceller.
Set the "Outline emphasis" to 0, the "Noise level" to 0 and the "False outline control" to 0.
3. Move the "Noise reduction" slider as you check details of a picture.By adjusting the "Noise reduction" slider, high frequency noise decreases, however, the details are easy to be pressed.
If you press the details here, you are not able to restore them later when you adjust the sharpness. Therefore, you must adjust the "Noise reduction" slider properly as the details are not pressed.
In addition, when you adjust by increasing the "Noise reduction" slider, on the contrary, low frequency color noise appears conspicuously. You have to adjust the false color control simultaneously.
The adjustment by moving the "Noise reduction" slider must be completed, before you adjust the "demosaic sharp".
4. Adjust the sharpness and the noise canceller until you obtain the optimal resolution.If you press the details here, you are not able to restore them later when you adjust the sharpness. Therefore, you must adjust the "Noise reduction" slider properly as the details are not pressed.
In addition, when you adjust by increasing the "Noise reduction" slider, on the contrary, low frequency color noise appears conspicuously. You have to adjust the false color control simultaneously.
The adjustment by moving the "Noise reduction" slider must be completed, before you adjust the "demosaic sharp".
When you adjust the noise canceller, you must maximize the canceller intensity first. Then you can adjust a noise level. Next, you can make fine adjustments with the canceller intensity. This adjusting order makes you feel comfortable.
While increasing the sharpness, if a false outline is noticeable around the outline, you can increase the false outline control.
There is a reason for this effective order.While increasing the sharpness, if a false outline is noticeable around the outline, you can increase the false outline control.
White balance, exposure bias, tone and color are parameters that are associated with the color direction. On the other hand, demosaic sharp, false color control, noise reduction, sharpness and noise canceller are parameters that are associated with the resolution direction (frequency aspect).
For this reason, first, you have to determine the basic parameters in the color direction. Then you can execute adjustment according to the picture processing order.
Regarding the processing in the resolution direction (frequency aspect), it is executed in the following order.
RAW --> Noise Reduction --> Demosaic (demosaic sharp, false color control) --> Sharpness(outline emphasis, detail emphasis, false outline control), Noise canceller (noise level, canceller intensity)
In other words, determining the parameters in the color direction (1), turning off the processes in the later stage (2), according to the processing order, adjusting noise reduction, false color control (3), finally optimizing sharpness and noise canceller (4).
SILKYPIX® allows you to control "dynamic range" recorded in RAW data.
Almost all of DSLR camera has some margin at highest space and they can record a little lighter energy of ray than white point because there are the different sensitivity between R, G, and B sensor.
"Dynamic range controller" makes the best use of such sensor information, and provides you the function to compress highlight.
In highlight area, this function makes it possible to be smooth and emphasis gradation until white point and to keep saturation like as a film.
However, you cannot restore the gradation if you take a photograph with overexposure.
It is easy to overexposure if there is high contrast or much brightness delta in the scene.
Then if you take a photograph with a little underexposure, you can record whiter energy than pure white point in the RAW data. And you can resume brightness with "Exposure bias" function and also use this "dynamic range" function.
Please try to take a photograph with a little underexposure, and make wealthy highlight expression with this function.
* In the case with FinePix S3/S5 Pro, it has low sensitive sensor additionally and can record about +2EV energy than white point.
Therefore if you use FinePix S3/S5 Pro to use "dynamic rage" function of SILKYPIX®, you need not take a photograph with a little underexposure, and you only have to set the camera "WIDE Mode".
10.1.10 How to Use Sharp and Unsharp MaskAlmost all of DSLR camera has some margin at highest space and they can record a little lighter energy of ray than white point because there are the different sensitivity between R, G, and B sensor.
"Dynamic range controller" makes the best use of such sensor information, and provides you the function to compress highlight.
In highlight area, this function makes it possible to be smooth and emphasis gradation until white point and to keep saturation like as a film.
However, you cannot restore the gradation if you take a photograph with overexposure.
It is easy to overexposure if there is high contrast or much brightness delta in the scene.
Then if you take a photograph with a little underexposure, you can record whiter energy than pure white point in the RAW data. And you can resume brightness with "Exposure bias" function and also use this "dynamic range" function.
Please try to take a photograph with a little underexposure, and make wealthy highlight expression with this function.
* In the case with FinePix S3/S5 Pro, it has low sensitive sensor additionally and can record about +2EV energy than white point.
Therefore if you use FinePix S3/S5 Pro to use "dynamic rage" function of SILKYPIX®, you need not take a photograph with a little underexposure, and you only have to set the camera "WIDE Mode".
SILKYPIX® provides you two type of sharpness function. One is one kind of development parameter "sharpness" and you can adjust sharpness to emphasis outline and increase false resolution for each scene.
The other is "unsharp mask" function for saving developed scenes or printing scenes, which is common parameter for all scenes same as jpeg quality or print resolution parameters.
"Sharpness" is for each scene, and you can adjust the balance of resolution and noise with 100% or more zoom in preview.
"Unsharp mask" function is for all scenes and additionally processed, which parameter will be decided for output purpose.
For example, when you develop the RAW data for 3 purpose, (1) one is to save jpeg file with original size, (2) next is scale down jpeg image for web site, (3) the other is printing.
(1) You should adjust only "sharpness" of development parameter.
(2) For scale down image, you should additionally use "unsharp mask" parameter to compensate sharpness, because resolution conversion processing for scale down image lost some sharpness.
(3) For printing, you should additionally use "unsharp mask" parameter, which will be determined by the paper and your printer.
We believe that the "unsharp mask" parameter will be determined by output purpose.
10.2 Photographic Techniques
10.2.1 Photography without Backlight Compensation
When taking a photograph against the sun or the light source without exposure compensation, you have to usually adjust by increasing a "exposure bias" since a subject is taken in underexposure.
Of course, it is better way that you adjust exposure compensation at the time of taking a photograph. However, it takes a time to adjust exposure compensation even if the shutter chance appears suddenly.
If you are taking a photograph in RAW format, give the first priority to the photo opportunity. Because this opportunity will never come again.
In a case of the photograph recorded in RAW format, the "exposure bias" can be post-processed after taking a photograph.
When using the camera which has a large-sized sensor with high S/N value and wide dynamic range, you can take a photograph without exposure compensation even if it is a backlight condition.
There is a way to take many photographs by giving the first priority to the photo opportunity. RAW makes such a new photography possible, which was not available in the past.
Since a DSLR camera has a large-sized sensor and wide dynamic range, would you try such photography without consideration of exposure compensation and enjoy post-adjusting "exposure bias" with SILKYPIX®?
10.2.2 Should RAW be Photographed in Underexposure?Of course, it is better way that you adjust exposure compensation at the time of taking a photograph. However, it takes a time to adjust exposure compensation even if the shutter chance appears suddenly.
If you are taking a photograph in RAW format, give the first priority to the photo opportunity. Because this opportunity will never come again.
In a case of the photograph recorded in RAW format, the "exposure bias" can be post-processed after taking a photograph.
When using the camera which has a large-sized sensor with high S/N value and wide dynamic range, you can take a photograph without exposure compensation even if it is a backlight condition.
There is a way to take many photographs by giving the first priority to the photo opportunity. RAW makes such a new photography possible, which was not available in the past.
Since a DSLR camera has a large-sized sensor and wide dynamic range, would you try such photography without consideration of exposure compensation and enjoy post-adjusting "exposure bias" with SILKYPIX®?
Some portion is true and some portion is false.
Even in the case of taking a photograph in RAW format, the most idealistic way is to take a picture at the maximum exposure level that image sensor linearity can be secured.
Because a noise increases and a picture becomes rough when a photograph is taken in underexposure.
However, there is a case that things do not go that way.
(1) High contrast scene in which a subject is irradiated strongly or a subject is metallic
As another reason, you can ease a decline of a color reproduction by taking in underexposure. Please refer to "10.3.2 Linearity and Saturation of Image Sensor".
* In the case with FinePix S3/S5 Pro, it has low sensitive sensor additionally, which has only one 16th sensitivity of high sensitive sensor.
Therefore you need not take a photograph with underexposure for the purpose of this section.
However, if the high sensitive sensor (=S sensor) is saturated completely, SILKYPIX® produces the image from only low sensitive sensor (R sensor) and it makes much noisy image.
10.2.3 Turning Exposure Compensation Dial into ISO Speed DialEven in the case of taking a photograph in RAW format, the most idealistic way is to take a picture at the maximum exposure level that image sensor linearity can be secured.
Because a noise increases and a picture becomes rough when a photograph is taken in underexposure.
However, there is a case that things do not go that way.
(1) High contrast scene in which a subject is irradiated strongly or a subject is metallic
Some portion will be overexposure even if the correct exposure setting.
In this case, detail of the highlighted portion is not lost by adjusting the exposure bias at the time of development if a photograph was taken in underexposure.
(2) When the correct exposure cannot be determined In this case, detail of the highlighted portion is not lost by adjusting the exposure bias at the time of development if a photograph was taken in underexposure.
You might miss a photo opportunity or spoil the atmosphere of surroundings because you have difficulty in determining the exposure at the time of taking a photograph.
If a photograph is taken in underexposure, an adjustment is available at the time of the development, however, if you lost a part of image you cannot adjust it.
For these reasons, it is said that "RAW should be photographed in underexposure".If a photograph is taken in underexposure, an adjustment is available at the time of the development, however, if you lost a part of image you cannot adjust it.
As another reason, you can ease a decline of a color reproduction by taking in underexposure. Please refer to "10.3.2 Linearity and Saturation of Image Sensor".
* In the case with FinePix S3/S5 Pro, it has low sensitive sensor additionally, which has only one 16th sensitivity of high sensitive sensor.
Therefore you need not take a photograph with underexposure for the purpose of this section.
However, if the high sensitive sensor (=S sensor) is saturated completely, SILKYPIX® produces the image from only low sensitive sensor (R sensor) and it makes much noisy image.
You have to take a picture with high-sensitivity in a case of a dark subject, and a case of a high-speed subject with a long lens.
It is difficult to take a picture with an insufficient shutter speed even though it is full aperture.
Perhaps, in a situation like that, you increase the ISO speed.
However, to change an ISO speed is a cumbersome task, isn't it?
Instead, to execute the exposure bias is an easy operation among many cameras.
Now, instead of increasing the ISO speed, adjust the exposure bias dial to the - side, to gain enough shutter speed and aperture.
This is the technique only for taking a photograph by RAW.
In the case of taking a photograph by RAW, a sensitization is available at development process, and its result is almost the same as the case of increasing ISO speed on a camera. In some scenes, a result would be much better than that.
Please refer to '10.1.3 Utilizing Difference between ISO Speed Adjustment of Camera and Exposure Bias of SILKYPIX®'.
From the time you set to record in a RAW file, the exposure bias dial changes to an ISO speed dial.
10.2.4 Appropriate Exposure for RAW PhotographyIt is difficult to take a picture with an insufficient shutter speed even though it is full aperture.
Perhaps, in a situation like that, you increase the ISO speed.
However, to change an ISO speed is a cumbersome task, isn't it?
Instead, to execute the exposure bias is an easy operation among many cameras.
Now, instead of increasing the ISO speed, adjust the exposure bias dial to the - side, to gain enough shutter speed and aperture.
This is the technique only for taking a photograph by RAW.
In the case of taking a photograph by RAW, a sensitization is available at development process, and its result is almost the same as the case of increasing ISO speed on a camera. In some scenes, a result would be much better than that.
Please refer to '10.1.3 Utilizing Difference between ISO Speed Adjustment of Camera and Exposure Bias of SILKYPIX®'.
From the time you set to record in a RAW file, the exposure bias dial changes to an ISO speed dial.
Here, define the term Appropriate Exposure as the optimal exposure which can represent a scene most beautifully.
Note that here, user preferences such as your liking for color deviation in dark region, or for colors just before the highlighted portion goes out and so forth, are excluded.
The appropriate exposure expose the brightest portion of a picture, where its details must not be lost, to the maximum value that linearity of image sensor can be secured.
In other words, the appropriate exposure gives the maximum light quantity that will not cause a lost of the portion on the RAW data.
This exposure allows you to use full of a dynamic range of an image sensor, you can obtain a clean picture with little noise.
Please refer to '10.3.2 Linearity and Saturation of Image Sensor' for more details.
When taking a picture with this exposure, its value is different from the appropriate exposure that an exposure meter indicates.
The exposure that an exposure meter indicates is determined by assuming an average reflectance of a subject. In a case of the RAW photography, adjustment is available at the development. Therefore, the maximum exposure value that the highlighted portion will not be gone is the best.
Although, it is very difficult to determine the exposure.
The best way is that you adjust the exposure until the maximum exposure value after taking a picture. When you do that, use the highlight warning preview mode of a camera to check the picture. Also, adjust the maximum exposure value to the point that highlighted portion will not be gone.
Since the highlight warning preview displays a case of recording it in a JPEG file, for some cases, it is good to give more exposure. It depends on the camera you are using.
Please refer to '10.3.2 Linearity and Saturation of Image Sensor' and '10.3.1 Desensitizing at Development' for more information about these advanced techniques.
10.3 Advanced Techniques
10.3.1 Desensitizing at Development
Regarding the highlighted portion that has gone on the RAW data, even if you execute the desensitizing at the development, the details are not displayed.
However, some cameras can record not only the region represented as white when the exposure bias amount is 0, but also brighter region in RAW data.
In order to check whether your camera can do it or not, do an experiment with this software as shown below.
First, take a picture as the highlighted portion of details that looks brighter continuously will be gone.
Then, adjust the "Exp. bias" slider to the - side. At this time, if you see the details appear on the region which has gone when the "Exp. bias" was set to 0, your camera can record the region which looks more brighter than white in RAW data.
If you execute this experiment carefully, you can find the breaking point from which details of the highlighted portion do not appear at above a certain exposure bias value. (*1)
For example, the detail appears at a value up to -1/2EV. However, it will not appear when the value is more than that.
At this time, this means that your camera has recorded the RAW data with an allowance of 1/2EV.
To put it the other way around, the upper 1/2EV level of sensor's dynamic range has not been used.
In some cameras, such function only works when ISO speed is increased.
Although the highlighted portion will not be gone up to 1/2EV, it is not good to take a picture by using the region fully.
Because linearity may have been lost already in the region.
In order to use the region fully, check a test shooting whether its color representation can be achieved to the level that you satisfy. There is no other way in this case.
If you know techniques up to this level, for example, in a certain subject, you might create a clean picture with little noise by setting the exposure bias amount as 1/2EV.
Please refer to '10.3.2 Linearity and Saturation of Image Sensor.'
*1 ... When you perform this examination, please set "luminance restoration" is 0, and also set "DR expansion" is 0 on "highlight controller".
* In the case with FinePix S3/S5 Pro, it has super CCD honeycomb SRII sensor that two kind of sensor is located like as checkered pattern.
The combination of high sensitive sensor and low sensitive sensor makes wide dynamic range in "WIDE mode", it records +2EV or lighter energy than white point.
Therefore you need not mind overexposure with this camera, and you can always adjust with "Exposure bias" even if you took a photograph with overexposure.
10.3.2 Linearity and Saturation of Image SensorHowever, some cameras can record not only the region represented as white when the exposure bias amount is 0, but also brighter region in RAW data.
In order to check whether your camera can do it or not, do an experiment with this software as shown below.
First, take a picture as the highlighted portion of details that looks brighter continuously will be gone.
Then, adjust the "Exp. bias" slider to the - side. At this time, if you see the details appear on the region which has gone when the "Exp. bias" was set to 0, your camera can record the region which looks more brighter than white in RAW data.
If you execute this experiment carefully, you can find the breaking point from which details of the highlighted portion do not appear at above a certain exposure bias value. (*1)
For example, the detail appears at a value up to -1/2EV. However, it will not appear when the value is more than that.
At this time, this means that your camera has recorded the RAW data with an allowance of 1/2EV.
To put it the other way around, the upper 1/2EV level of sensor's dynamic range has not been used.
In some cameras, such function only works when ISO speed is increased.
Although the highlighted portion will not be gone up to 1/2EV, it is not good to take a picture by using the region fully.
Because linearity may have been lost already in the region.
In order to use the region fully, check a test shooting whether its color representation can be achieved to the level that you satisfy. There is no other way in this case.
If you know techniques up to this level, for example, in a certain subject, you might create a clean picture with little noise by setting the exposure bias amount as 1/2EV.
Please refer to '10.3.2 Linearity and Saturation of Image Sensor.'
*1 ... When you perform this examination, please set "luminance restoration" is 0, and also set "DR expansion" is 0 on "highlight controller".
* In the case with FinePix S3/S5 Pro, it has super CCD honeycomb SRII sensor that two kind of sensor is located like as checkered pattern.
The combination of high sensitive sensor and low sensitive sensor makes wide dynamic range in "WIDE mode", it records +2EV or lighter energy than white point.
Therefore you need not mind overexposure with this camera, and you can always adjust with "Exposure bias" even if you took a photograph with overexposure.
An image sensor is made of CCD or CMOS and outputs a signal corresponding to a given light quantity.
However, at a certain level, even the light quantity is increased, the output level of the signal does not increase anymore. This is Saturation.
This causes overexposure even on the RAW data.
This does not mean that you can use the sensor fully up to right before the saturation occurs.
Degradation of color representation occurs when the given light quantity is out of the region where the output signal is proportional to the light quantity.
Normally a camera is designed to create a JPEG picture with this proportional region.
However, it is not a perfect proportion and it includes allowable range that shows the level that can be allowed at maximum.
If the allowable ranges differ between a camera manufacturer settings and your setting, use your own setting. The difference doesn't mean fault of your camera.
You just try to adjust the exposure bias toward underexposure until the exposure enters in your allowable range.
If this does not work well, that the camera is no good anymore. We recommend you to buy a new one. There is no other way.
If you are able to prevent degradation of color representation by taking a picture with underexposure setting, a noise may increase.
Since that is a capability of a camera sensor, you have to find a middle ground between the color representation and the noise.
In a contrary sense, in a case of some subject, you may set the exposure out of the allowable range of a manufacturer setting.
In this case, set overexposure within the range which is described in '10.3.1 Desensitizing at Development', to obtain a clean picture with little noise.
10.4 Knowledge
10.4.1 Color Temperature and Color Deflection
The term color temperature is frequently used to represent colors of a light source.
When heating a matter, it emits light.
When heating it gradually, first, it emits reddish light. Soon the light changes to orange, yellow, white, and then bluish white.
In this case, the colors of the light source can be represented as temperature.
For example, light emitted by the 1500degrees matter is described as color temperature 1500K (Kelvin), if the matter is 2000degrees, the color temperature is 2000K.
The matter, which emits light, is called blackbody radiator or Planck radiator.
Since surface temperature of the sun is about 6000degrees, the sun emits light of 6000K color temperature.
Before the sunlight reaches the earth's surface, blue light scatters and is absorbed while it passes through atmosphere. The sunlight temperature is around 5000 - 5500K.
In a case of an electric light bulb, temperature of the filament is between 2000 - 3000degrees and the color temperature is between 2000 - 3000K.
There are other light sources such as fluorescent tube, mercury-vapor tube and so forth, whose emission principle is completely different.
For these light sources, color temperature of the black-body radiator which is most visually alike is used.
To be more precise, by plotting light-source color on the coordinate system of CIE 1960 UCS, then from there dropping a perpendicular line to the black-body radiation locus, we take the portion as the color temperature.
It is considered that all colors on this perpendicular line are assumed as the same color temperature, and this line is called Isotemperature Line.
The length of the perpendicular line indicates blackbody radiation deflection and is called color deflection in this software.
Introduce the color deflection to adjust white balance on the subject that cannot be balanced with color temperature alone.
10.4.2 Exif InformationWhen heating a matter, it emits light.
When heating it gradually, first, it emits reddish light. Soon the light changes to orange, yellow, white, and then bluish white.
In this case, the colors of the light source can be represented as temperature.
For example, light emitted by the 1500degrees matter is described as color temperature 1500K (Kelvin), if the matter is 2000degrees, the color temperature is 2000K.
The matter, which emits light, is called blackbody radiator or Planck radiator.
Since surface temperature of the sun is about 6000degrees, the sun emits light of 6000K color temperature.
Before the sunlight reaches the earth's surface, blue light scatters and is absorbed while it passes through atmosphere. The sunlight temperature is around 5000 - 5500K.
In a case of an electric light bulb, temperature of the filament is between 2000 - 3000degrees and the color temperature is between 2000 - 3000K.
There are other light sources such as fluorescent tube, mercury-vapor tube and so forth, whose emission principle is completely different.
For these light sources, color temperature of the black-body radiator which is most visually alike is used.
To be more precise, by plotting light-source color on the coordinate system of CIE 1960 UCS, then from there dropping a perpendicular line to the black-body radiation locus, we take the portion as the color temperature.
It is considered that all colors on this perpendicular line are assumed as the same color temperature, and this line is called Isotemperature Line.
The length of the perpendicular line indicates blackbody radiation deflection and is called color deflection in this software.
Introduce the color deflection to adjust white balance on the subject that cannot be balanced with color temperature alone.
Exif information is the information of settings at shooting and characteristics of the picture. It is the standards that is widely adopted in cameras and utilities made in Japan.
An outputted file can include the photography information such as shutter speed, aperture, shooting date, Exif thumbnail picture, colorspace information, and so forth by recording the Exif information can be recorded in the outputted file.
Since this software conforms to Exif 2.21, it outputs the color information that is in conformity with Exif.
This information is effective when the output file is processed with software that is in conformity with the Exif information.
In addition to sRGB colorspace information, Adobe RGB color information can also be recorded from the Exif 2.21. However, because there is only few software that can support the information, we recommend you to use 'Embedding ICC Profile' when you record colorspace information.
10.4.3 Files Created AutomaticallyAn outputted file can include the photography information such as shutter speed, aperture, shooting date, Exif thumbnail picture, colorspace information, and so forth by recording the Exif information can be recorded in the outputted file.
Since this software conforms to Exif 2.21, it outputs the color information that is in conformity with Exif.
This information is effective when the output file is processed with software that is in conformity with the Exif information.
In addition to sRGB colorspace information, Adobe RGB color information can also be recorded from the Exif 2.21. However, because there is only few software that can support the information, we recommend you to use 'Embedding ICC Profile' when you record colorspace information.
10.4.3.1 Development Parameter File and Collateral Information File
10.4.4 TroubleshootingA file with an extension .spd is created into "SILKYPIX_DS" sub-folder in the same folder in which a RAW file exists in order to save development parameters, reservation status, rotation information, user mark etc. The file has the same base name as the case of the RAW file.
This file is called development parameter file.
You can disenable to create these files. Please refer to '9.3 Function Setting' for the setting.
In this case, development parameter information, reservation status, rotation information etc. are lost, when the software completes, or a new file/folder is loaded.
In addition, since a file cannot be created in write-protected folder and file, just as same as described above, development parameter information, reservation status, rotation information etc. are lost, when the software completes, or a new file/folder is loaded.
10.4.3.2 Thumbnail FileThis file is called development parameter file.
You can disenable to create these files. Please refer to '9.3 Function Setting' for the setting.
In this case, development parameter information, reservation status, rotation information etc. are lost, when the software completes, or a new file/folder is loaded.
In addition, since a file cannot be created in write-protected folder and file, just as same as described above, development parameter information, reservation status, rotation information etc. are lost, when the software completes, or a new file/folder is loaded.
A file with an extension .spi is created into "SILKYPIX_DS" sub-folder in the same folder in which the RAW file exists in order to speed-up a thumbnail picture resulted from the executing a simple development of RAW data. The file has the same base name as the case of the RAW file.
In the case of prohibiting creation of a development parameter file at the "Function setting", a thumbnail will not be created.
10.4.3.3 Virtual Storage FileIn the case of prohibiting creation of a development parameter file at the "Function setting", a thumbnail will not be created.
Temporary files such as DefaultTCCBSectionNNNN.lck and DefaultTCCBSectionNNNN.vm0 are created in a temporary folder of an OS
(NNNN stands for 0000 to 9999).
These files are the virtual storage files that this software manages. They are created when this software starts up, and deleted when this software completes.
You can specify the location where the virtual storage files are created. Please refer to '9.3.3.2 Specify Temporary Folder.'
10.4.3.4 Initialization File(NNNN stands for 0000 to 9999).
These files are the virtual storage files that this software manages. They are created when this software starts up, and deleted when this software completes.
You can specify the location where the virtual storage files are created. Please refer to '9.3.3.2 Specify Temporary Folder.'
SPD15.ini is created in the user setting folder, which an OS provides in order to memorize the environment setting etc.
In the cases of Windows 2000/Windows XP/Windows Vista, a separate setting is managed according to a user.
In the cases of Windows 2000/Windows XP/Windows Vista, a separate setting is managed according to a user.
There is a case that you need to execute initialize thumbnail files and a user configuration file by following the direction given from our support when trouble occurs in your system environment.
The menu [Help(H)]-[Troubleshooting] is used only when our company tells you to execute this function. Normally you may not use it.
Note that when you use it by your own judgment, at the worst there is a possibility that a program does not run normally.
10.4.4.1 Initializing Thumbnail
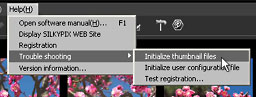 In the thumbnail mode, first, the thumbnail that is contained in the RAW data is displayed. Then a thumbnail is created on the basis of the set parameters. A file with an extension .spd, is created in the same folder in which the RAW file exists with the same base name as the case of the RAW file.
This function deletes this thumbnail.
10.4.4.2 Initializing User Setting File
10.4.5 DNG (Digital Negative) FormatThe menu [Help(H)]-[Troubleshooting] is used only when our company tells you to execute this function. Normally you may not use it.
Note that when you use it by your own judgment, at the worst there is a possibility that a program does not run normally.
10.4.4.1 Initializing Thumbnail
This function deletes this thumbnail.
When this function is executed, the settings (function setting, display setting, setting for developed image, setting for troubleshooting) and the user settings (file history, folder history, window position and so forth) are initialized.
After the function completes, the program also completes. You need to reboot it. When it is rebooted, all settings have been initialized.
10.4.4.3 Testing Registration of Product KeyAfter the function completes, the program also completes. You need to reboot it. When it is rebooted, all settings have been initialized.
This function allows you to check whether you can register product key online or not.
Click "TEST" button to start checking. If the message "You can register the product key in this environment." is displayed, you can register your product key online in your PC environment.
Click "TEST" button to start checking. If the message "You can register the product key in this environment." is displayed, you can register your product key online in your PC environment.
In this software, you can develop the DNG (Digital Negative) formatted file (from this onward, it is indicated as DNG).
DNG is the unified standards for RAW data, which is proposed by Adobe Systems Incorporated. By the use of the conversion utility produced by Adobe Systems Incorporated, RAW files of various cameras can be converted to DNG files.
By the use of this utility, you can handle the RAW data that are varied according to a camera as common formatted data.
Please refer to the web sites of Adobe Systems Incorporated for details.
10.4.5.1 DNG Overview
10.4.6 PriorityDNG is the unified standards for RAW data, which is proposed by Adobe Systems Incorporated. By the use of the conversion utility produced by Adobe Systems Incorporated, RAW files of various cameras can be converted to DNG files.
By the use of this utility, you can handle the RAW data that are varied according to a camera as common formatted data.
Please refer to the web sites of Adobe Systems Incorporated for details.
10.4.5.1 DNG Overview
Refer to the DNG Standards, which are on public view by Adobe Systems Incorporated for details. In this section, we explain about DNG in order to help users understand operation of this software.
The DNG consists of the RAW image data taken from an image sensor, the parameters that indicate characteristics of the image data, color representation information, photography information (information when a picture is taken), thumbnail information and so forth.
In addition, it can contain the Linear RAW image data that have information of 3 colors per pixel instead of RAW image data.
In this software, regarding the RAW image data, it is called RAW format. Regarding the Linear RAW image data, it is called Linear RAW format.
When you use the DNG converter, you can select either the RAW format or the Linear RAW format in the optional setting at the time of conversion.
Since the RAW format keeps the color array that an image sensor has, the demosaic process (process to create a color structure) can be done in this software. This contributes to the maximum usage of this software.
Since the Linear RAW format contains data after the demosaic process is done, even in a case of camera with the image sensor's color array which this software cannot handle, it is possible to developed the data by the use of this format.
When the specified white balance is recorded, this information can be recognized as the photography information, and you can use a camera-set value (being set when a picture was taken) as white balance.
Color representation is executed with the color representation information.
10.4.5.2 DNG Files Available with this SoftwareThe DNG consists of the RAW image data taken from an image sensor, the parameters that indicate characteristics of the image data, color representation information, photography information (information when a picture is taken), thumbnail information and so forth.
In addition, it can contain the Linear RAW image data that have information of 3 colors per pixel instead of RAW image data.
In this software, regarding the RAW image data, it is called RAW format. Regarding the Linear RAW image data, it is called Linear RAW format.
When you use the DNG converter, you can select either the RAW format or the Linear RAW format in the optional setting at the time of conversion.
Since the RAW format keeps the color array that an image sensor has, the demosaic process (process to create a color structure) can be done in this software. This contributes to the maximum usage of this software.
Since the Linear RAW format contains data after the demosaic process is done, even in a case of camera with the image sensor's color array which this software cannot handle, it is possible to developed the data by the use of this format.
When the specified white balance is recorded, this information can be recognized as the photography information, and you can use a camera-set value (being set when a picture was taken) as white balance.
Color representation is executed with the color representation information.
In the DNG Standards, it is possible to contain RAW data with an array of various image sensors. However, there is a limit for this software when it handles DNG files.
In this section, we explain about the DNG files, which this software can develop.
1. DNG files with RAW format and Linear Raw format taken with the camera, which is compatible with this software.
In this section, we explain about the DNG files, which this software can develop.
1. DNG files with RAW format and Linear Raw format taken with the camera, which is compatible with this software.
In the case of the DNG files that are converted form the RAW files taken with the camera that is compatible with this software, it is possible to develop them regardless of a format type, not exclusively to the RAW format and the Linear Raw format
In addition to the color representation with this software, it is possible to execute the color representation on the basis of the color representation information contained in the DNG files.
Regarding the color representation on the basis of the color representation information contained in the DNG files, you can select it "DNG standard color", "DNG memory color 1" and "DNG portrait color 1" in the color mode.
In the case of Linear RAW format, the parameters ("Noise reduction" in the "Exposure" sub-control and "Demosaic sharp" in the "Development" sub-control) that affect the demosaic process cannot be used.
2. DNG files with RAW format taken with the camera, which is not compatible with this software.In addition to the color representation with this software, it is possible to execute the color representation on the basis of the color representation information contained in the DNG files.
Regarding the color representation on the basis of the color representation information contained in the DNG files, you can select it "DNG standard color", "DNG memory color 1" and "DNG portrait color 1" in the color mode.
In the case of Linear RAW format, the parameters ("Noise reduction" in the "Exposure" sub-control and "Demosaic sharp" in the "Development" sub-control) that affect the demosaic process cannot be used.
In a case of DNG files taken with 3 color filters having Bayer pattern such as tetragonal array or rectangular array, it is possible to develop with this software.
The color representation is executed based on the color representation information contained in the DNG files.
This software (this version) does not support the RAW format with the array which is not explained the above. So you should convert them to the Linear RAW format.
3. DNG files with Linear RAW format taken with camera, which is not compatible with this software.The color representation is executed based on the color representation information contained in the DNG files.
This software (this version) does not support the RAW format with the array which is not explained the above. So you should convert them to the Linear RAW format.
In a case of DNG files taken with 3 color filters, it is possible to develop with this software (There is a case that DNG files taken with the CCD camera of complementary colors system which has 4 or more color filters cannot be handled).
However, since the demosaic process has already been executed, the parameters ("Noise reduction" in the "Exposure" sub-control and "Demosaic sharp" in the "Development" sub-control) that affect the demosaic process cannot be used.
The color representation is executed on the basis of the color representation information contained in the DNG files.
When you develop the RAW data taken with the camera which has a special array such as a honeycomb array with this software, you should convert them to the DNG files with the Linear RAW format.
4. Compressed formatHowever, since the demosaic process has already been executed, the parameters ("Noise reduction" in the "Exposure" sub-control and "Demosaic sharp" in the "Development" sub-control) that affect the demosaic process cannot be used.
The color representation is executed on the basis of the color representation information contained in the DNG files.
When you develop the RAW data taken with the camera which has a special array such as a honeycomb array with this software, you should convert them to the DNG files with the Linear RAW format.
DNG Files with compressed format and non-compressed format can be handled.
Here priority means the order of the program to use the CPU that is assigned to it.
When multiple programs are running simultaneously, a CPU is assigned to the higher priority program, and it is assigned to the lower priority program when a CPU is not busy.
In SILKYPIX(R) Developer Studio, if you check "To develop with low priority" checkbox, you can lower the priority that a CPU is assigned to when executing the batch development.
This gives the priority that a CPU is assigned to given to the other program that is running simultaneously. So you can use other program comfortably.
For example, while executing the batch development, when you start up a web browser and visit web sites or start up word processing software and make out a document, if you lower the development process, you can visit Web sites or make out a document comfortably.
So then you might have a question, "Will a speed of the batch development processing get slower?" Well, it is true. Since the priority that a CPU is assigned to is given to the other program, the speed of development processing gets slower.
However, if only a web browser and word processing software are running simultaneously, the speed will get slower but only a little bit. Because most of the interactive programs are not using a CPU until an input is made by a user and just waiting for an input made by a user.
So until a user makes an input, a CPU is not busy. Therefore a CPU is used mainly for executing the batch development.
However, a user inputs something (typing on the keyboard or moving a mouse), the interactive program corresponds instantly.
For this reason, while the development processing can run fairly good, other program can also run at the front.
By the use of this function in a positive way, why not visit the Web site of SILKYPIX® (http://www.silkypix.com) while the development processing is executed?
When you check "To develop with low priority" checkbox, if the development processing takes an extremely long time or other program does not run smoothly, it is thinkable that amount of memory installed in your PC is not sufficient.
Even the priority gets lower, a lot of memory is necessary. Because of insufficient memory amount, when you run other program simultaneously, both of them run slowly.
In this case, it is wise to add more memory or wait without using "Developing with Low Priority" until the development processing completes while executing the batch development.
10.4.7 Thermal RunawayWhen multiple programs are running simultaneously, a CPU is assigned to the higher priority program, and it is assigned to the lower priority program when a CPU is not busy.
In SILKYPIX(R) Developer Studio, if you check "To develop with low priority" checkbox, you can lower the priority that a CPU is assigned to when executing the batch development.
This gives the priority that a CPU is assigned to given to the other program that is running simultaneously. So you can use other program comfortably.
For example, while executing the batch development, when you start up a web browser and visit web sites or start up word processing software and make out a document, if you lower the development process, you can visit Web sites or make out a document comfortably.
So then you might have a question, "Will a speed of the batch development processing get slower?" Well, it is true. Since the priority that a CPU is assigned to is given to the other program, the speed of development processing gets slower.
However, if only a web browser and word processing software are running simultaneously, the speed will get slower but only a little bit. Because most of the interactive programs are not using a CPU until an input is made by a user and just waiting for an input made by a user.
So until a user makes an input, a CPU is not busy. Therefore a CPU is used mainly for executing the batch development.
However, a user inputs something (typing on the keyboard or moving a mouse), the interactive program corresponds instantly.
For this reason, while the development processing can run fairly good, other program can also run at the front.
By the use of this function in a positive way, why not visit the Web site of SILKYPIX® (http://www.silkypix.com) while the development processing is executed?
When you check "To develop with low priority" checkbox, if the development processing takes an extremely long time or other program does not run smoothly, it is thinkable that amount of memory installed in your PC is not sufficient.
Even the priority gets lower, a lot of memory is necessary. Because of insufficient memory amount, when you run other program simultaneously, both of them run slowly.
In this case, it is wise to add more memory or wait without using "Developing with Low Priority" until the development processing completes while executing the batch development.
"Thermal Runaway" means that a CPU cannot handle a micro-processing task correctly because of heat. Just as its literal sense, a CPU runs recklessly.
In some cases, Blue-Back (an error message is displayed on a blue screen) occurs or a PC itself resets for protection from heat or power turns off.
If such symptoms occur, you have to suspect this thermal runaway.
If such symptoms occur while executing this software, we recommend you to refer to '9.4.1.3 To Develop Slowly' and check whether the cause is thermal runaway or not. Then take measures to cope with this trouble.