SILKYPIX Developer Studio 8 SE Startup Guide
About SILKYPIX Developer Studio 8 SE
1-1. What you can do with SILKYPIX Developer Studio 8 SE
SILKYPIX Developer Studio 8 SE is RAW mage development software specially designed to be used with Panasonic products.
Overview
The SILKYPIX Developer Studio 8 SE allows you to convert RAW images (.RAW,RW2) captured with a Panasonic digital camera into JPEG and TIFF images.
When converting images, you can make basic adjustments such as lightness and hue, detailed adjustments such as noise reduction and sharpening, and other adjustments such as tilt. Compared to retouching JPEG images, making adjustments to RAW images helps minimize deterioration of image quality, which means anybody can easily edit images and produce high-quality results.
Developing RAW images
1. Take pictures in RAW mode
 Set the camera to RAW mode and take pictures
2. Import images
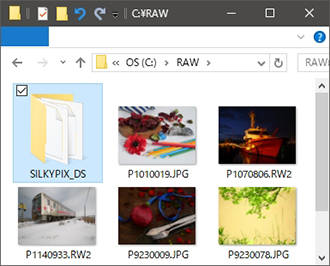
Transfer the RAW images from the memory card to your computer. Mount the memory card on your computer, and copy the image files using the Explorer/Finder. Depending on the environment or camera you use, the import function of the operating system may also be used.
 RAW image (.RAW,RW2 file)
3. Open a folder
The SILKYPIX Developer Studio 8 SE opens RAW images in folder units. Select the folder containing the RAW images from the folder tree.
4. Adjust images
Make adjustments to the photographs.
Basic adjustment items in RAW image development
| Exposure | Adjustment of lightness |
|---|---|
| White balance | Adjustment of hue |
| Tone | Adjustment of contrast and density |
| Color | Adjustment of Photo Style and saturation |
| Sharpening | Adjustment of the sharpness of outline |
| Noise reduction | Adjustment of the amount of noise |
Other major functions
Rotation/crop/lens aberration controller/spot removal/HDR/DR
5. Develop RAW images

RAW image

Development (conversion)

JPEG/TIFF
The term "development" refers to the process of converting an adjusted RAW image into a general-purpose JPEG or TIFF image.
1-2. Start SILKYPIX Developer Studio 8 SE
Starting the software and initial setup
Start SILKYPIX Developer Studio 8 SE
Once the SILKYPIX Developer Studio 8 SE has been installed, the SILKYPIX Developer Studio 8 SE shortcut icon will be created on your desktop.
Double-click the shortcut icon to run the software.
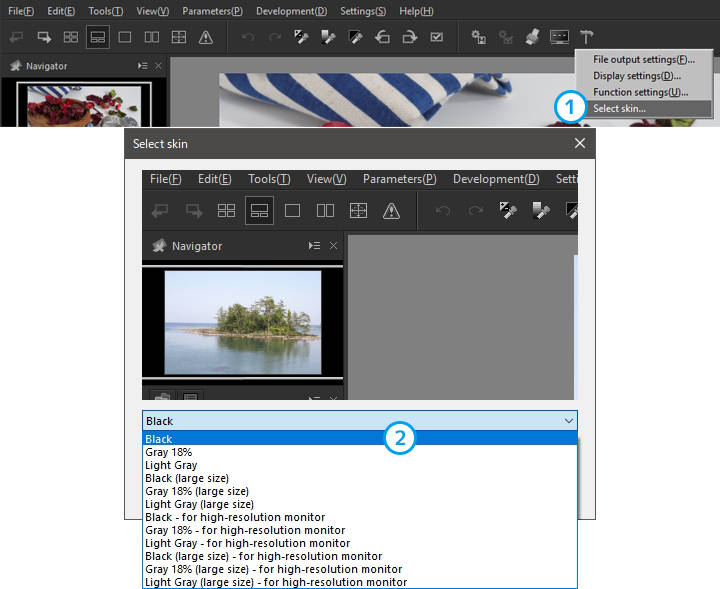
Initial setup (changing text and icon sizes)
After starting the SILKYPIX Developer Studio 8 SE if the text and icons are too small and hard to read, select 1. [Select skin] in [Environment settings] in the toolbar. Then, select 2. [Large size skin] in the [Select skin] window that is displayed, and close the SILKYPIX Developer Studio 8 SE The skin will be changed when the software is restarted.
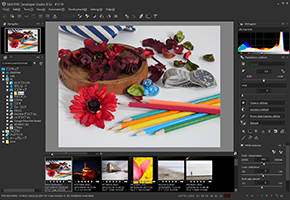
1-3. Screen composition
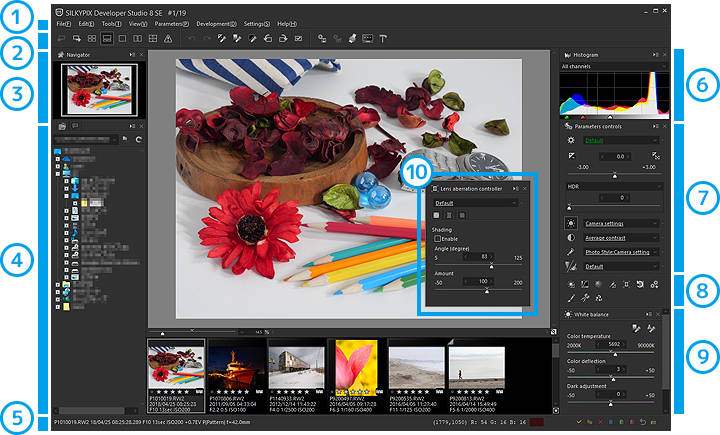
Names and basic functions of screen components
| Name | Overview | |
|---|---|---|
| 1 | Menu bar | Execute functions from the menus. |
| 2 | Toolbar | Switch between screen display modes and develop/print images by clicking icons. |
| 3 | Navigator | The area shown in the preview mode is indicated. Shift the preview screen by moving the frame. |
| 4 | Folder | Folders are displayed in a hierarchical structure. Select the folder that contains the desired RAW image. |
| Image properties |
Information about the image such as EXIF and IPTC is displayed.
 Use tabs to switch between the views
|
|
| 5 | Status bar | Simple shooting information is displayed. |
| 6 | Histogram | The lightness distribution of the selected image is displayed in a graph. |
| 7 | Parameters controls | These controls are mainly used to select a preset "taste" to adjust an image. |
| 8 | Sub-controls icon | Supplementary functions for particular uses are displayed in a floating window. The floating window can be placed anywhere on the screen, and it can be hidden once editing is finished. |
| 9 | Tab pages | Details of the parameters selected in 7. are displayed. |
| 10 | Floating window | The 8. sub-controls are displayed in a separate window. This window can be hidden by pressing the [x] button when not in use. |
1-4. Icons and functional overview
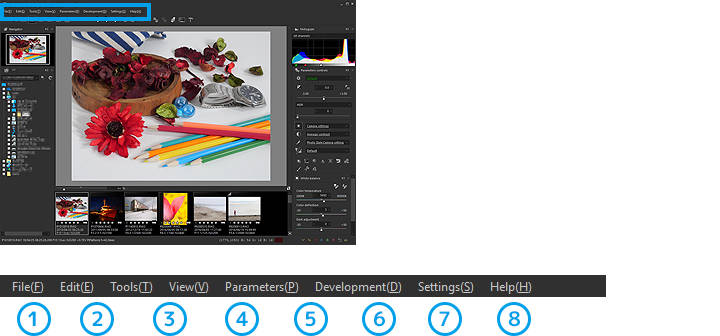
Menu bar
Select a function to execute in each menu.
| Name | Overview | |
|---|---|---|
| 1 | File | Copy, rename, and print files from this menu. |
| 2 | Edit | Undo/redo actions from this menu. |
| 3 | Tools | Zoom in/zoom out of the preview screen and call up various tools from this menu. |
| 4 | View | Switch between screen display modes and show/hide parameters from this menu. |
| 5 | Parameters | Copy, paste, and initialize development parameters from this menu. |
| 6 | Development | Convert RAW images into general-purpose JPEG or TIFF images from this menu. |
| 7 | Settings | Make various software settings from this menu. |
| 8 | Help | Access the software manual and version information from this menu. |
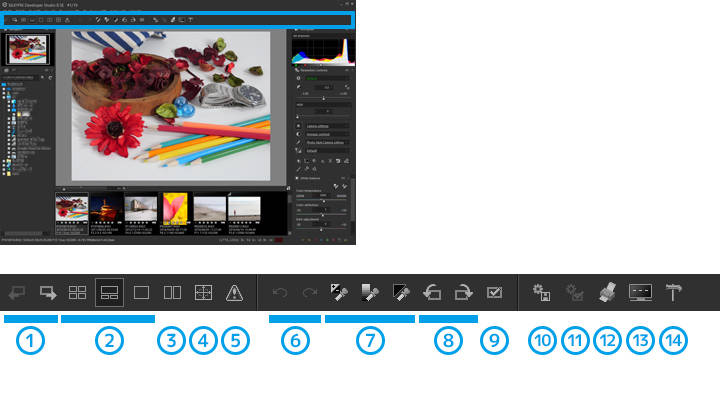
Toolbar
Switch between screen display modes, develop/print images, and execute other functions by clicking icons.
| Name | Overview | |
|---|---|---|
| 1 | Move selected images | Moves to an adjacent image (forward/backward). |
| 2 | Screen display | Switches between screen display modes. (Thumbnail/Combination/Preview) |
| 3 | Enable/Disable multi preview | Displays images in two screens. |
| 4 | Change display magnification of preview screen | Zooms in/out of the preview screen, sets to fitted display, and moves images. |
| 5 | Display warning/Enable/Disable soft proofing | Emphasizes highlights/shadows/out of color gamut on the preview screen. |
| 6 | Undo/Redo | Undoes/redoes edit operations. |
| 7 | Eyedropper tool | Enables adjustments to the exposure bias/white balance/black level of a specified area. |
| 8 | Rotate image 90. degrees | Rotates the image 90. degrees. |
| 9 | Develop mark | Marks an image to be developed. |
| 10 | Develop | Develops a selected image (converts a RAW image to JPEG/TIFF). |
| 11 | Batch develop marked images | Develops all marked images together. |
| 12 | Prints selected images. | |
| 13 | Batch development status | Displays the progress of development in a list. |
| 14 | Environment settings | Displays a menu of display, function, and other settings. |
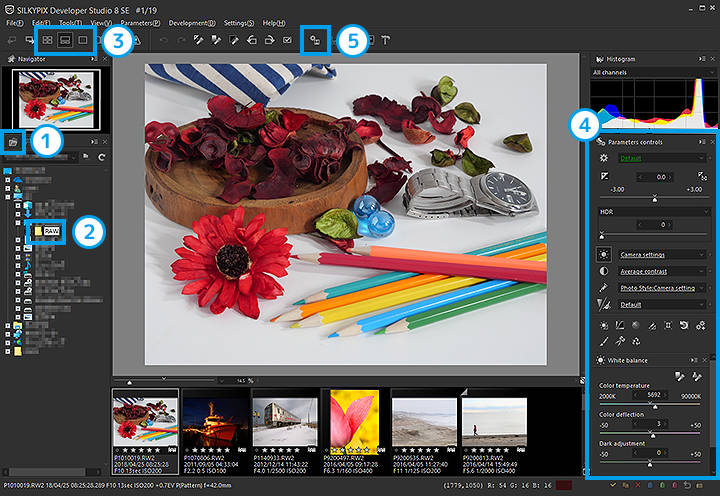
1-5. Basic steps
| 1 |
Display Folder

|
Display the Folder view. |
| 2 |
Select a folder

|
In the Folder view, select a folder that contains RAW images. All RAW images contained in the folder will open. |
| 3 | Switch between screen modes | Select an image in the thumbnail mode to make adjustments in the preview mode. |
Thumbnail mode

|
Displays a thumbnail list of RAW images contained in the folder. | |
Combination mode

|
Displays a combination of thumbnail versions and a magnified version of the RAW images contained in the folder. | |
Preview mode

|
Displays the magnified version of a selected image. | |
| 4 | Adjust images | Adjust images using parameters controls. |
| 5 |
Develop RAW images

|
Convert RAW images into general-purpose JPEG or TIFF images. |
1-6. Non-destructive image processing/autosave
"Non-destructive image processing" to enable restoring images to the original state anytime and autosaving of parameters
Non-destructive image processing
The SILKYPIX Developer Studio 8 SE features "non-destructive image processing" in which RAW images and parameters (adjustment values) are saved as separate files. This keeps the original RAW images from being altered, which means that images can be restored to their original states even after editing has been done, and that editing can be redone repeatedly.
Autosave
The SILKYPIX Developer Studio 8 SE autosaves parameters (adjustment values) every time adjustment is made. For this reason, there is no need to save the RAW image every time parameters are adjusted. A folder named "SILKYPIX_DS" is automatically created inside the folder containing the RAW image, and inside this newly created folder a .spd parameter file with the same name as the RAW image is saved.
SILKYPIX_DS folder

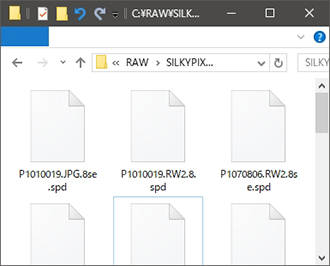
.spd file (parameter file)
Copyright (C) TECHNO HORIZON CO., LTD. 2004-2026. All Rights Reserved.