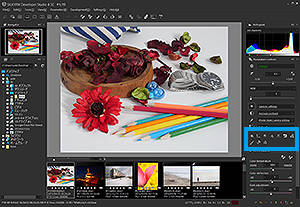
SILKYPIX Developer Studio 8 SE Startup Guide
5. Adjust Images (Sub-controls)
5-1. Sub-controls
Sub-control icons
Various functions are available to make adjustments according to use. Clicking the icons will open the parameters in a floating window.
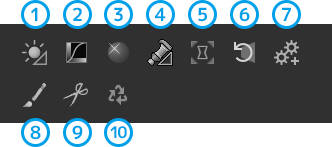
| Name | Overview | |
|---|---|---|
| 1 | Show/Hide "White balance adjustment" | This function allows you to adjust white balance using a color circle. |
| 2 | Show/Hide "Tone curve" | This function allows you to adjust contrast using a curve graph. |
| 3 | Show/Hide "Highlight controller" | This function restores or adjusts the colors of blown-out areas. |
| 4 | Show/Hide "Fine color controller" | This function allows you to adjust the hue/saturation/lightness of each color arranged on a color circle. |
| 5 | Show/Hide "Lens aberration controller" | This function corrects lens distortion/limb darkening/color misalignment. |
| 6 | Show/Hide "Rotation/Shift lens effect" | This function corrects the tilt of an image and adjusts the perspective due to effect of a wide-angle lens. |
| 7 | Show/Hide "Development settings" | This function allows you to make development settings including color spaces such as Adobe RGB and sRGB. |
| 8 | Enable/Disable "spotting tools" | This function allows you to remove spots and undesired objects appearing in an image. |
| 9 | Enable/Disable "crop tool" | This function allows you to crop a part of an image or change the aspect ratio. |
| 10 | Editing history | Editing history is recorded. You can also return to any point of editing. |
5-2. Adjust images (sub-controls)
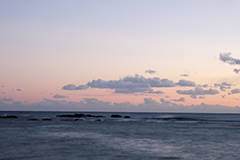
White balance adjustment
Adjust white balance by shifting it to the color specified on a color circle.
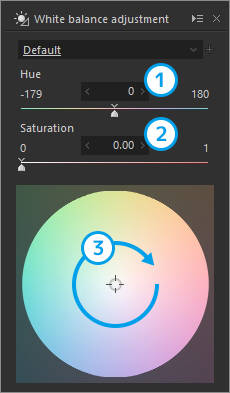
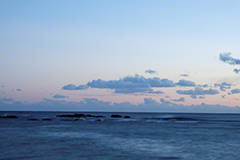
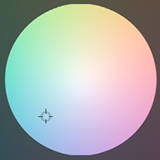
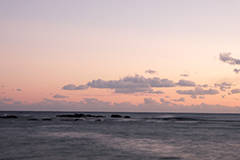
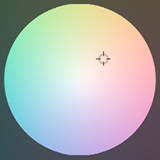
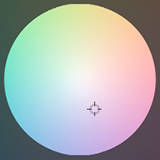
| 1 | Hue | Adjusts the hue. |
| 2 | Saturation | Adjusts the saturation of colors. |
| 3 | White balance target | A desired hue/saturation can be set using the mouse. |
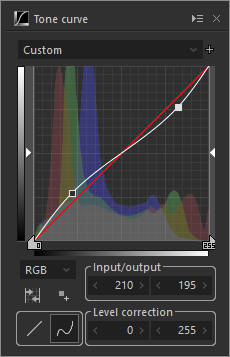
Tone curve
Adjust contrast by drawing a curve on the graph.
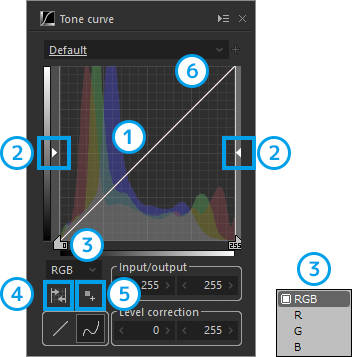
| 1 | Tone curve | A 6. "point" can be added by clicking the mouse. |
| 2 | Level correction | Highlight/shadow levels can be adjusted by moving sideways. |
| 3 | Channel | RGB/R/G/B channels can be selected. |
| 4 | Automatic level correction | This function evaluates the image and automatically performs level correction. |
| 5 | Add point | A 6. "point" can be added by specifying an area on the preview screen. |
| 6 | Point | The tone can be changed by moving the point with the mouse. The point can be removed with a right-click on the mouse. |
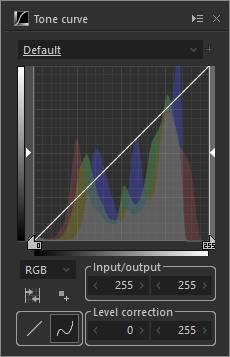
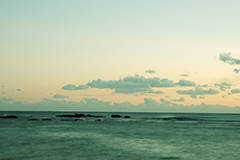
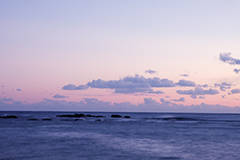
1. RGB tone curve
Adjust contrast by drawing a curve on the graph.
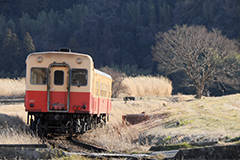
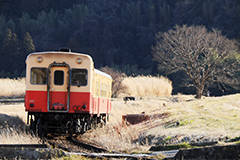
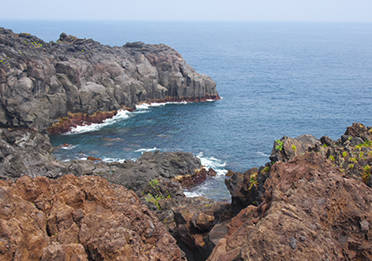
Low contrast
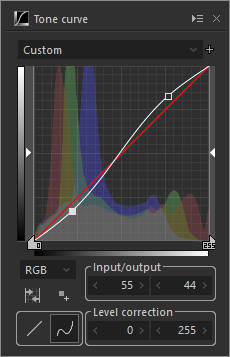
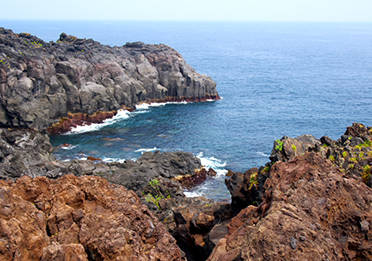
High contrast
2. Level correction
Adjust highlight/shadow levels.
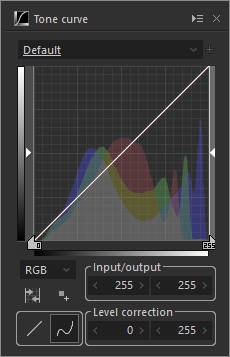
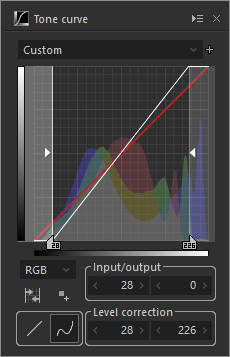
Level correction
3. RGB channel
Adjust the tone of RGB channels.

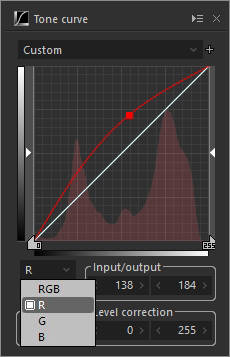
R channel
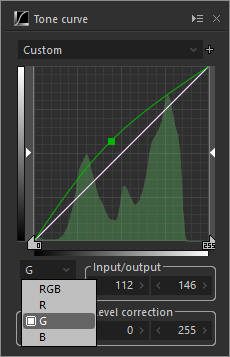
G channel
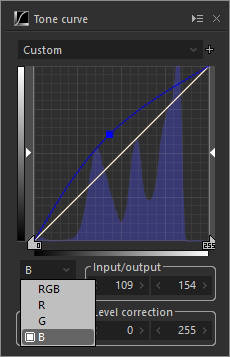
B channel
4. Add point
Add a point along the tone curve by specifying an area on the preview screen.
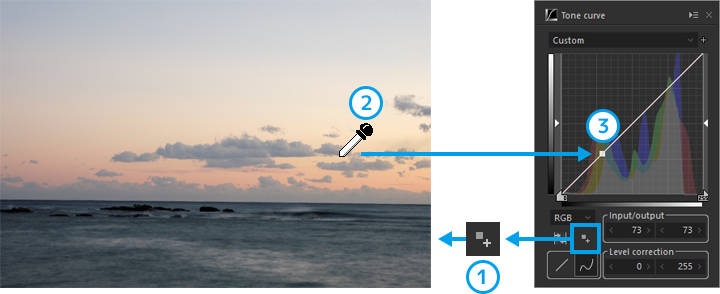
If you click the 1. [Add point] button and move the mouse cursor over the preview screen, the cursor will turn into an eyedropper. Then, if you 2. "left-click on the mouse over the area you wish to adjust," 3. "a point will be added along the tone curve."
Highlight controller
Adjust blown-out highlights.
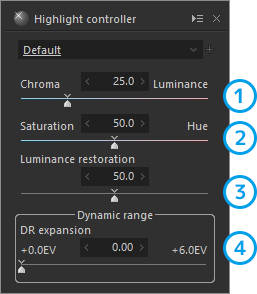
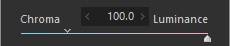
| 1 | Chroma/Luminance | Adjusts whether to reproduce the colors or lightness of saturated areas. |
| 2 | Saturation/Hue | Adjusts whether to emphasize saturation or hue when chroma is emphasized. |
| 3 | Luminance restoration | Reproduces blown-out highlights in grayscale. |
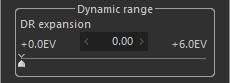
| 4 | Dynamic range | Restores the colors and gradation of blown-out areas. |
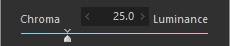
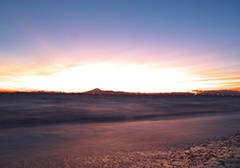
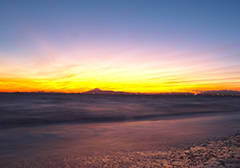
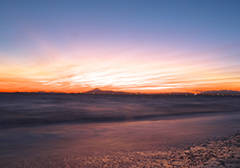
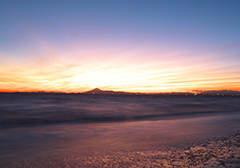
1. Chroma/Luminance
The correct colors cannot be reproduced when any of the RGB information is saturated. Use [Chroma]/[Luminance] to adjust whether to reproduce the colors or lightness of saturated areas.

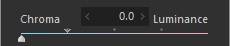
Chroma

Luminance
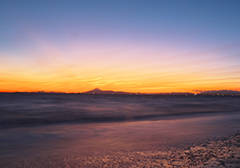
2. Saturation/Hue
Use [Saturation]/[Hue] to adjust whether to emphasize saturation or hue when reproducing saturated areas.

Saturation


Hue
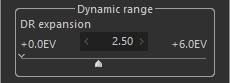
3. DR expansion
Restores the colors and gradation of blown-out areas.
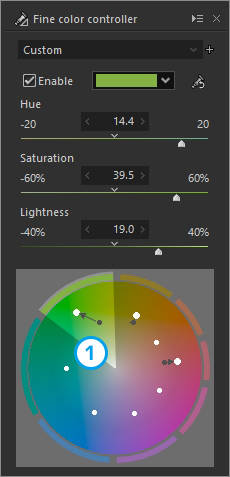
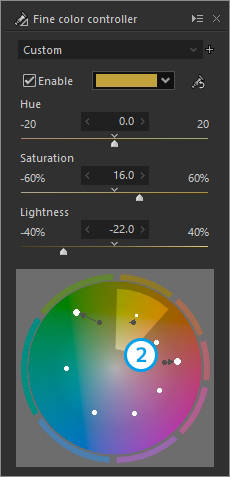
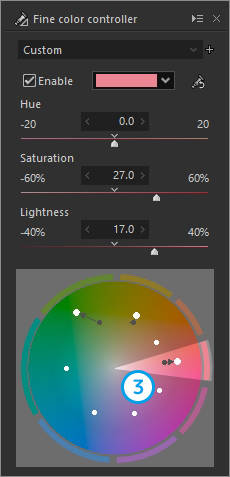
Fine color controller
[Hue]/[Saturation]/[Lightness] can be adjusted for each color specified on a color circle.
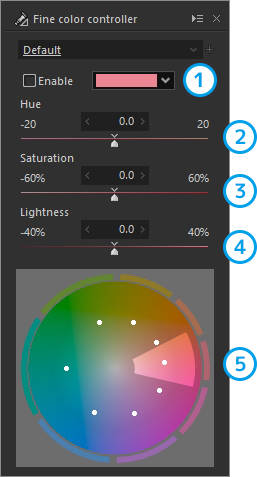
| 1 | Hue adjustment | The color to be adjusted is selected here. |
| 2 | Hue | Adjusts the hue of the color selected in 1. "Hue adjustment." |
| 3 | Saturation | Adjusts the saturation of the color selected in 1. "Hue adjustment." |
| 4 | Lightness | Adjusts the lightness of the color selected in 1. "Hue adjustment." |
| 5 | Color circle | Adjustment is made by moving the control points on the color circle. |
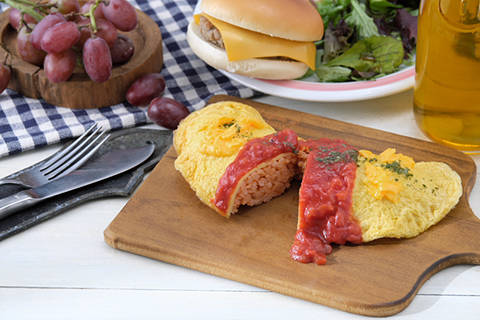
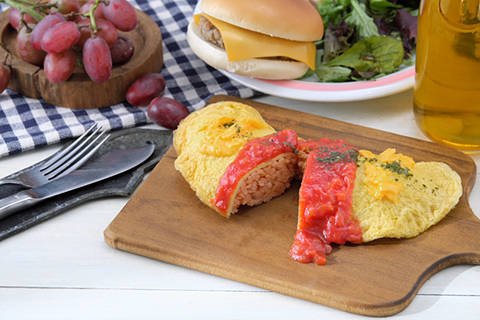
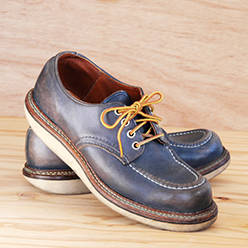
Adjustment example
Image before adjustment
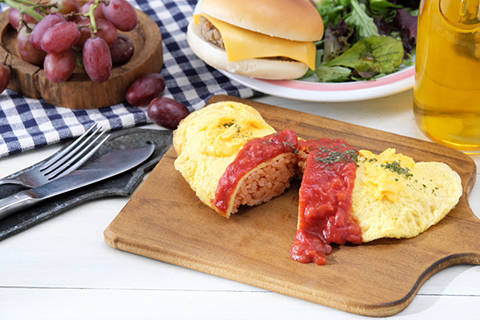
![]() 1. "Green" is made more bluish and vivid and lighter
1. "Green" is made more bluish and vivid and lighter

![]() 2. "Yellow" is made more vivid and darker
2. "Yellow" is made more vivid and darker
![]() 3. "Red" is made more vivid and lighter
3. "Red" is made more vivid and lighter
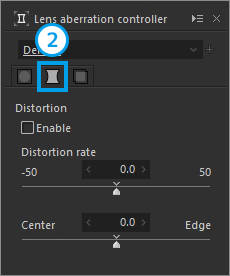
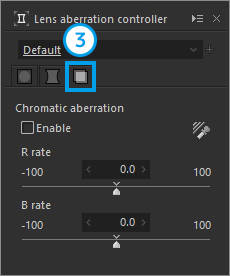
Lens aberration controller
Correct "limb darkening/distortion/color misalignment" due to lens aberration.
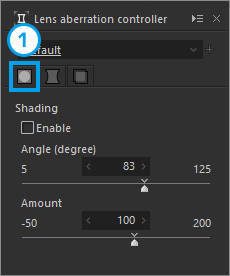
| 1 | Shading | Corrects limb darkening. |
| 2 | Distortion | Corrects lens distortion. |
| 3 | Chromatic aberration | Corrects the misalignment of red and green that occurs on the outline of a subject. |
1. Shading
Corrects limb darkening.

| 1 | Angle | Adjusts the correction range by the lens angle. |
| 2 | Application rate | Adjusts the correction amount of the peripheral lightness. |
2. Distortion
Adjusts lens distortion.
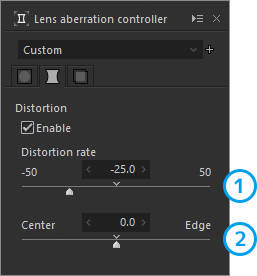
| 1 | Distortion rate | Adjusts the correction amount of distortion. |
| 2 | Center/Edge | Determines whether to emphasize the center or the edges in correcting distortion. |
3. Chromatic aberration
Corrects the misalignment of red and green that occurs on the outline of a subject.
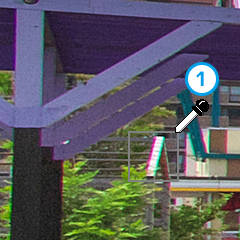
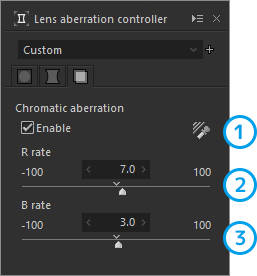
| 1 | Chromatic aberration tool | Corrects chromatic aberration by specifying an area with a major color misalignment. |
| 2 | R rate | Corrects the misalignment of red. |
| 3 | B rate | Corrects the misalignment of blue. |
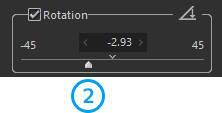
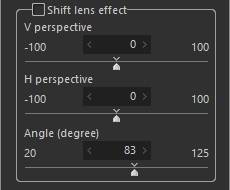
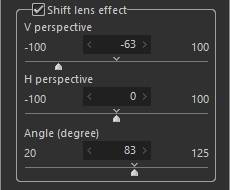
Rotation/Shift lens effect
Adjust the tilt and perspective of an image.
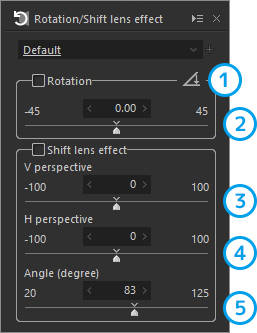
| 1 | Rotation tool | Corrects the tilt of an image by dragging the part you wish to make vertical or horizontal with the mouse. |
| 2 | Rotation | Corrects the tilt of an image. |
| 3 | V perspective | Corrects the vertical perspective. |
| 4 | H perspective | Corrects the horizontal perspective. |
| 5 | Angle | Makes an adjustment when the result of shifting lens effect is too long either in the horizontal or vertical direction. |
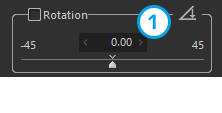
1. Rotation tool/Rotation
Click the 1.[Rotation tool] icon and drag the part you wish to make vertical or horizontal on the preview screen with the mouse to correct the tilt of an image. Adjust the tilt using the 2. [Rotation slider].
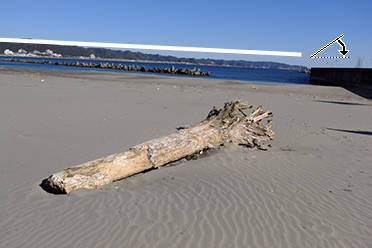
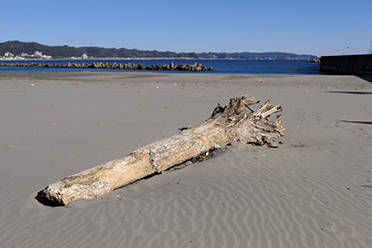
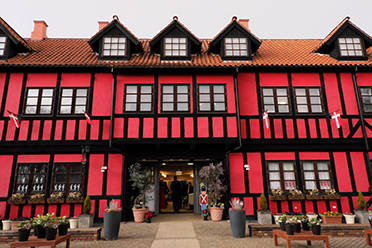
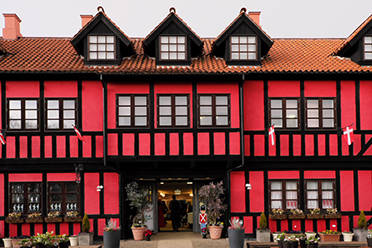
2. Shift lens effect
Correct the distortion of an image due to perspective. The images below show an example of adjustment made to [V perspective].
Development settings
Make sRGB and AdobeRGB color space settings.
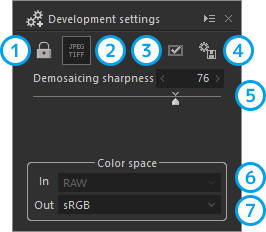
| 1 | Protect | Locks parameter edits. |
| 2 | Enable JPEG/TIFF processing | Switches between JPEG and TIFF to enable processing. |
| 3 | Develop mark | Marks selected images for development. |
| 4 | Develop | Converts a selected image into JPEG or TIFF. |
| 5 | Demosaicing sharpness | Determines the fineness of pixel resolution of developed images. Default values vary according to the ISO of the picture taken. |
| 6 | Input color space | A color space can be selected when the image to be edited is either JPEG or TIFF. |
| 7 | Output color space | Either an sRGB or AdobeRGB color space can be selected when outputting an image as JPEG or TIFF (converting to JPEG or TIFF). |
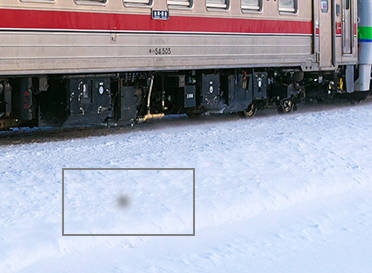
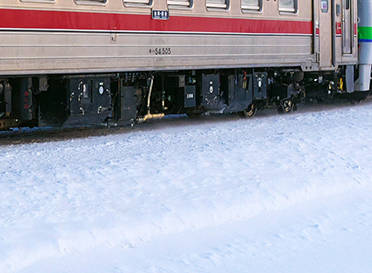
Spotting tools
Remove spots in images caused by dust attached to the image sensor.

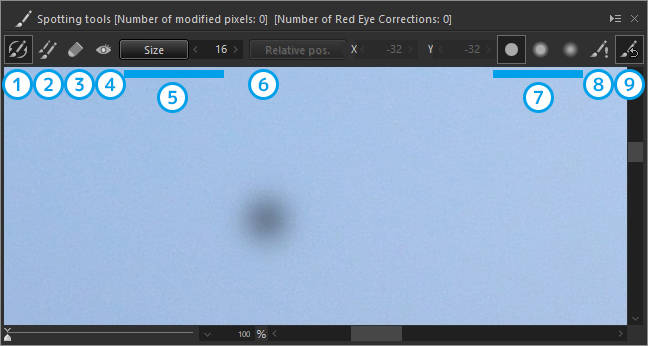
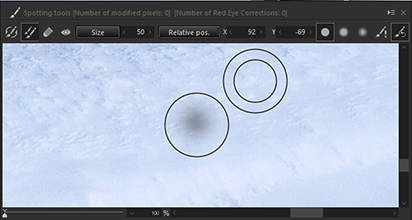
| 1 | Auto Erase | Automatically erases a spot by referencing the image information of the area surrounding the clicked spot. |
| 2 | Copy | Copies from a specified area to remove a spot. |
| 3 | Eraser | Undoes the correction of a clicked area. |
| 4 | Red Eye Correction | Automatically corrects the red-eye effect caused by a camera's flash by clicking the area to be corrected. |
| 5 | Size | Specifies the size of the area to be corrected. |
| 6 | Relative pos. | Changes the position of the copy source and destination. |
| 7 | Effect | Changes the strength of the edges of the corrected area. |
| 8 | Emphasize spotting areas | Emphasizes the corrected area. |
| 9 | Initialize spotting areas | Initialized the correction. |
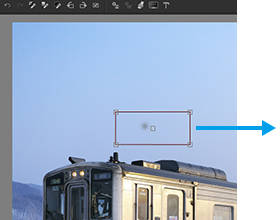
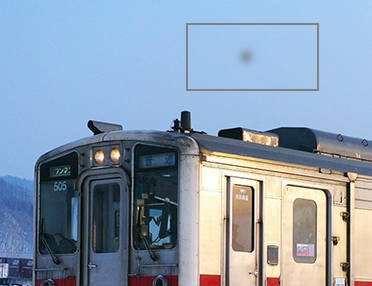
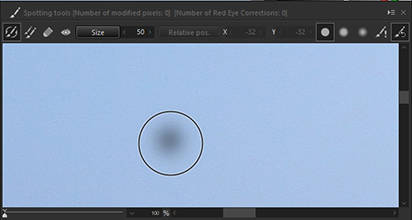
1. Move to a spot
Move the box shown on the preview screen to where the spot is. Drag the □ at the center with the mouse to move the box.
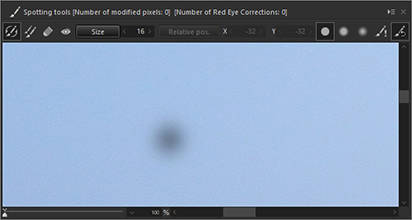
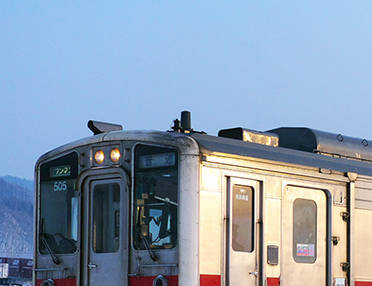
2. Auto Erase
Adjust the size of the ○ according to the size of the spot and click with the mouse. The spot will be automatically erased by referencing the image information of the surrounding area.
3. Copy
Copy the part of the image encircled by the ◎ and paste it to the area encircled by ○ to remove a spot. The positions of ◎ and ○ can be changed with the [Relative pos.] button. The positions of ◎ and ○ can also be changed while Ctrl key is held down.
Crop tool
Crop an image in the specified size or aspect ratio.

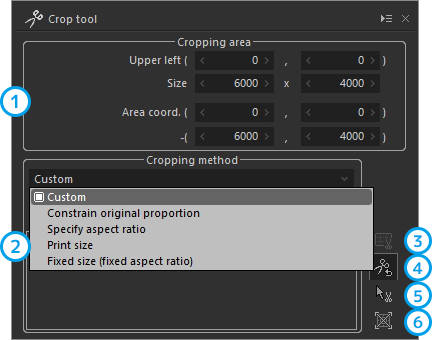
| 1 | Cropping area | Sets or displays the cropping area or image size in numbers. |
| 2 | Cropping method | Crops an image in the selected aspect ratio. |
| Custom | Sets the cropping area in any desired aspect ratio. | |
| Constrain original proportion | Sets the cropping area while maintaining the original proportion. | |
| Specify aspect ratio | Sets the cropping area in a specified aspect ratio. | |
| Print size | Sets the cropping area in the aspect ratio of the print paper selected on the printer. | |
| Fixed size (fixed aspect ratio) | Sets the cropping area in an aspect ratio of standard sizes prepared in a list. | |
| 3 | Apply specified aspect ratio | Applies the setting when the cropping method has been changed. |
| 4 | Initialize to default | Initializes the cropping area to default. |
| 5 | Crop image on preview | Sets the cropping area by dragging the mouse on the preview screen. |
| 6 | Extend processing area to entire recorded area | The entire area recorded on the RAW data will be processed. |
1. Select a cropping method
Select how you wish to specify the aspect ratio of the image to be cropped.

2. Set the cropping area
Set the cropping area on the preview screen.

| 1 | Area setting handle | Drag with the mouse to set the area. |
| 2 | Area moving handle | Drag with the mouse to move the center of the area. |
| 3 | Area rotation handle | Drag with the mouse to rotate the area 90. degrees. |
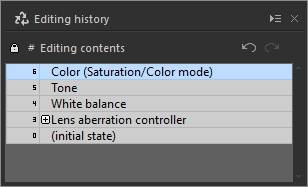
Editing history
You can return to any specified point in the adjustment process. The editing history will remain valid until the application is exited.
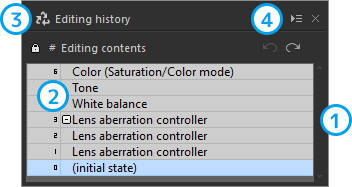
| 1 | Select history | Editing history will be recorded. You can return to any adjustment performed by clicking it. |
| 2 | Group history | The history of edits made in the same category will be saved as a group at a lower hierarchical level. |
| 3 | Protect history | Editing history exceeding a prescribed amount will be deleted. Specific edits can be protected by protecting history. |
| 4 | Undo/redo history | Editing status in "1" can be undone or redone. |
Copyright (C) TECHNO HORIZON CO., LTD. 2004-2026. All Rights Reserved.